Photoshop Tutorial: 9 Selection Tools
February 15 in Design, Tutorials
In our last Photoshop tutorial we showed you some techniques to remove elements from your photos. But what if you want to select certain elements in order to manipulate them (e.g. adjust colours, sharpen or blur them) rather than removing them? In this tutorial we’ll show you nine useful tools for doing just that.
As Dave Grohl will tell you, Photoshop gives you the ability to select areas of your image based on two criteria: the colour and the shape. The first one is the easiest to work with, so let’s start with that.
SHAPE BASED SELECTIONS
1) Rectangular Marquee Tool
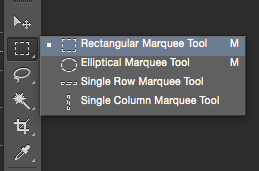
If you need to make an adjustment to an area which has a basic geometric shape, the rectangular marquee tool (M) is the best tool for the job. Simply click on one corner and drag to the opposite one. Boom!

2. Elliptical Marquee Tool
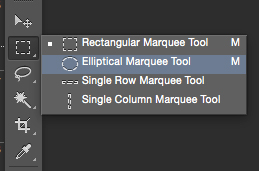
The Elliptical Marquee Tool is just like the Rectangular Marquee Tool, but surprisingly it works with ellipses and circles rather than rectangles. (Pro Tip: Press SHIFT+M to toggle between the various marquee tools). It can be tricky to position your ellipse accurately as you’re not starting at a precise point – to counter this just hold down SPACE and you can move it around. If you need to select a perfect circle just hold down SHIFT whilst you drag. Simples!

3. The Lasso Tool
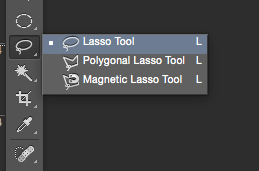
So far so easy. It’s time to get to the next level. When you have non-geomtric shapes to select the marquee tools won’t work – you’ll need the lasso tool (L). It works the same way as a pencil, just draw around the areas you need to select. By holding down ALT you can subtract areas from the current selection

4) The Polygonal Lasso Tool
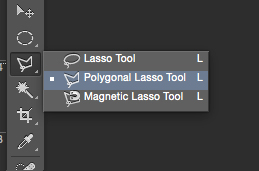
If you have a very complex geometric shape made only of straight lines, then the polygonal lasso tool can be a lifesaver. It’s pretty straightforward to use: click on the picture to create anchor points and create a straight line based selection. If you hold down SHIFT you can add a selection to the existing selection.

5) The Magnetic Lasso Tool
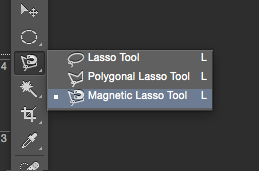
The big brother of the lasso tool is the magnetic lasso tool (use SHIFT+L to toggle between the lasso tools). It follow the movement of your mouse, creating a selection around a clearly defined object. You can adjust the amount of points it puts down using the Frequency setting – the higher the number the more anchor points it will lay down, increasing the accuracy of the selection.

6) Quick Mask mode
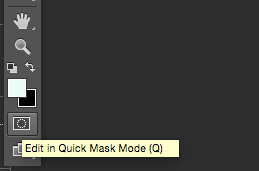
Do you draw like Leonardo da Vinci? if so you should consider using the Quick Mask mode – just hit Q to activate it. Once in Quick Mask Mose you can draw using the brush with either a white or black fill on the canvas. When you are done, hit Q again and see all your black painted areas (which by default are highlighted with in red) transform into selections.

Unfortunately, sometimes selecting by shape simply won’t work. As a general rule of thumb, it only works when you have sharp edges. So the moment you have some blurriness or drop of sharpness, your best option is selecting by colour instead…
COLOUR BASED SELECTIONS
7) The Magic Wand Tool
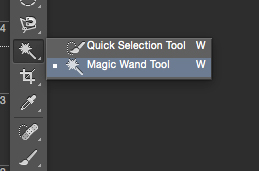
Arguably the king of the colour based selections is the Magic Wand tool (W). Set its tolerance in the option bar (the default is 32, which will works well much of the time) and then click on the colour you want to select.

As you can see, the selection is better articulated and quicker to create than if you had done this manually with a shape based tool. If you uncheck the ‘contiguous’ option the selection will be extended to all areas of the image matching the selected colour, not just the neighbouring areas.

8) Color Range
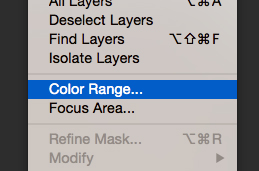
For a more controlled colour based selection it’s worth trying the Color Range function, found in the Select menu. It works in a similar way to the magic wand tool but you can manipulate the finished output in real time.

9) The Quick Selection Tool
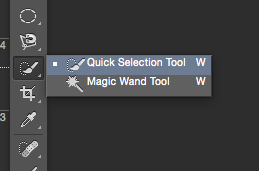
A hybrid between shape and colour based selection tools is the Quick Selection tool (W), which works like a brush and it considers both colour and shape (edges) for defining shapes. The Quick Selection tool is smart – if you make a mistake and repaint over an unintended section, the quick selection tool will learn from this and ignore that input area in future strokes. Genius!

Often one selection tool in isolation won’t do the job – you’ll need to use a couple. One common scenario is creating a rough initial selection with the magic wand or quick selection tools and then fine tuning it with either in the Quick Mask Mode or the lasso tool. Over time you’ll learn which tools are best for the job, and creating accurate selections will be a walk in the park!
We’re using Photoshop CC 2015 but most of these tools can be found in earlier editions of Photoshop.