Here’s how to create awesome cut paths in Adobe Illustrator
January 11 in Design, Tutorials
An awesome cut path makes all the difference when designing die cut stickers. The best cut paths are even all the way round the design, and smoothly follow the contours of the shape.
Creating a fluid, even cut path by hand can be tricky, so we’ve put together this guide to generating amazing cut paths from both vector and raster designs. Read on!
Creating cut paths from vector artwork
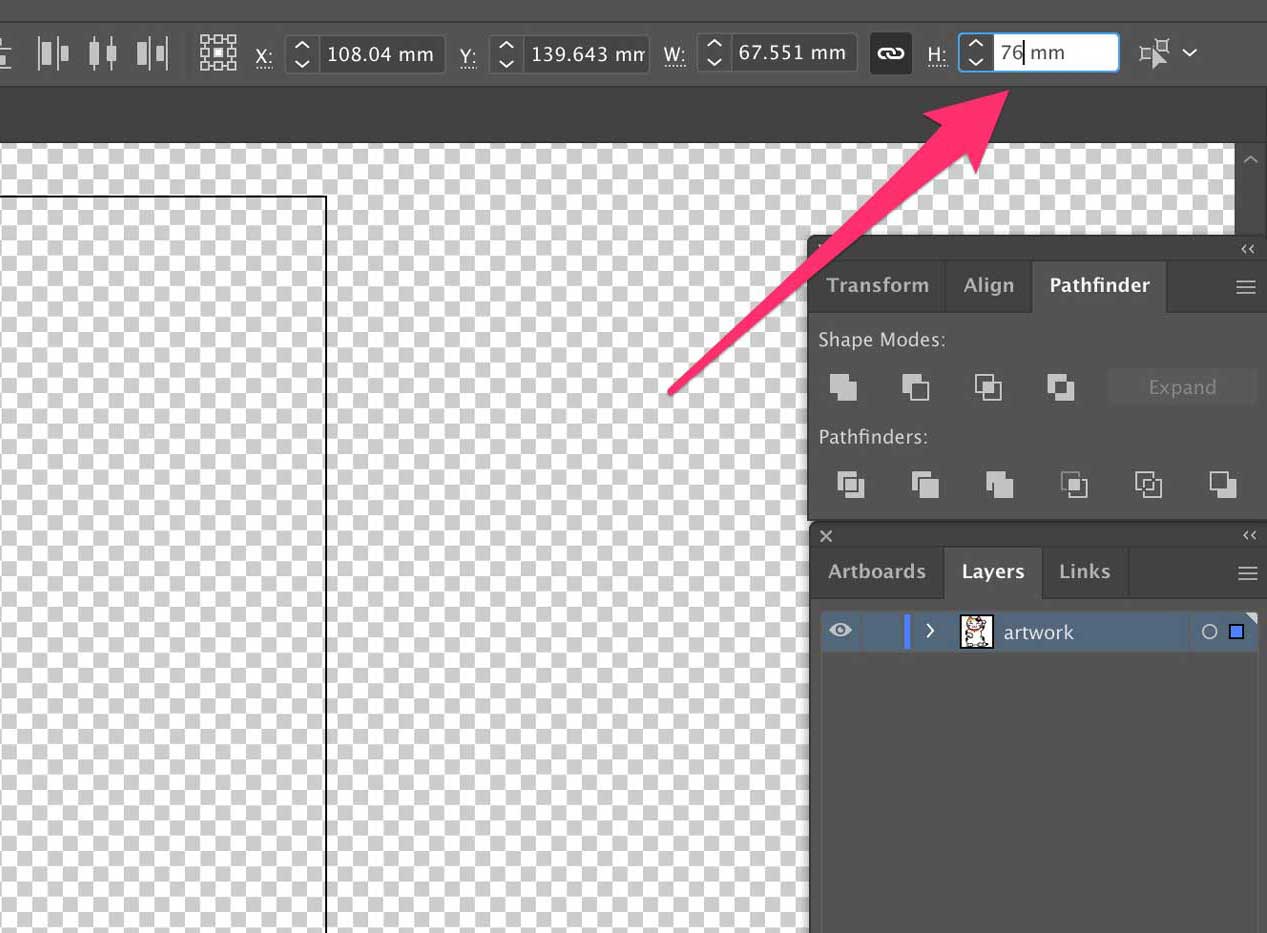
If your logo or design is in vector format you’re in luck! Creating great cut paths from vector artwork is simple. Start by opening up your sticker design in Illustrator. Rename the layer with your artwork on… ‘artwork’.
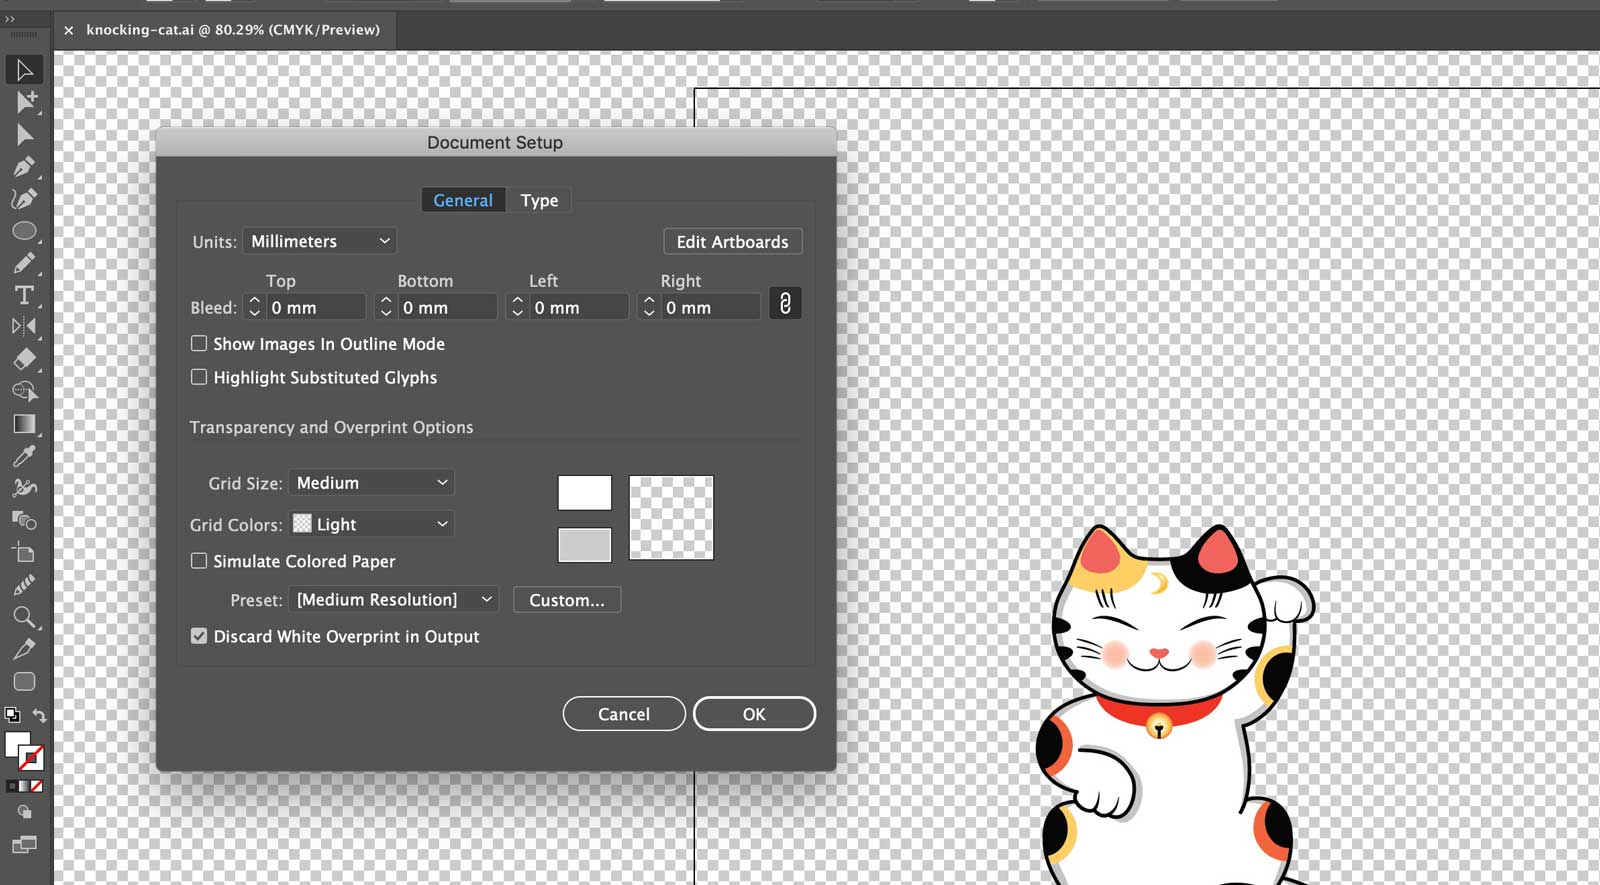
You’ll want to work in millimetres – click ‘File > Document Setup’ to change the unit if required.
It’s good to scale the design to the rough size you want the finished sticker. I want a finished sticker 80mm high, including a 2mm border between the design and the cut path, so I’ll set my artwork size to 76mm tall. Make sure you’ve set Illustrator to scale strokes – otherwise the design will become… weird.
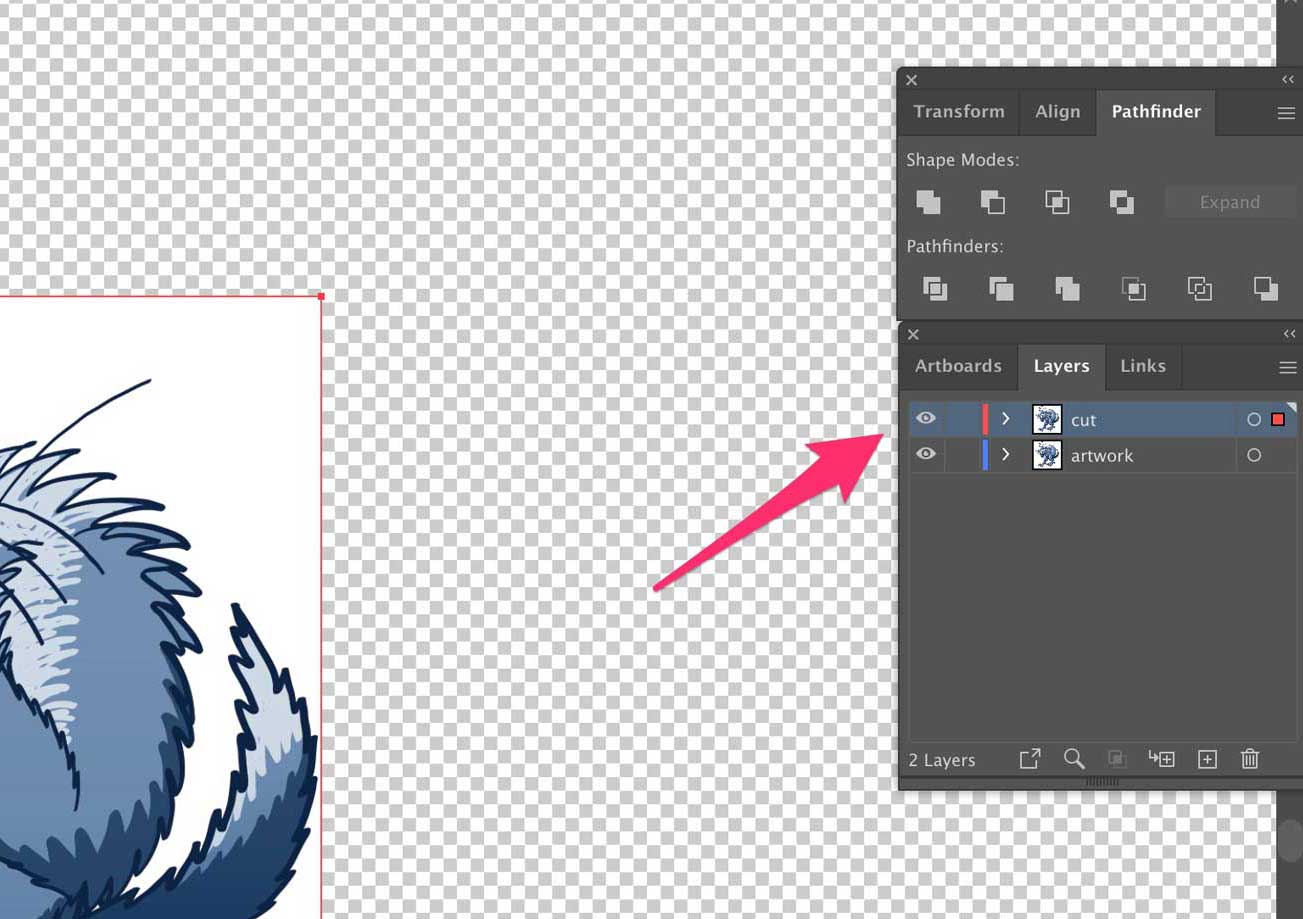
Next, set up a new blank layer called ‘cut’. This is where we’re going to put the cutpath, obvs.
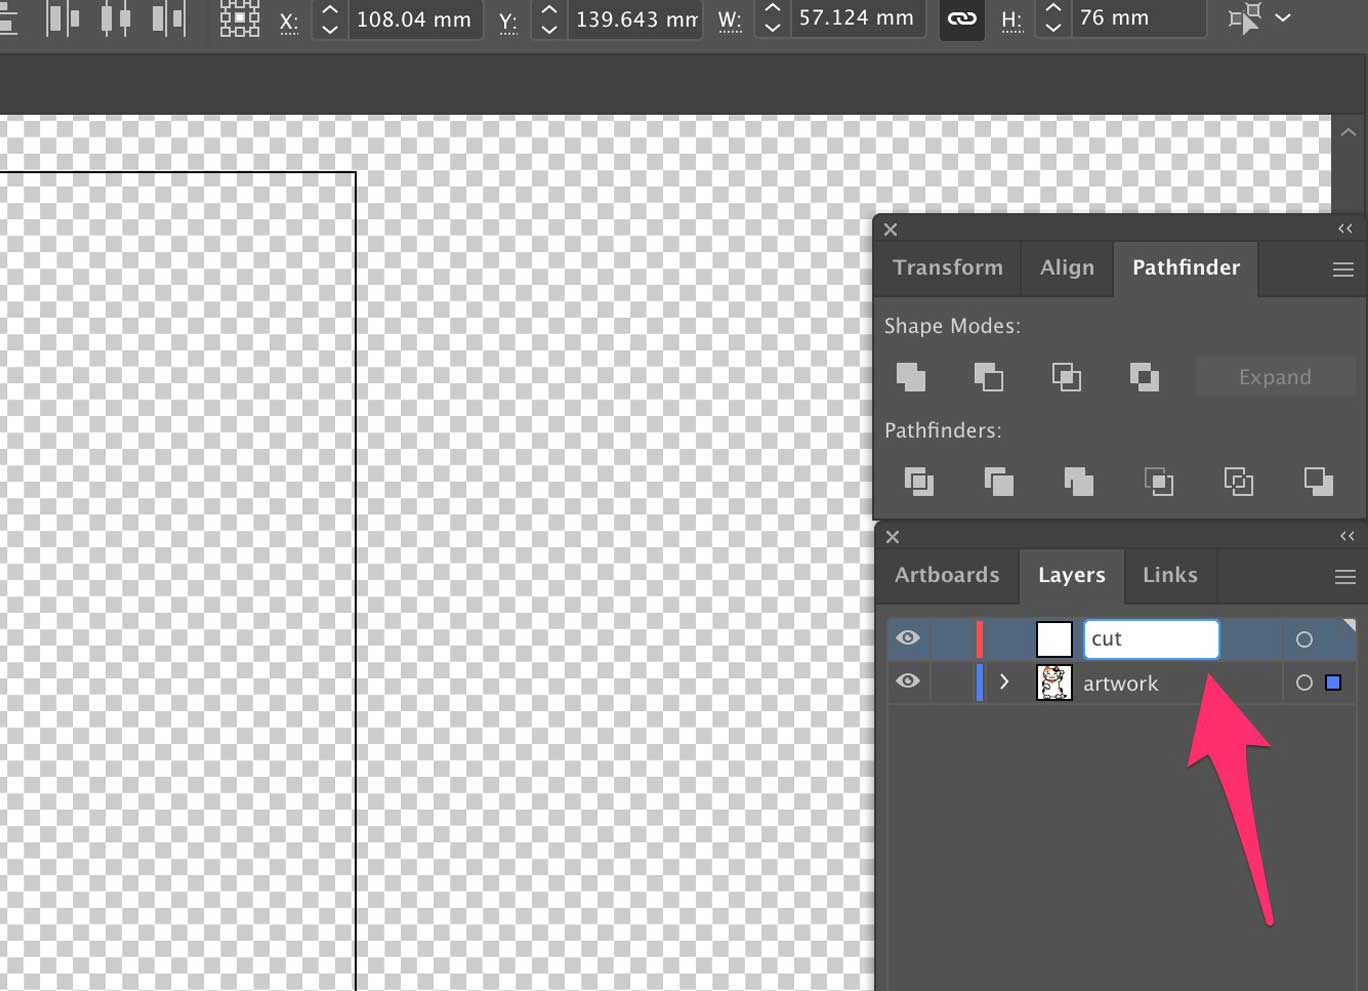
Duplicate the artwork layer onto the cut layer. Quick tip – click the little square on the right of the layer name on the layers panel. Then hold down Option (Mac) or Alt (Windows) and drag it onto the new layer. Voila – a perfect duplication. It’s a good idea to lock the artwork layer so you don’t ruin it by mistake.
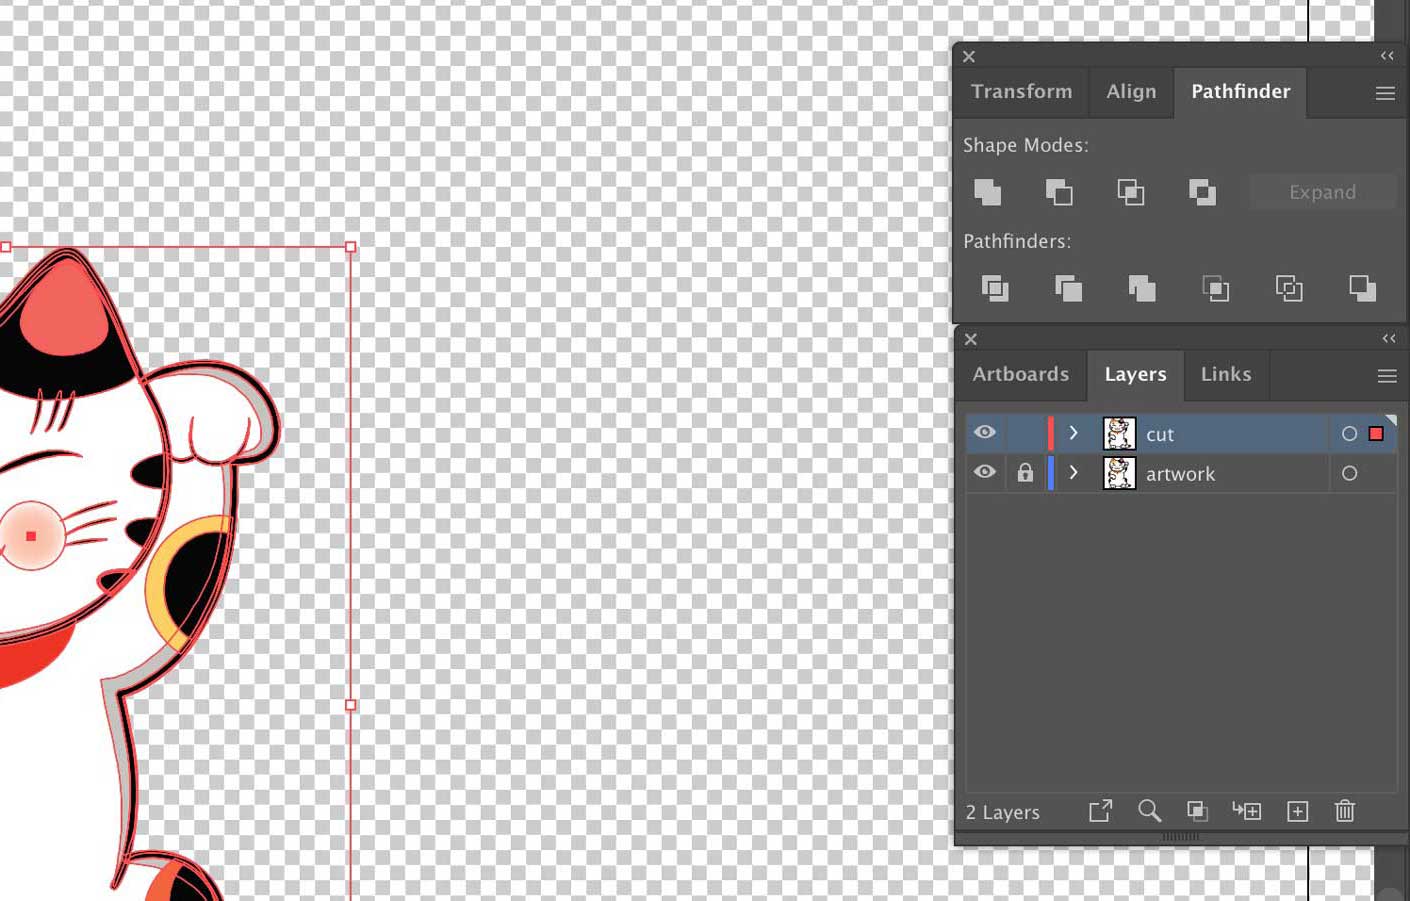
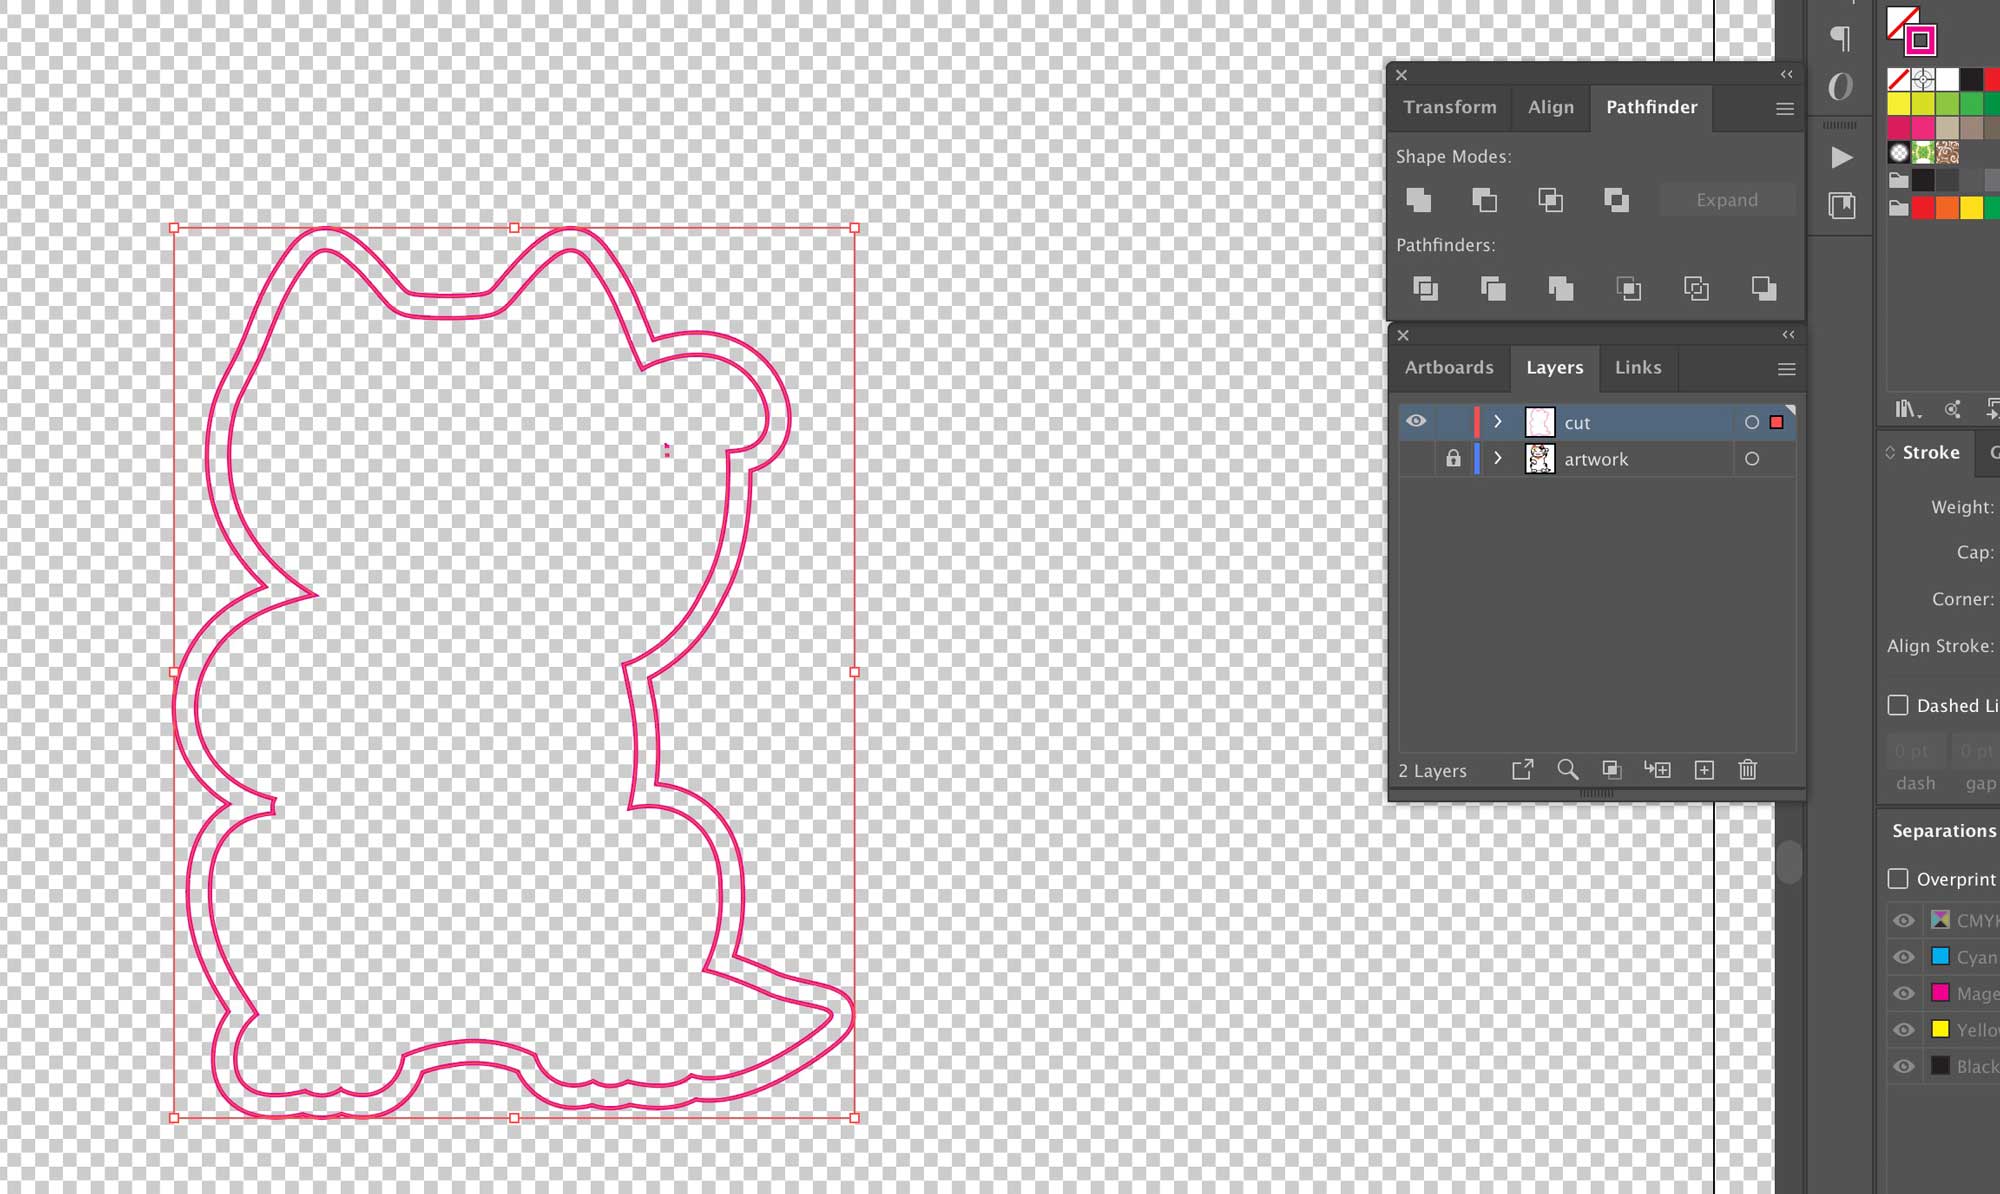
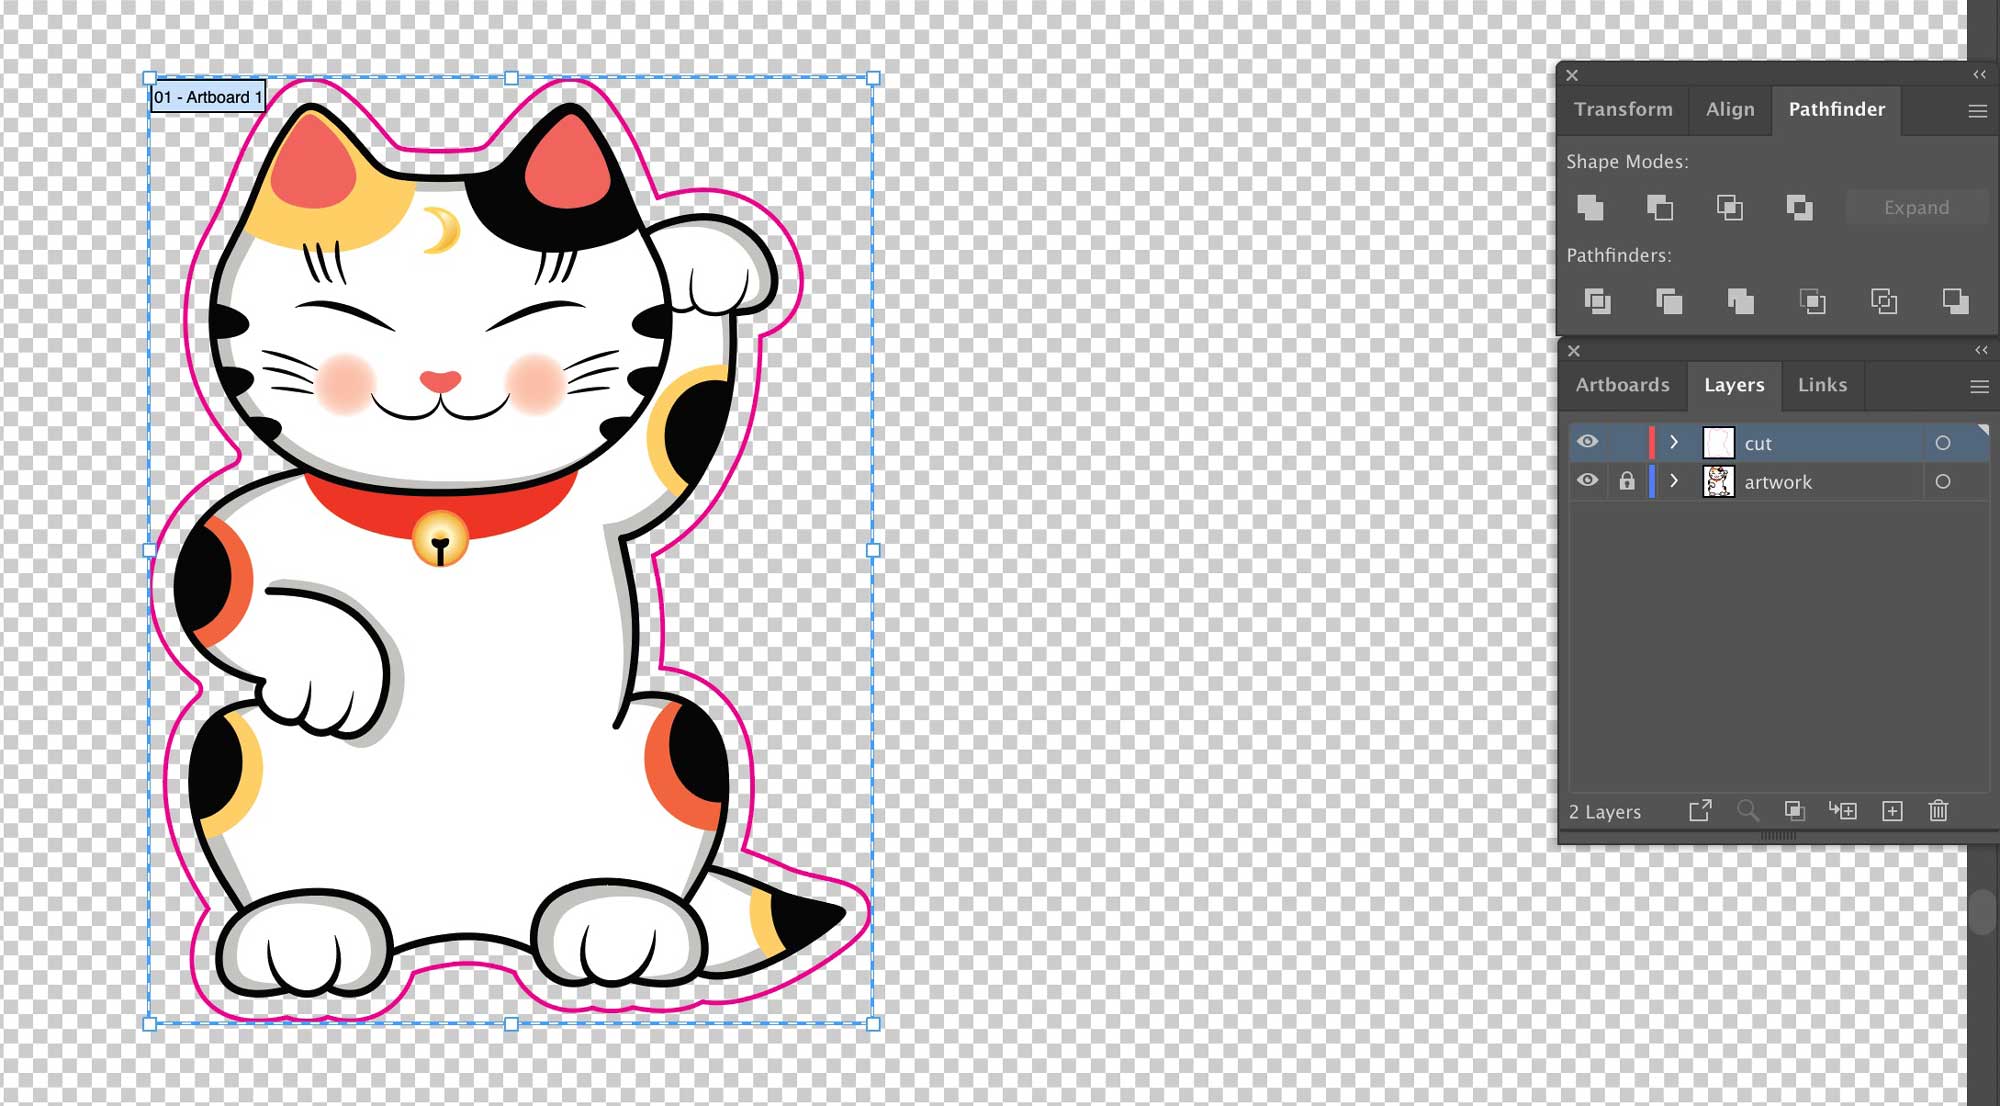
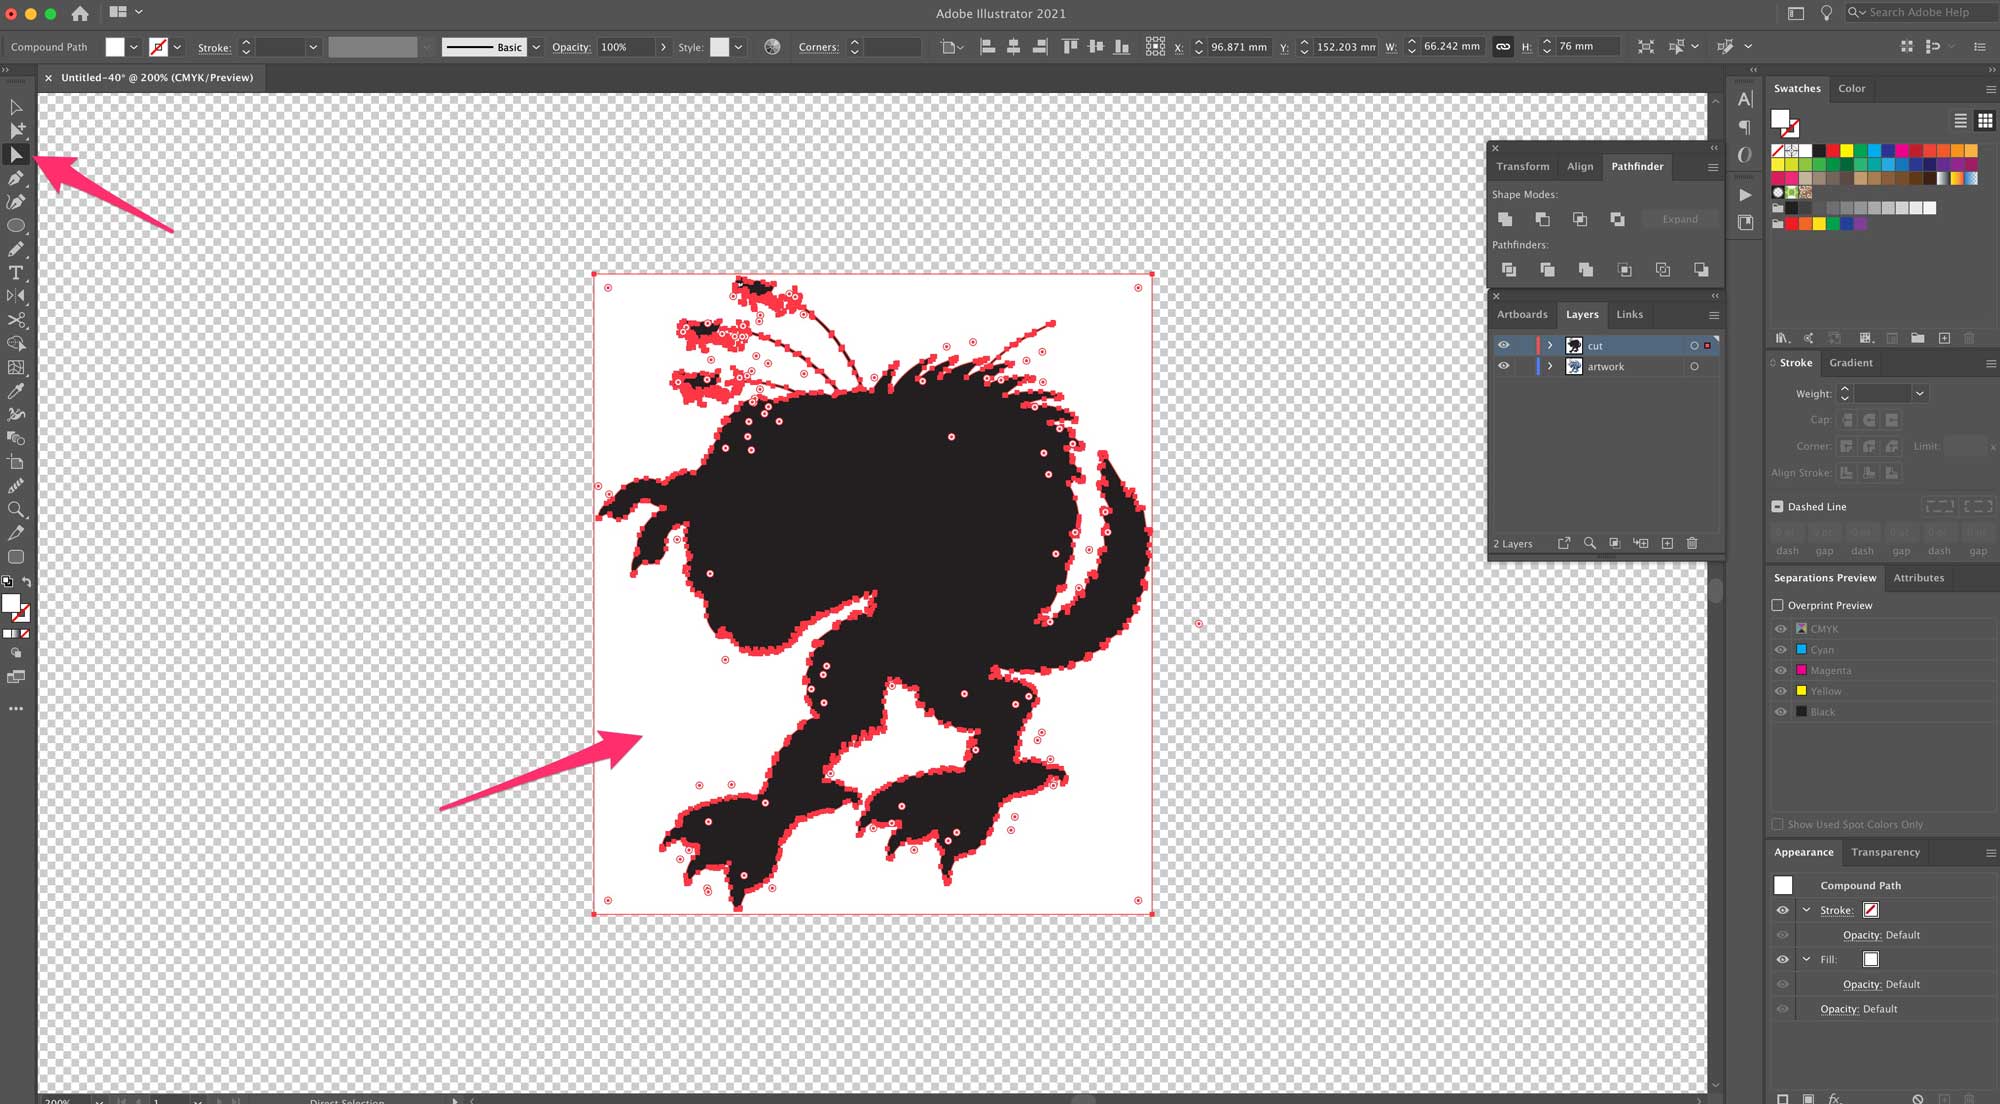
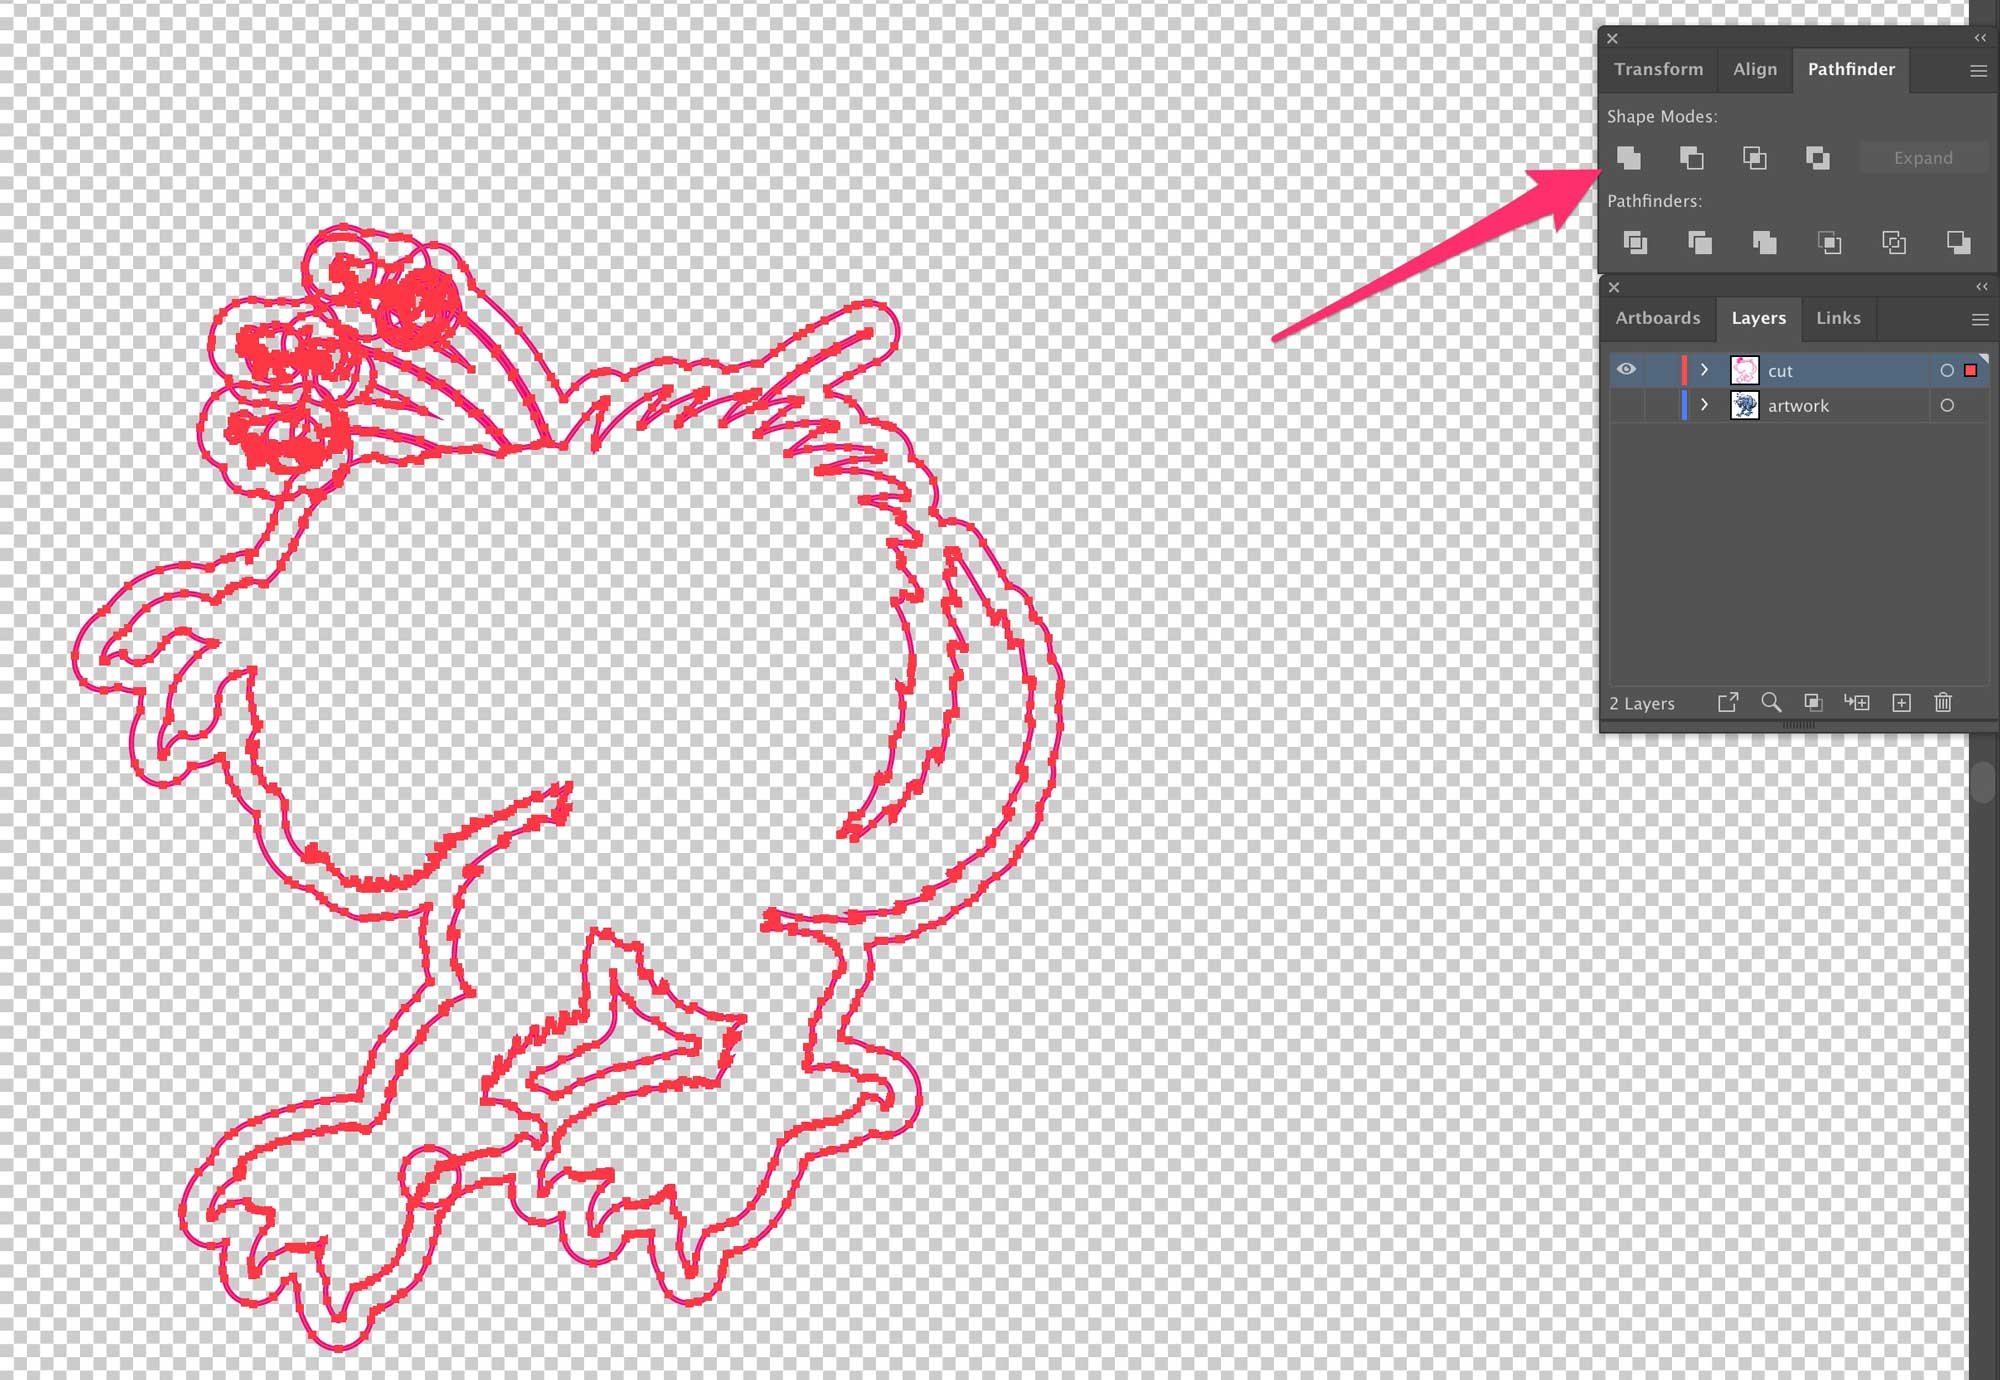
Next, click the little square next to the layer name in the layer palate to select everything on the layer, and click ‘Unite’ on the Pathfinder palate.
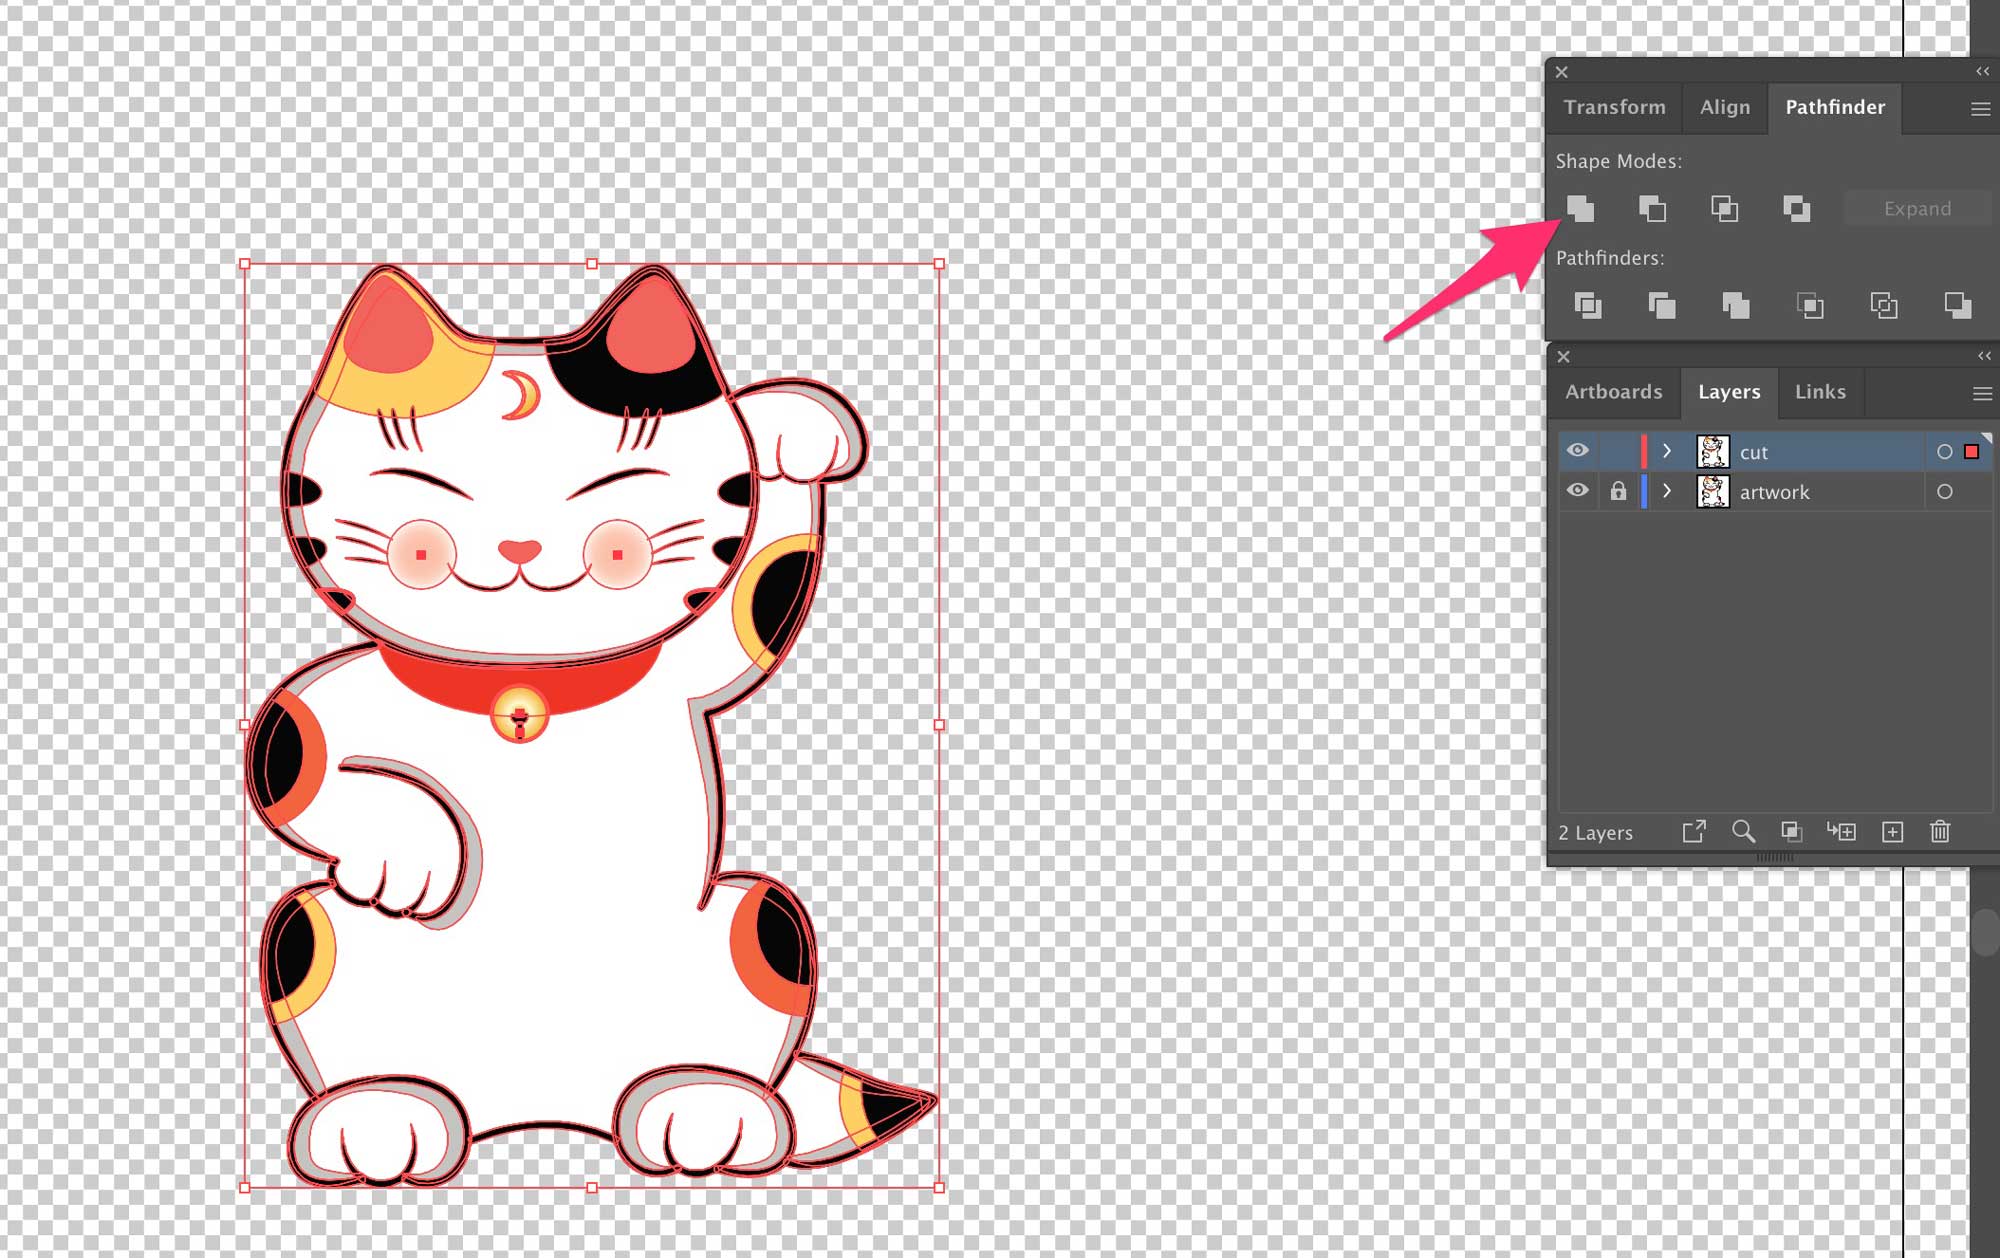
This will merge everything into one shape. There may be some inner shapes, but we’ll deal with those in a bit.
Apply a magenta stoke and remove the fill from the black shape on the cut layer. Magenta is the universally acknowledged colour of cut paths. Don’t ask me why.
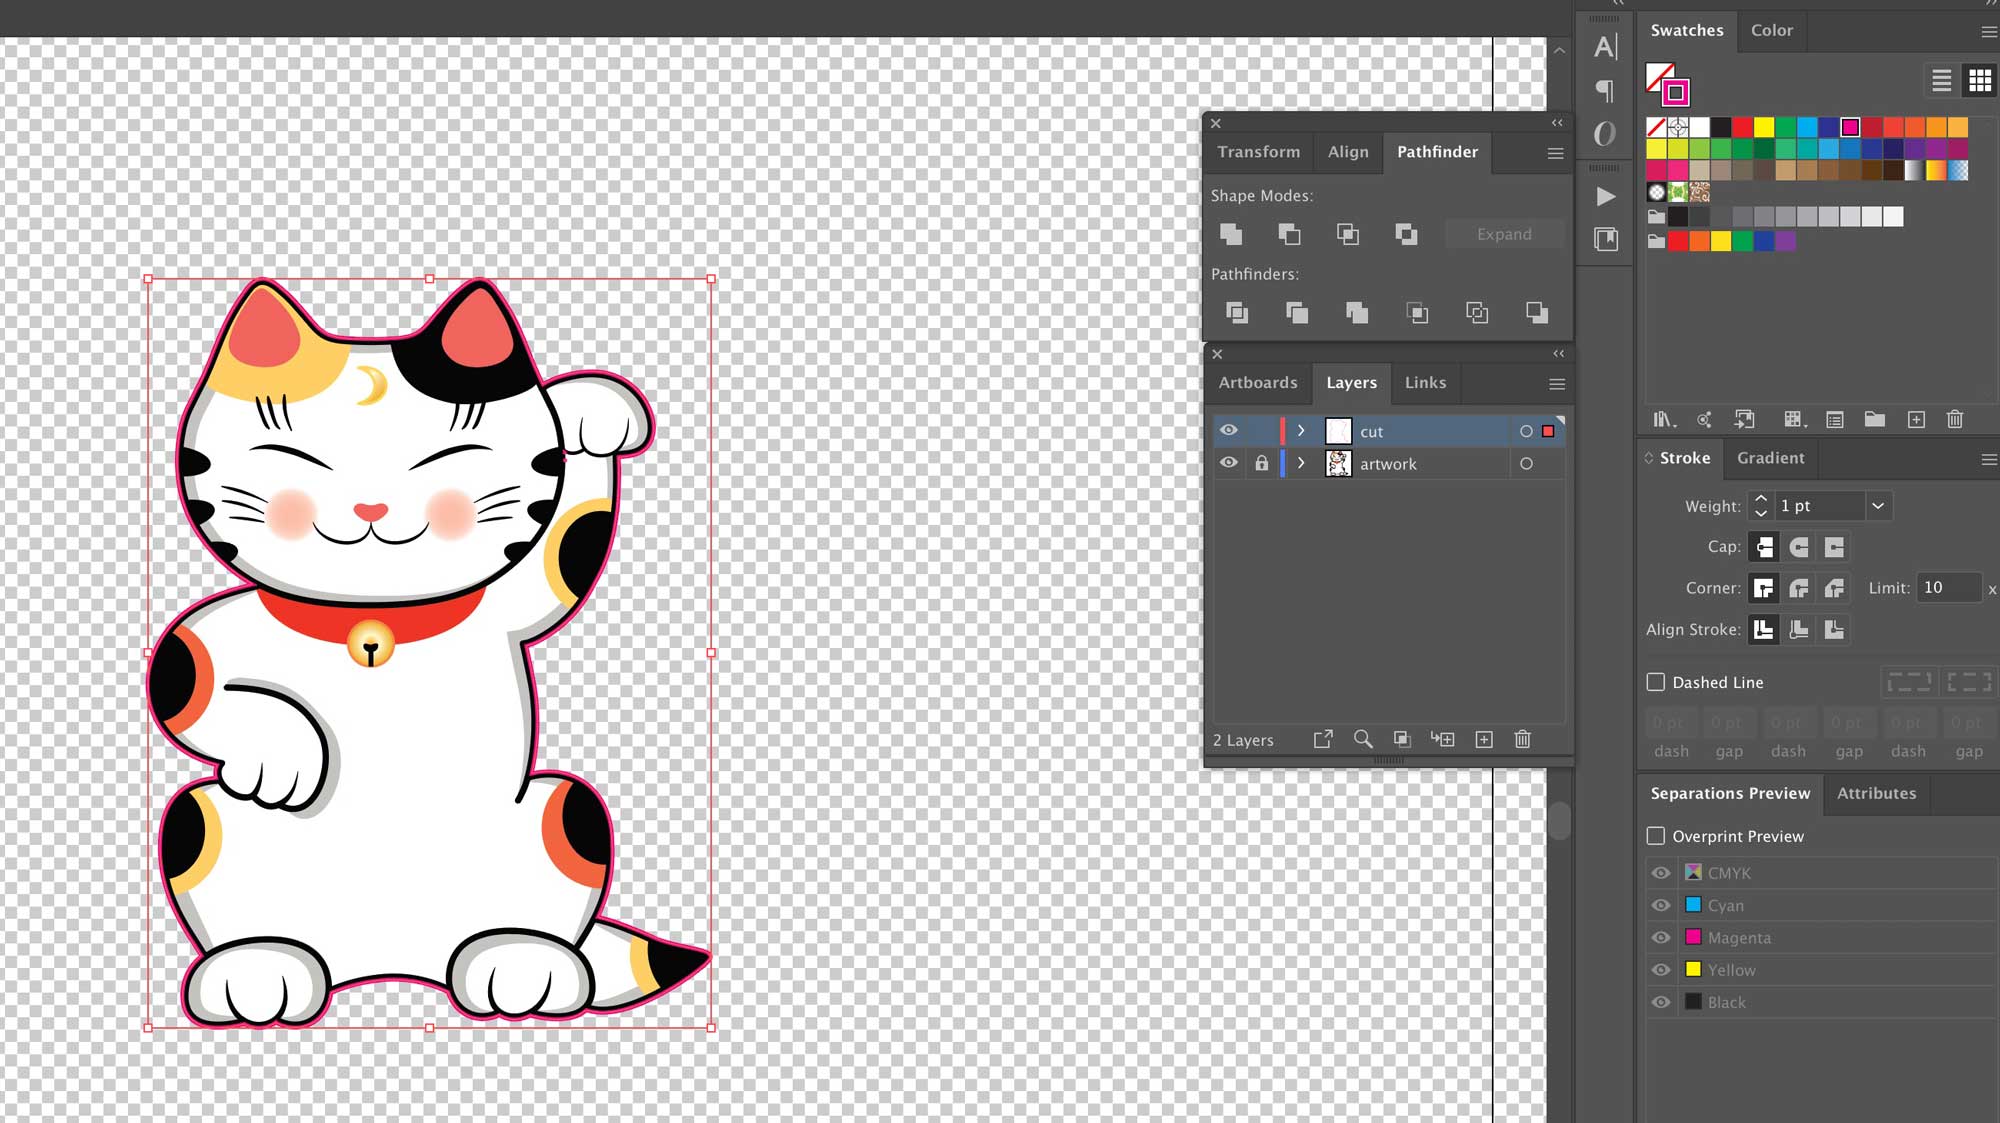
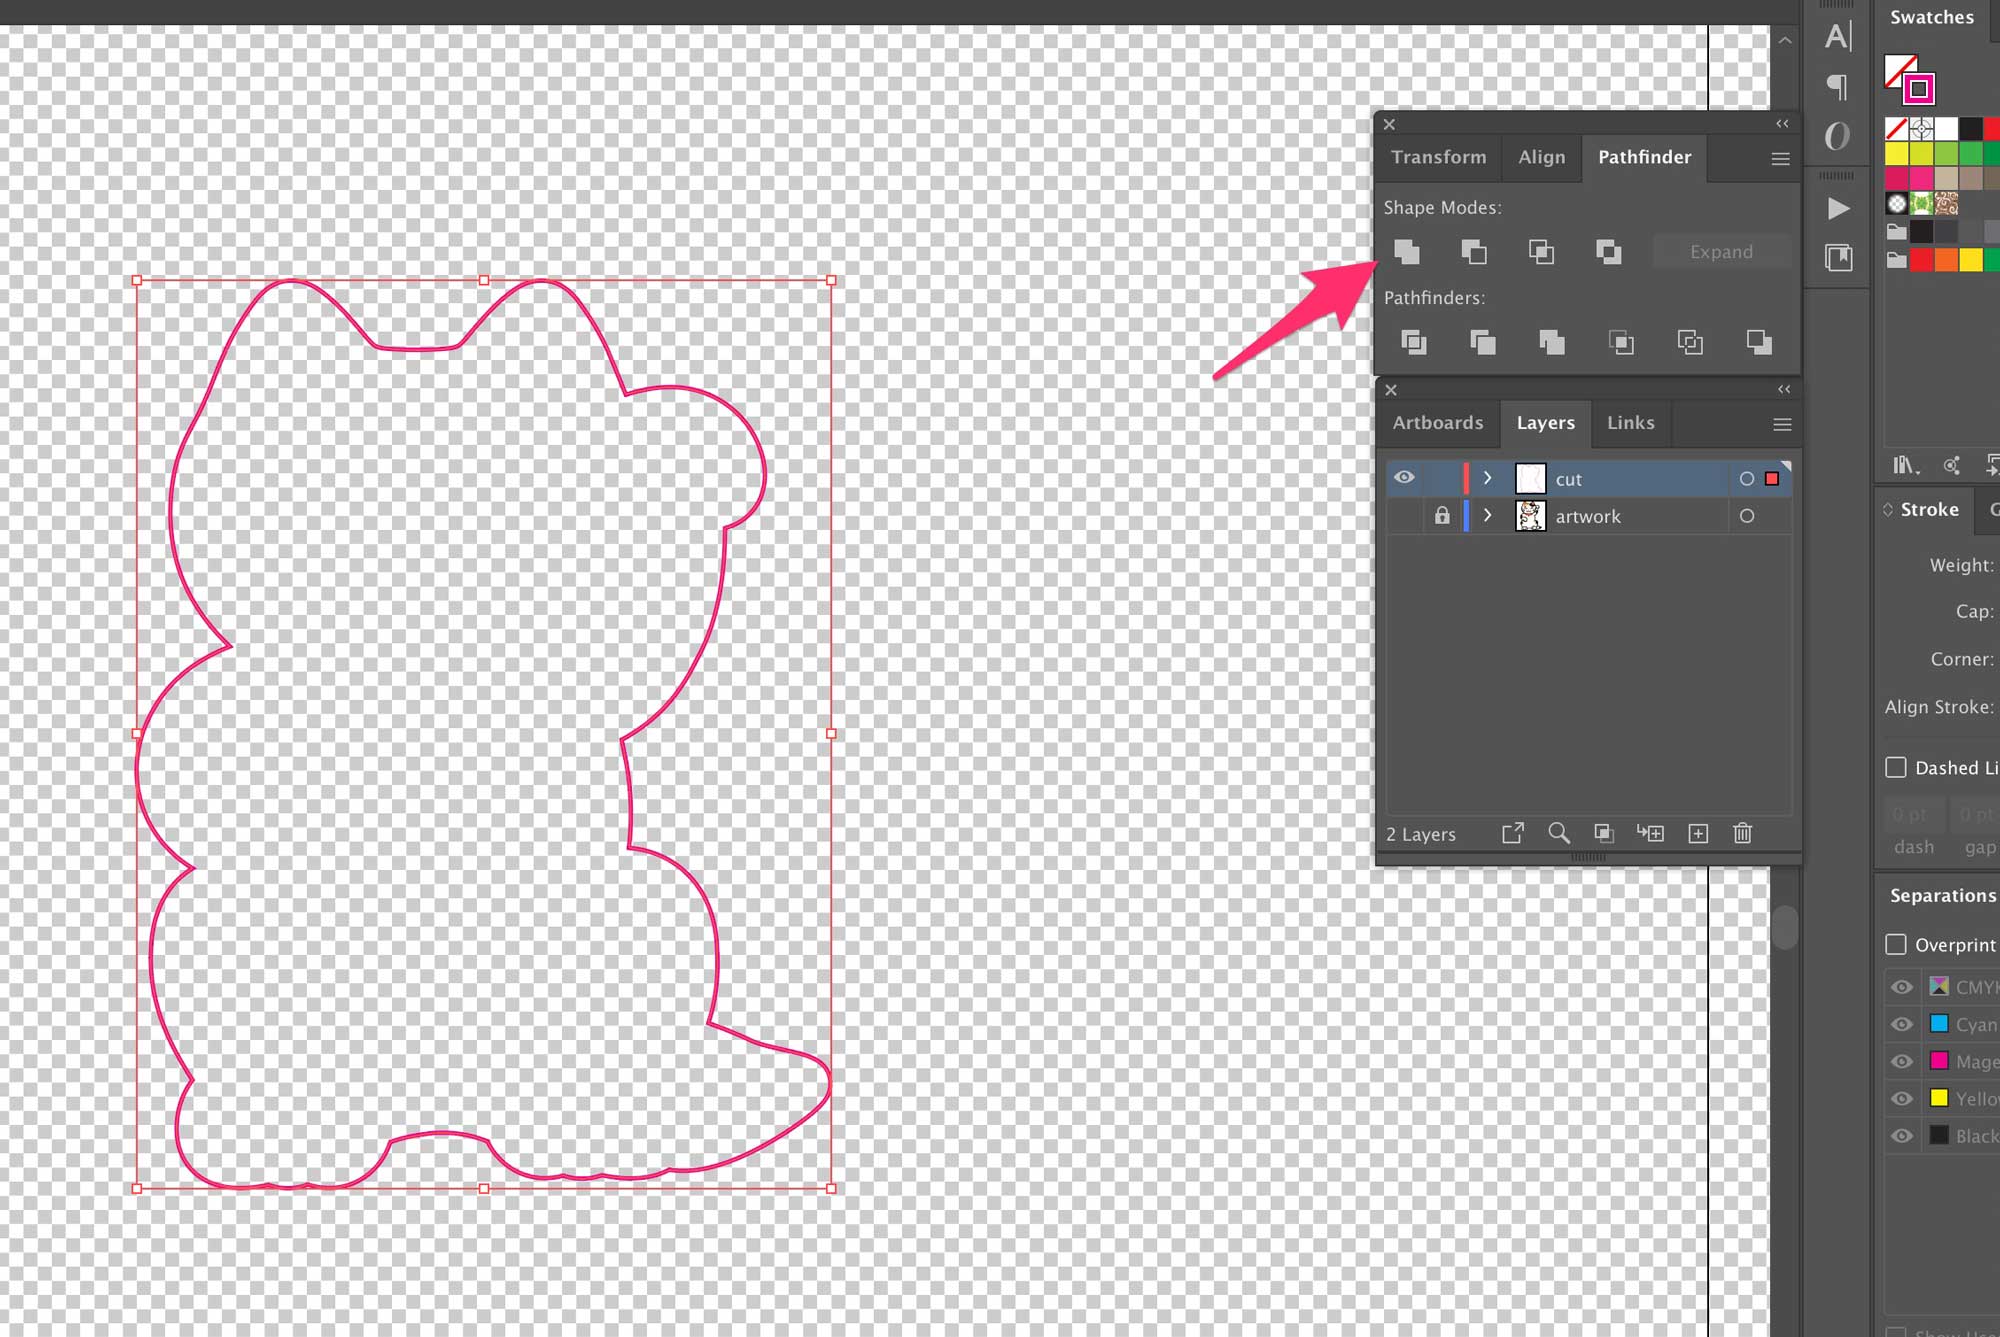
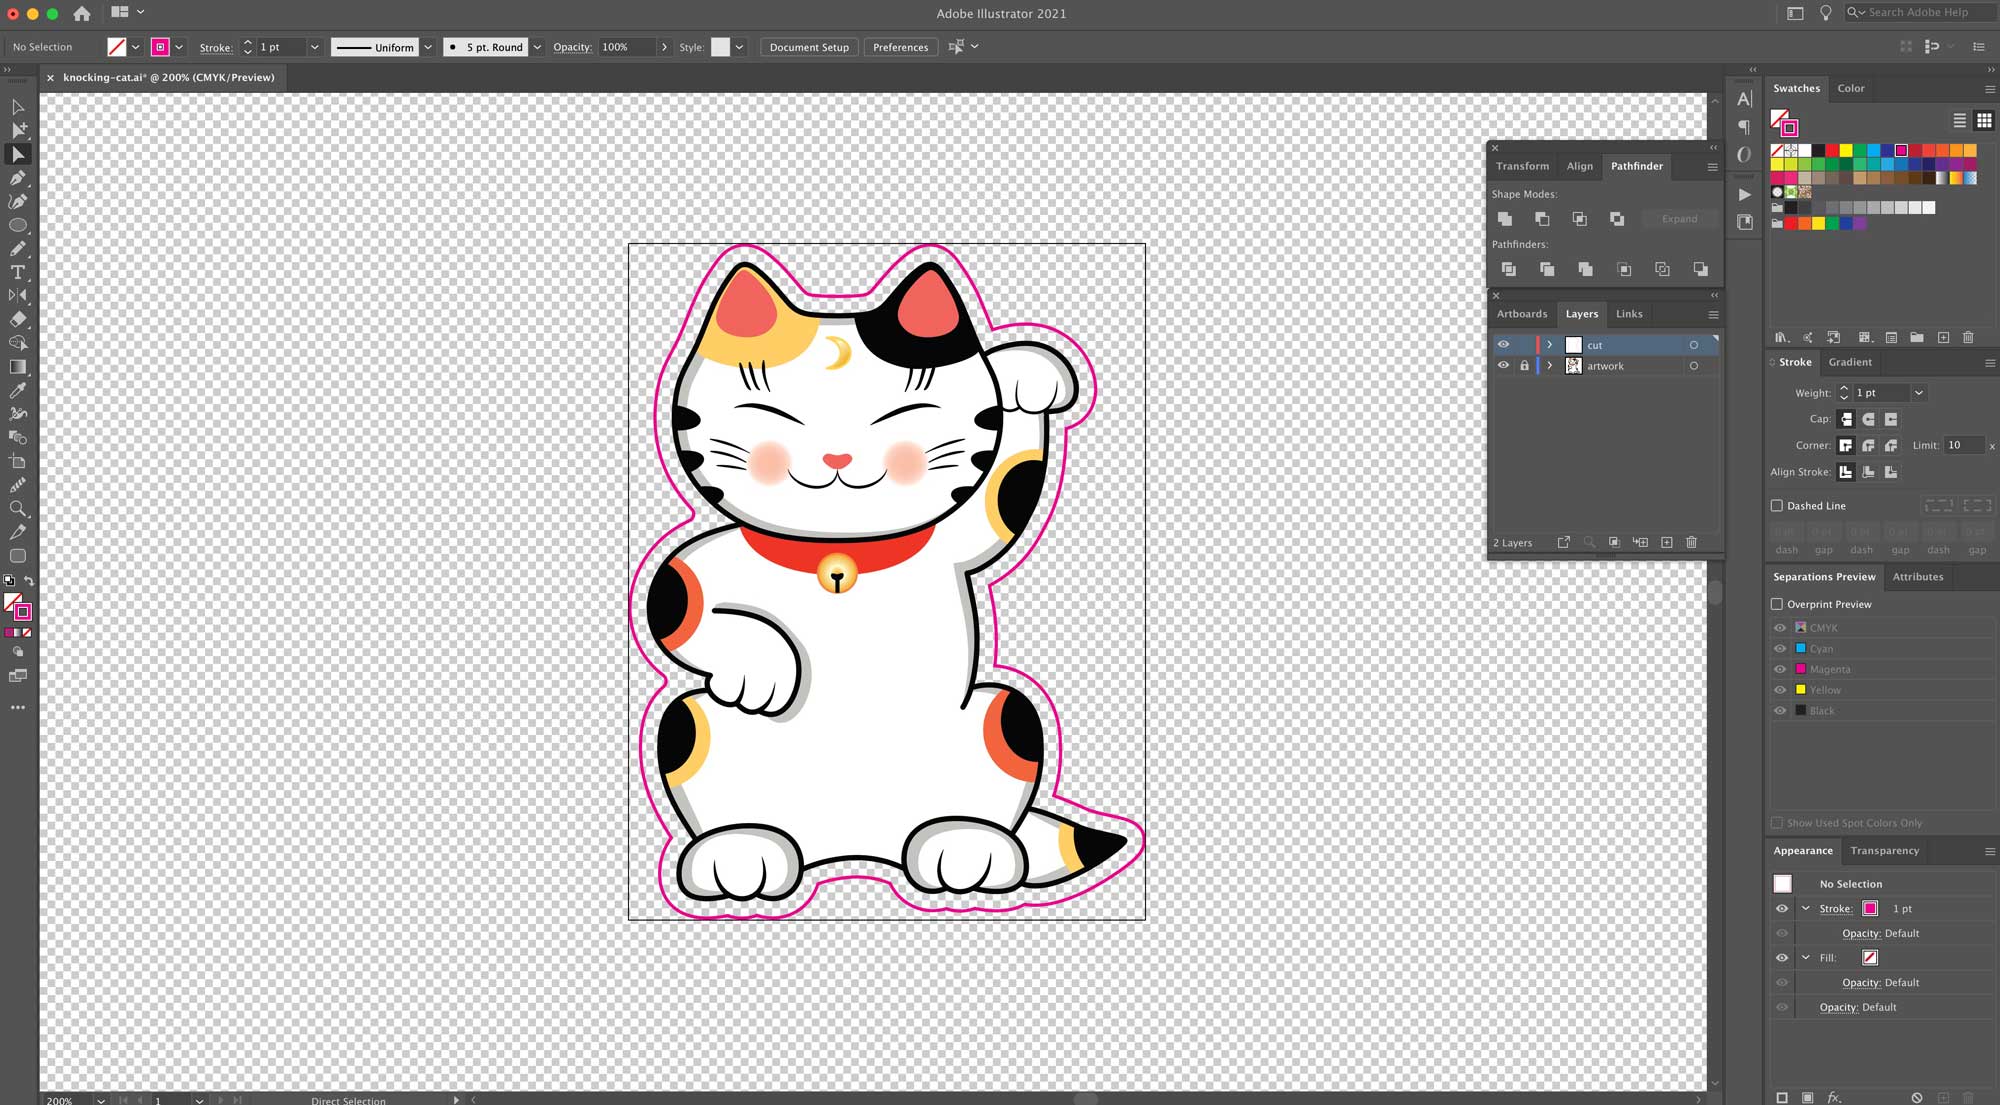
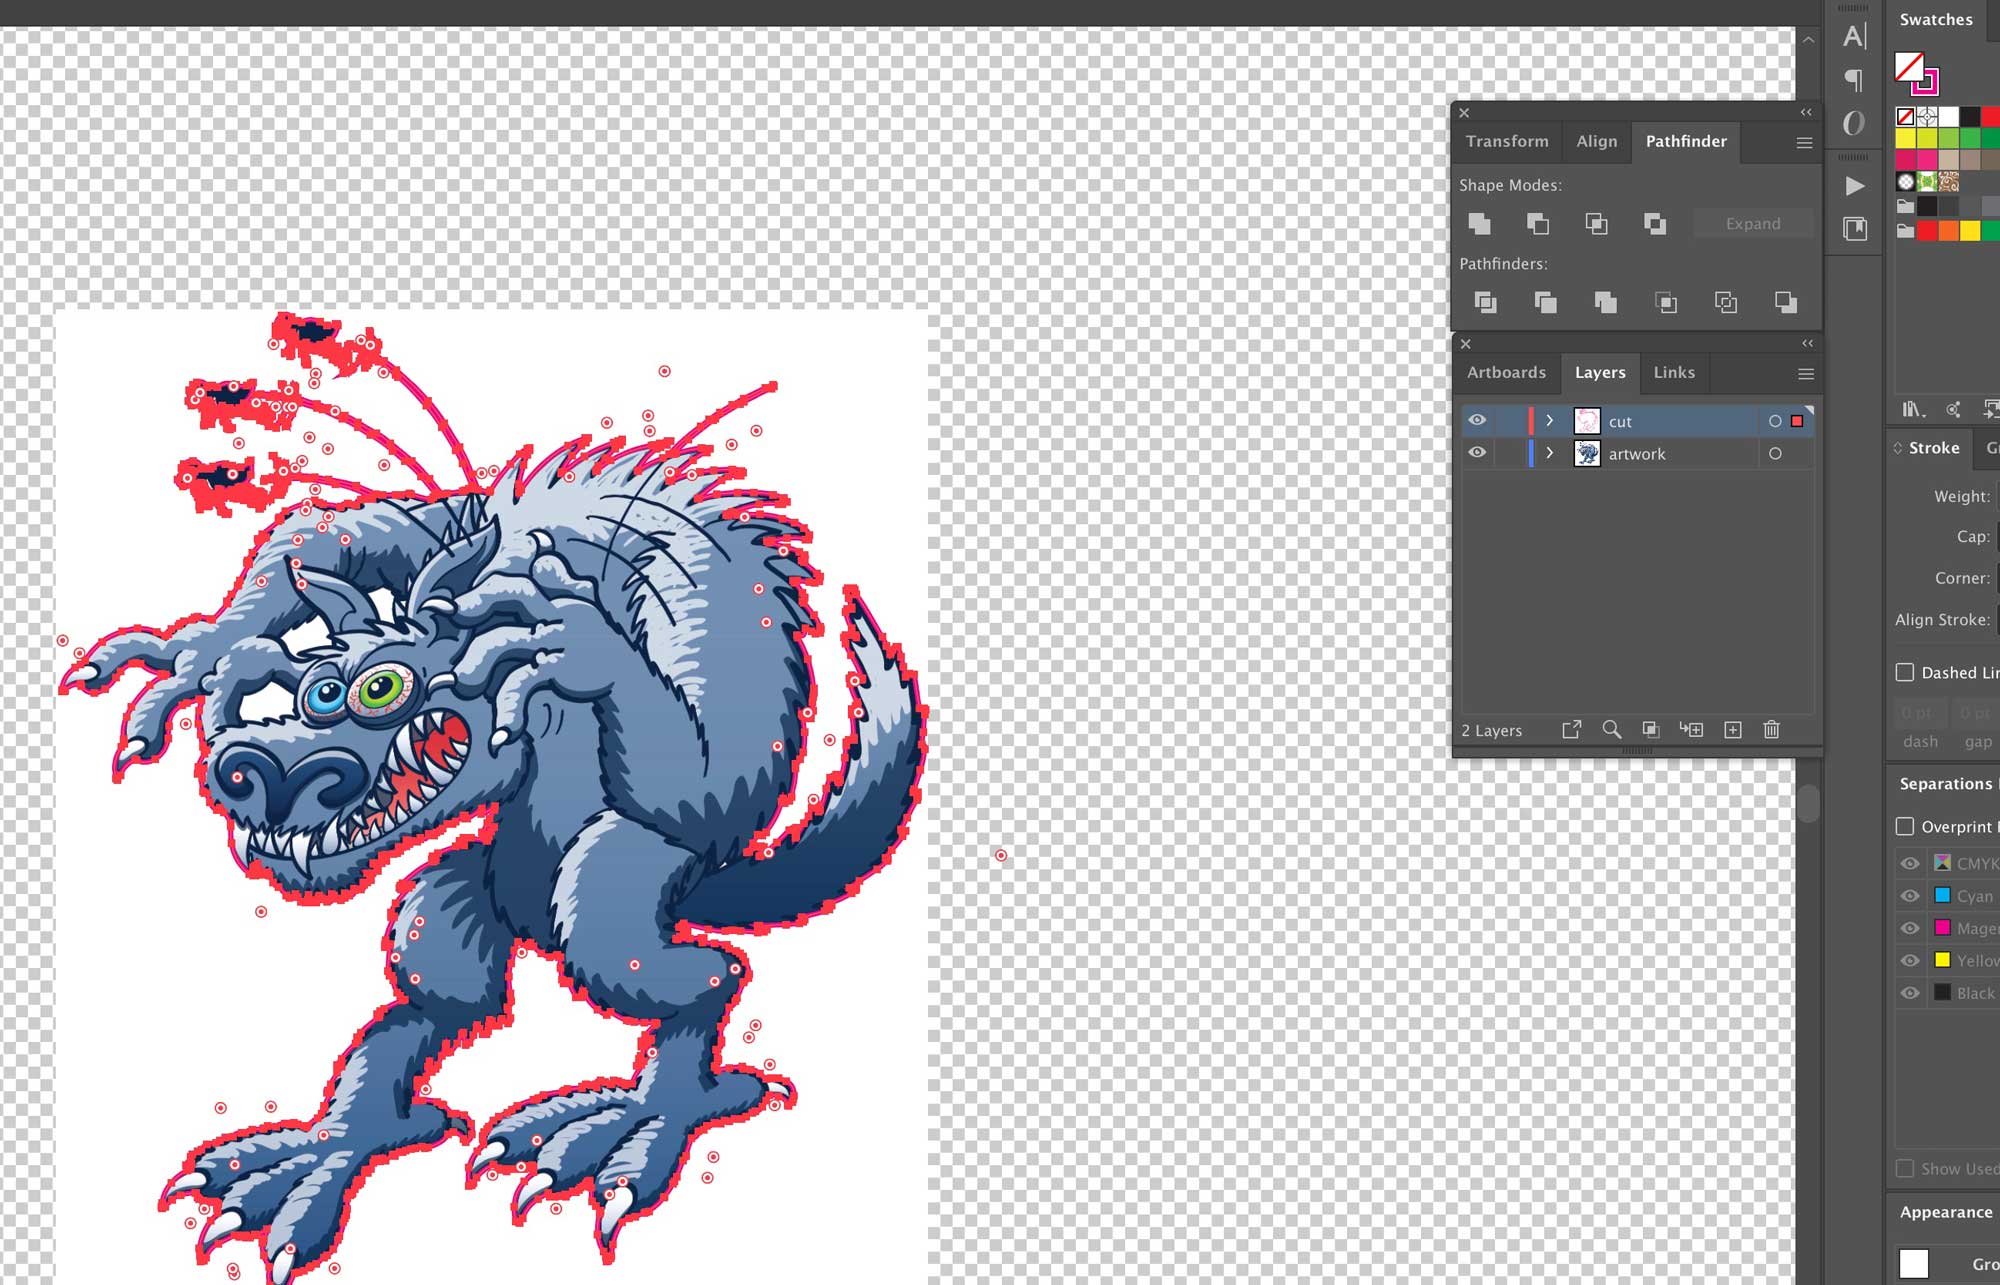
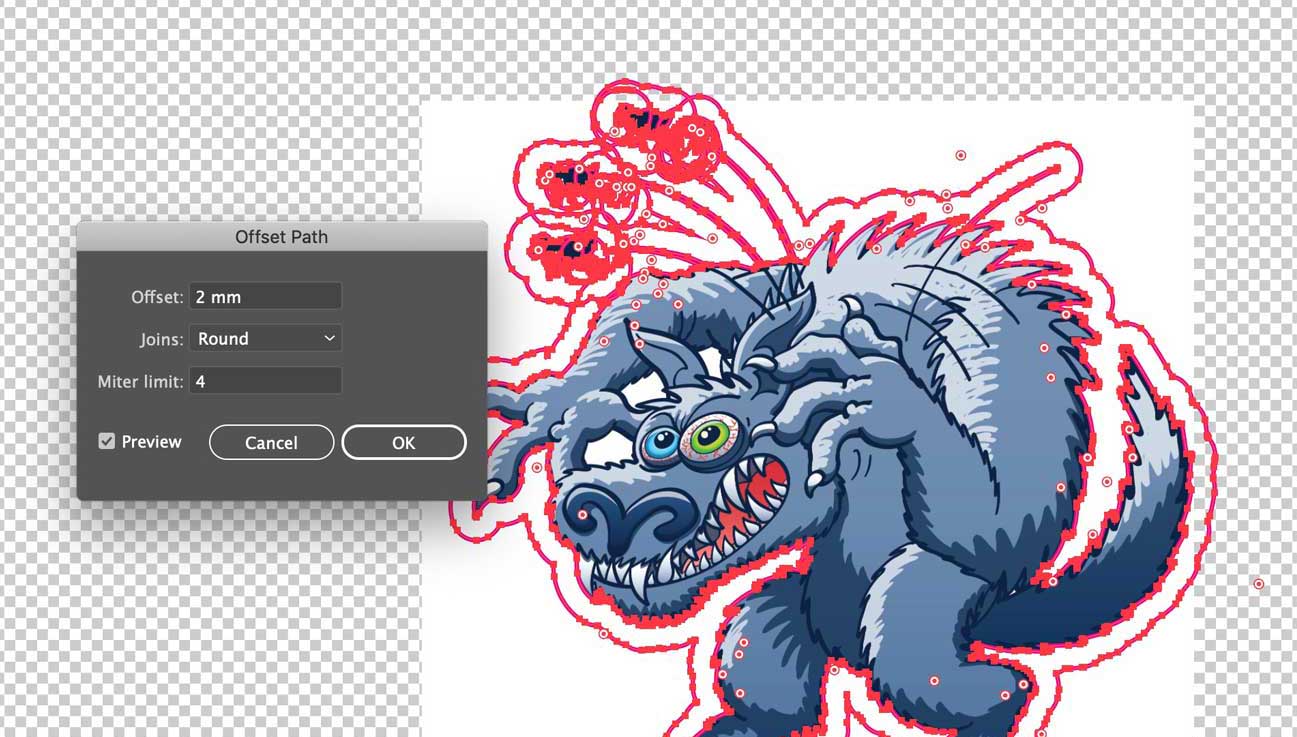
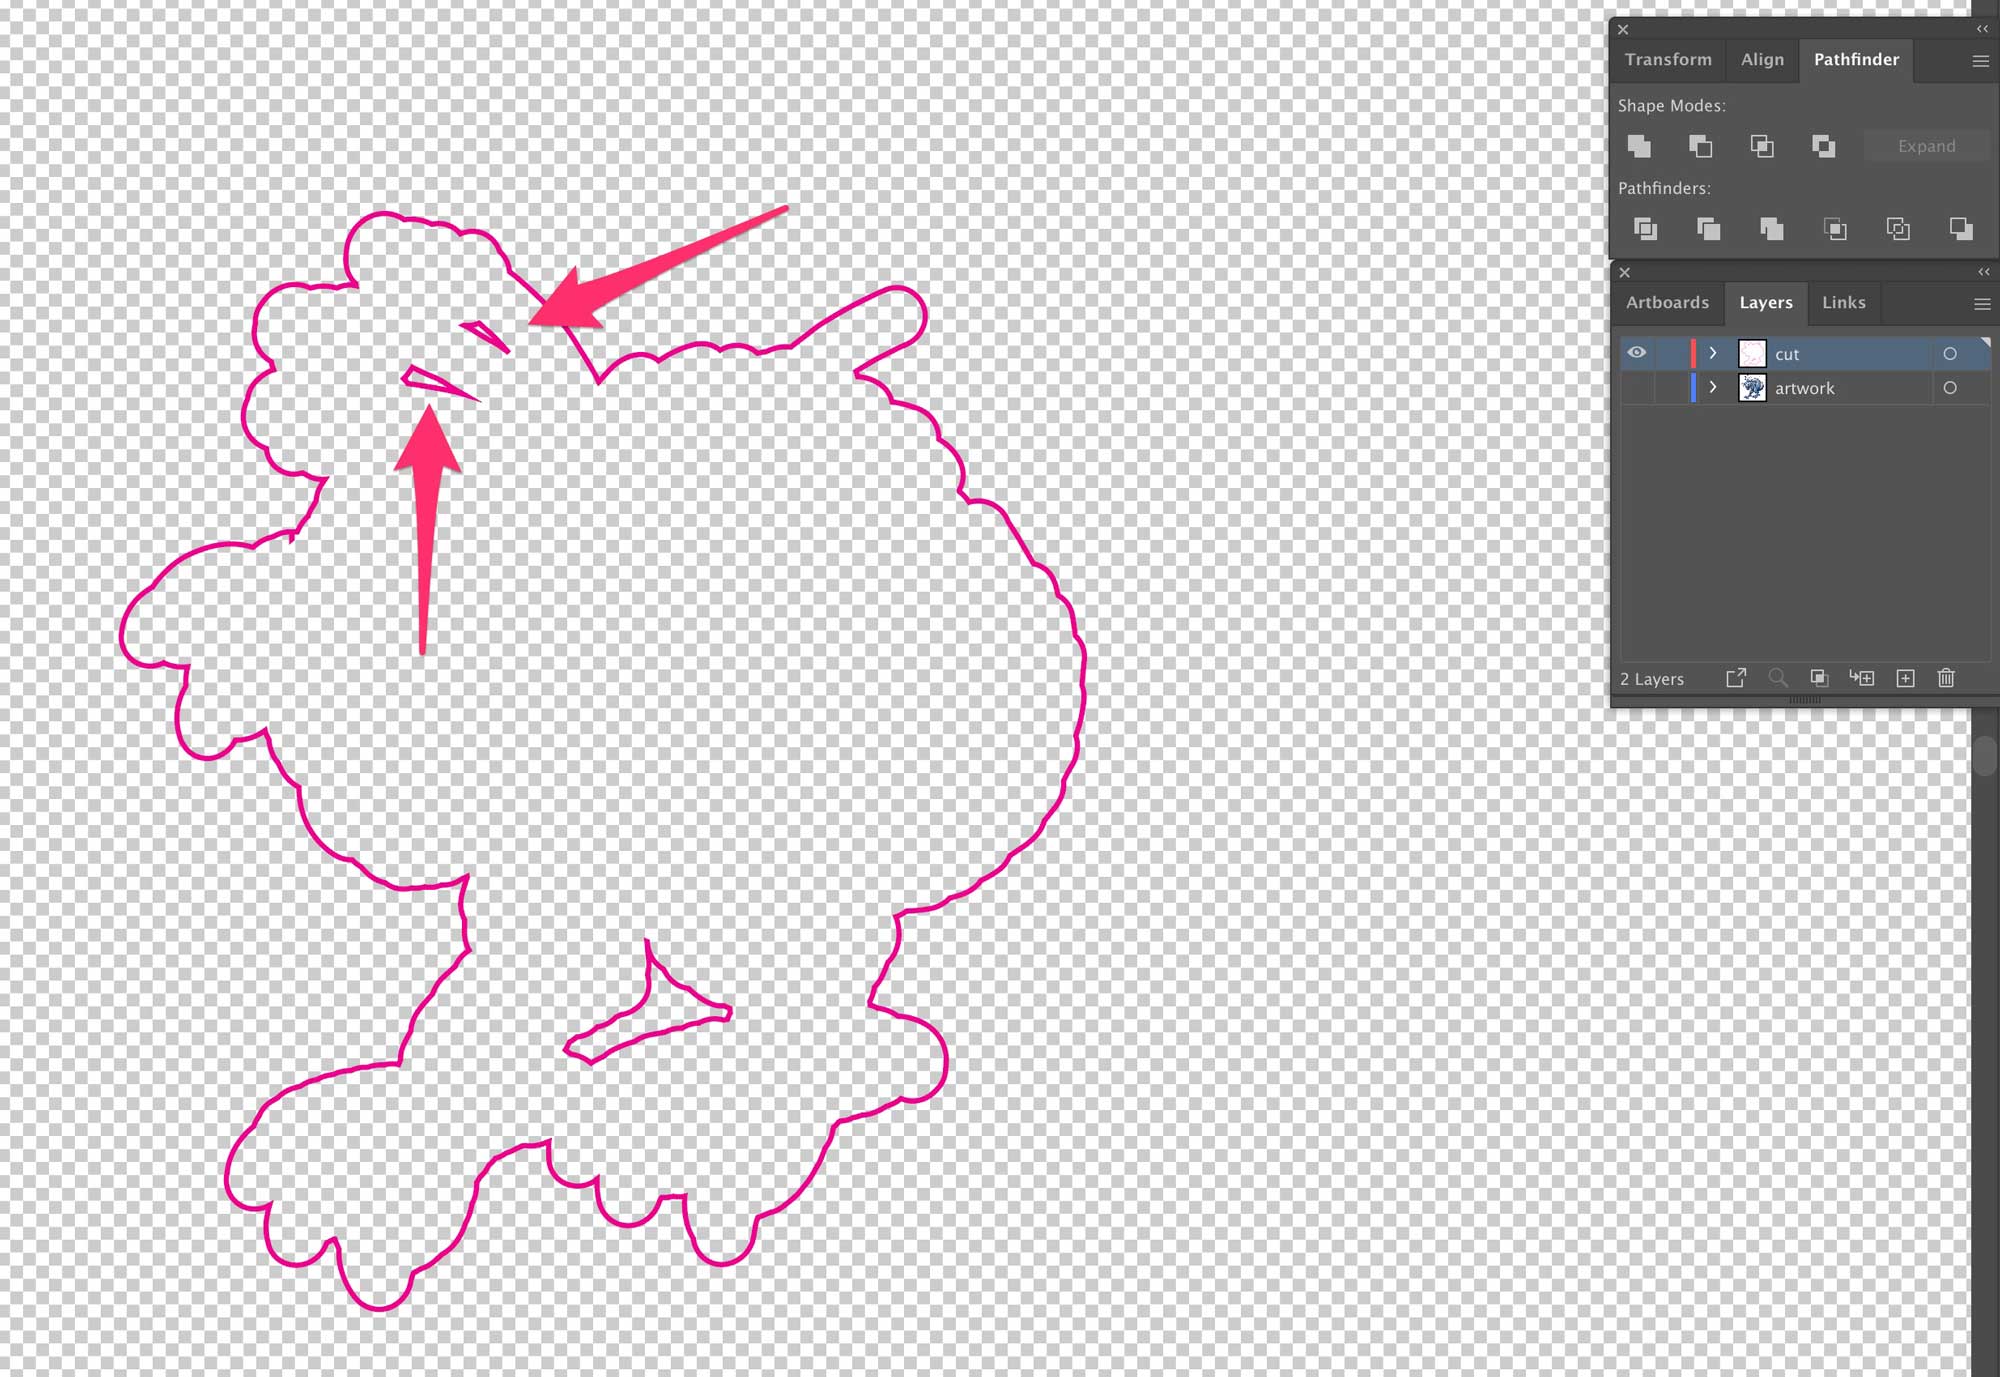
Select the contents of the cut layer again, and hit ‘Object > Path > Offset Path’. Enter the offset (in my case 2mm) and choose ‘Round’ for Joins. This is essential for a smooth path.
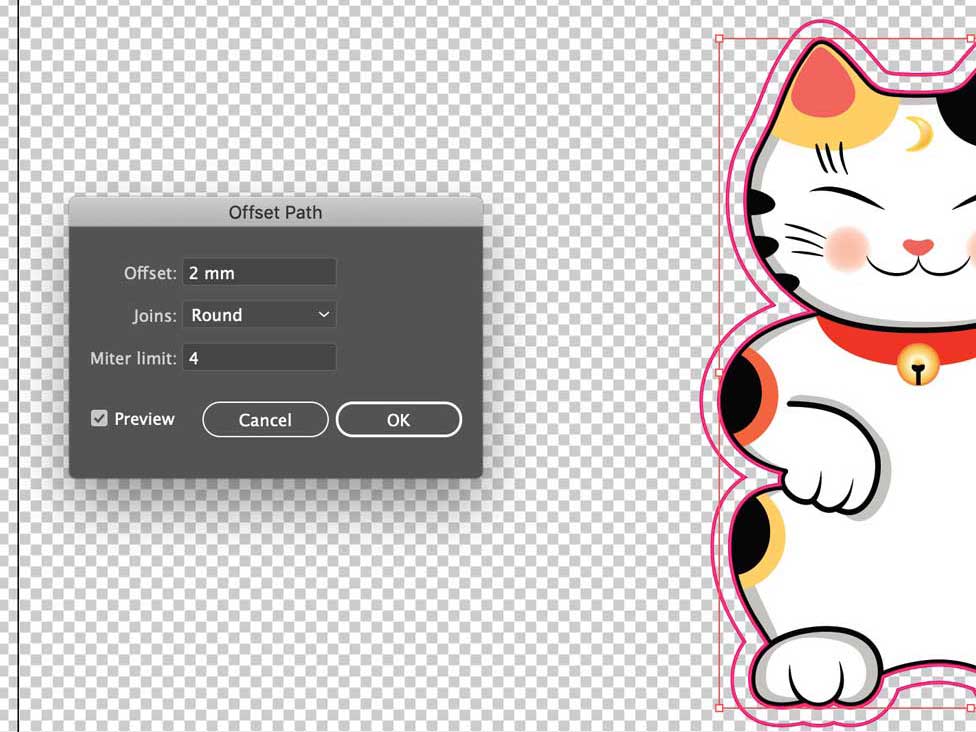
Once you’ve ok’d that you’ll see the two paths (I’ve turned off the artwork layer so you can see them more clearly) – the original and the offset path.
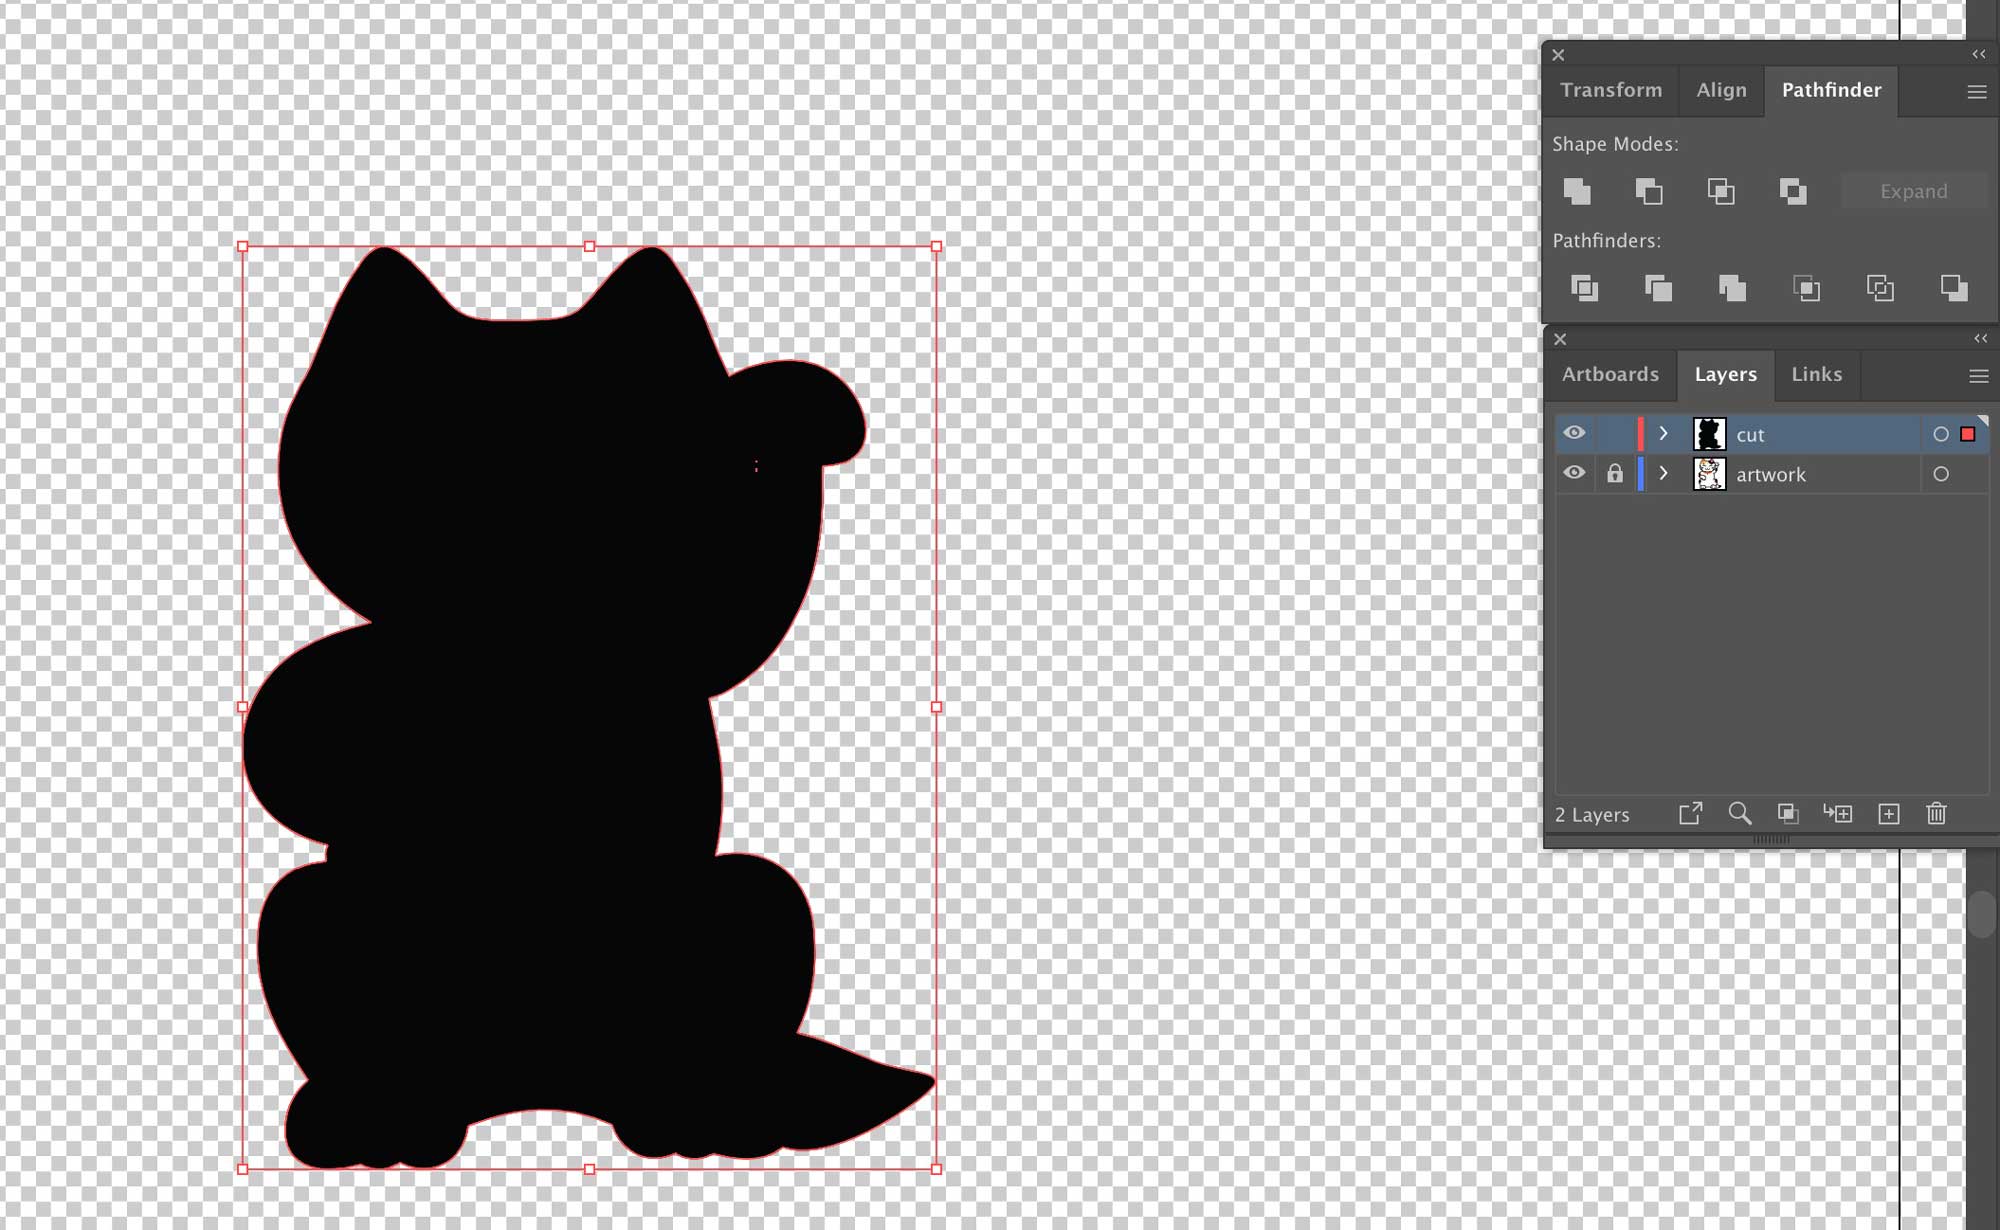
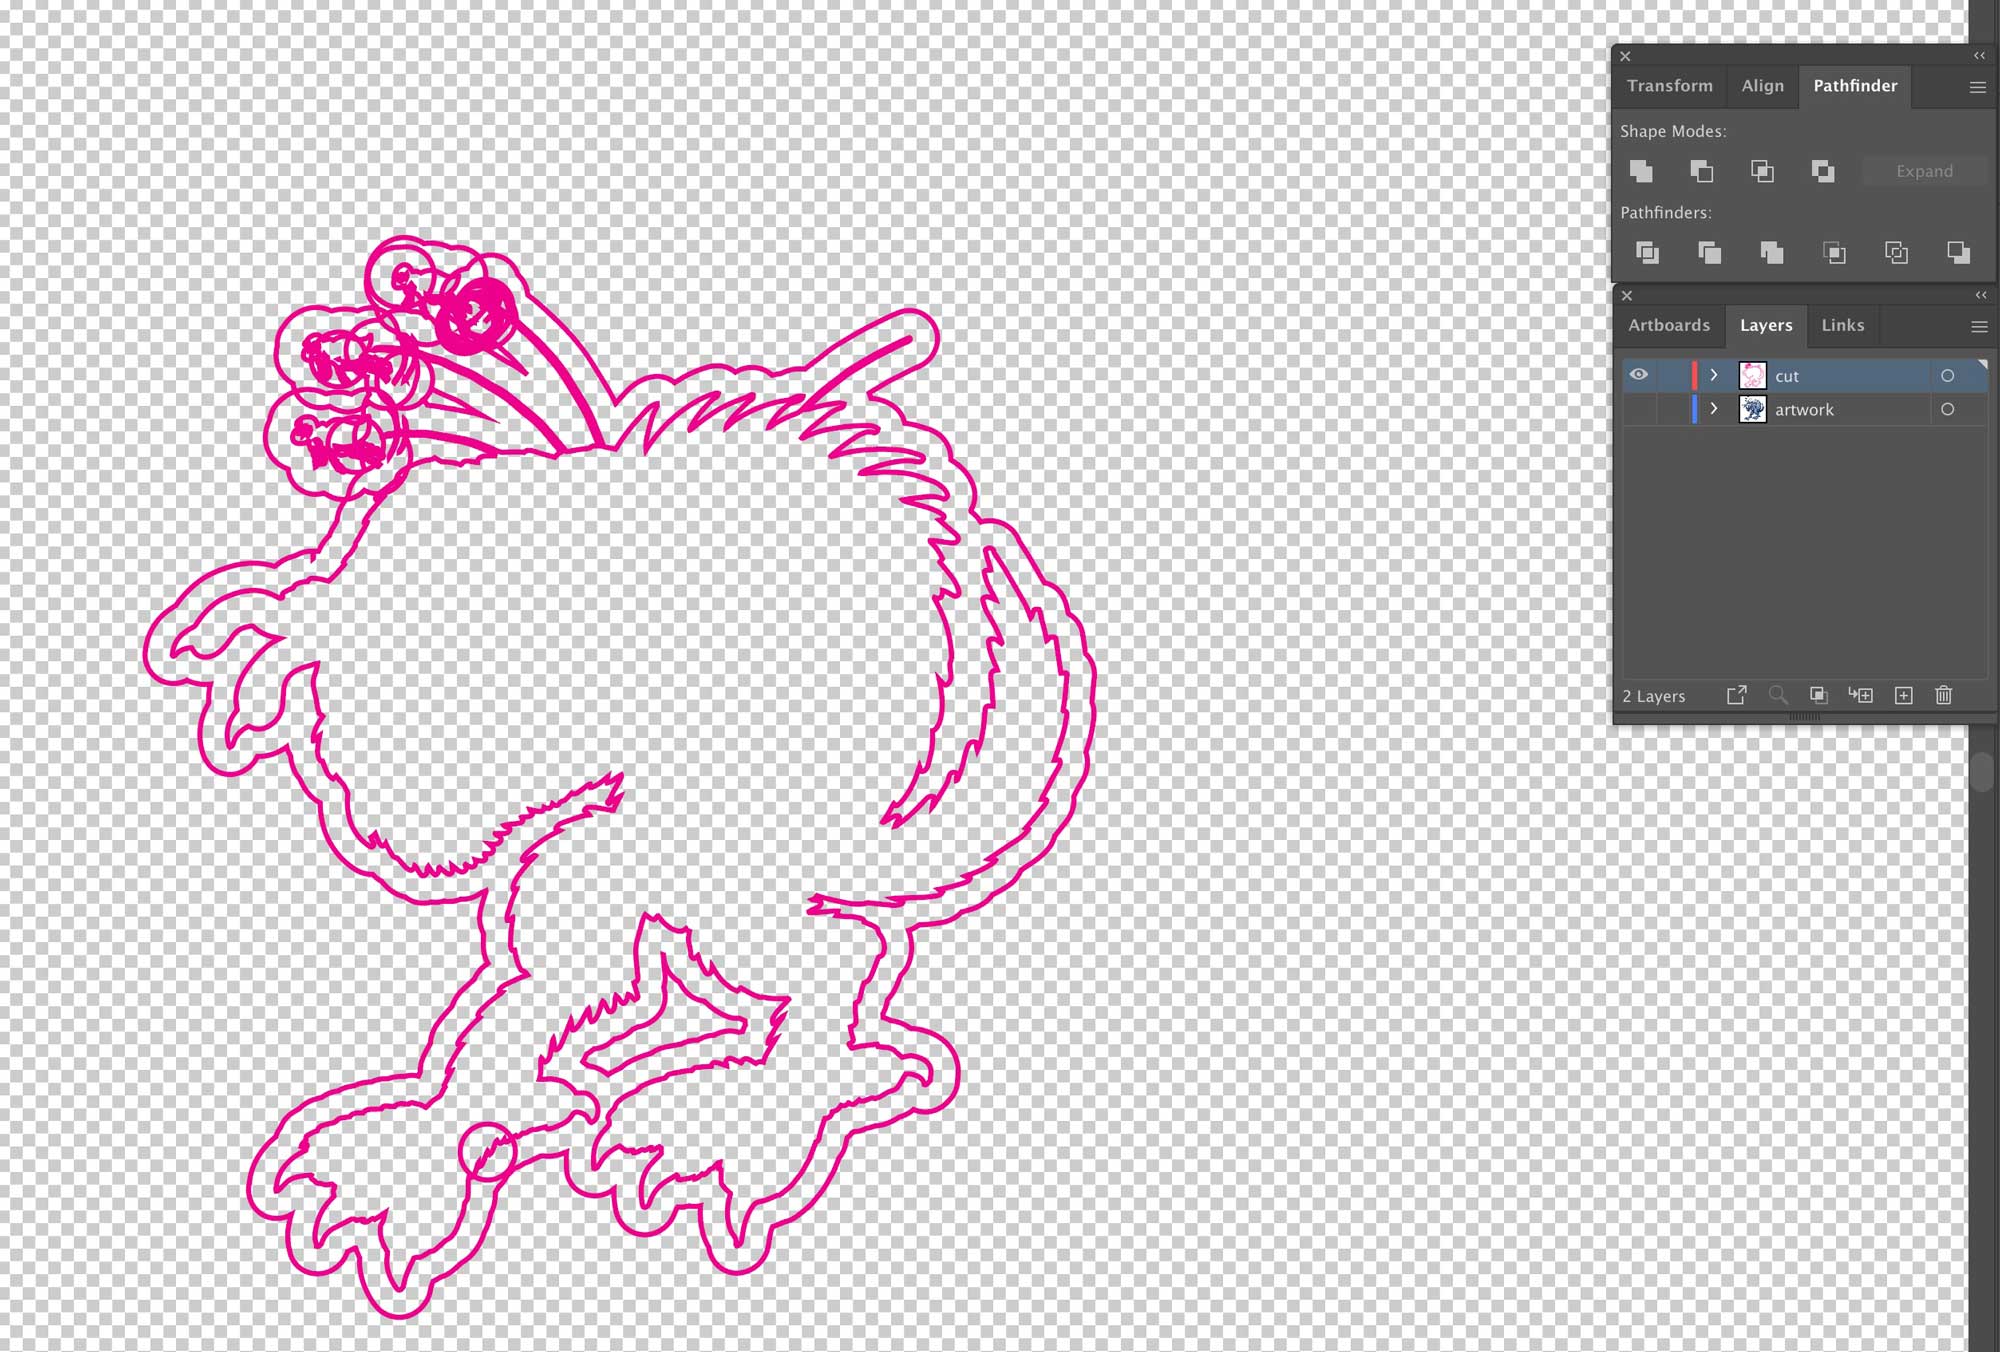
Again, select everything on the cut layer and click ‘Unite’ on the Pathfinder Palate. This will merge all your cut paths into one beautiful shape.
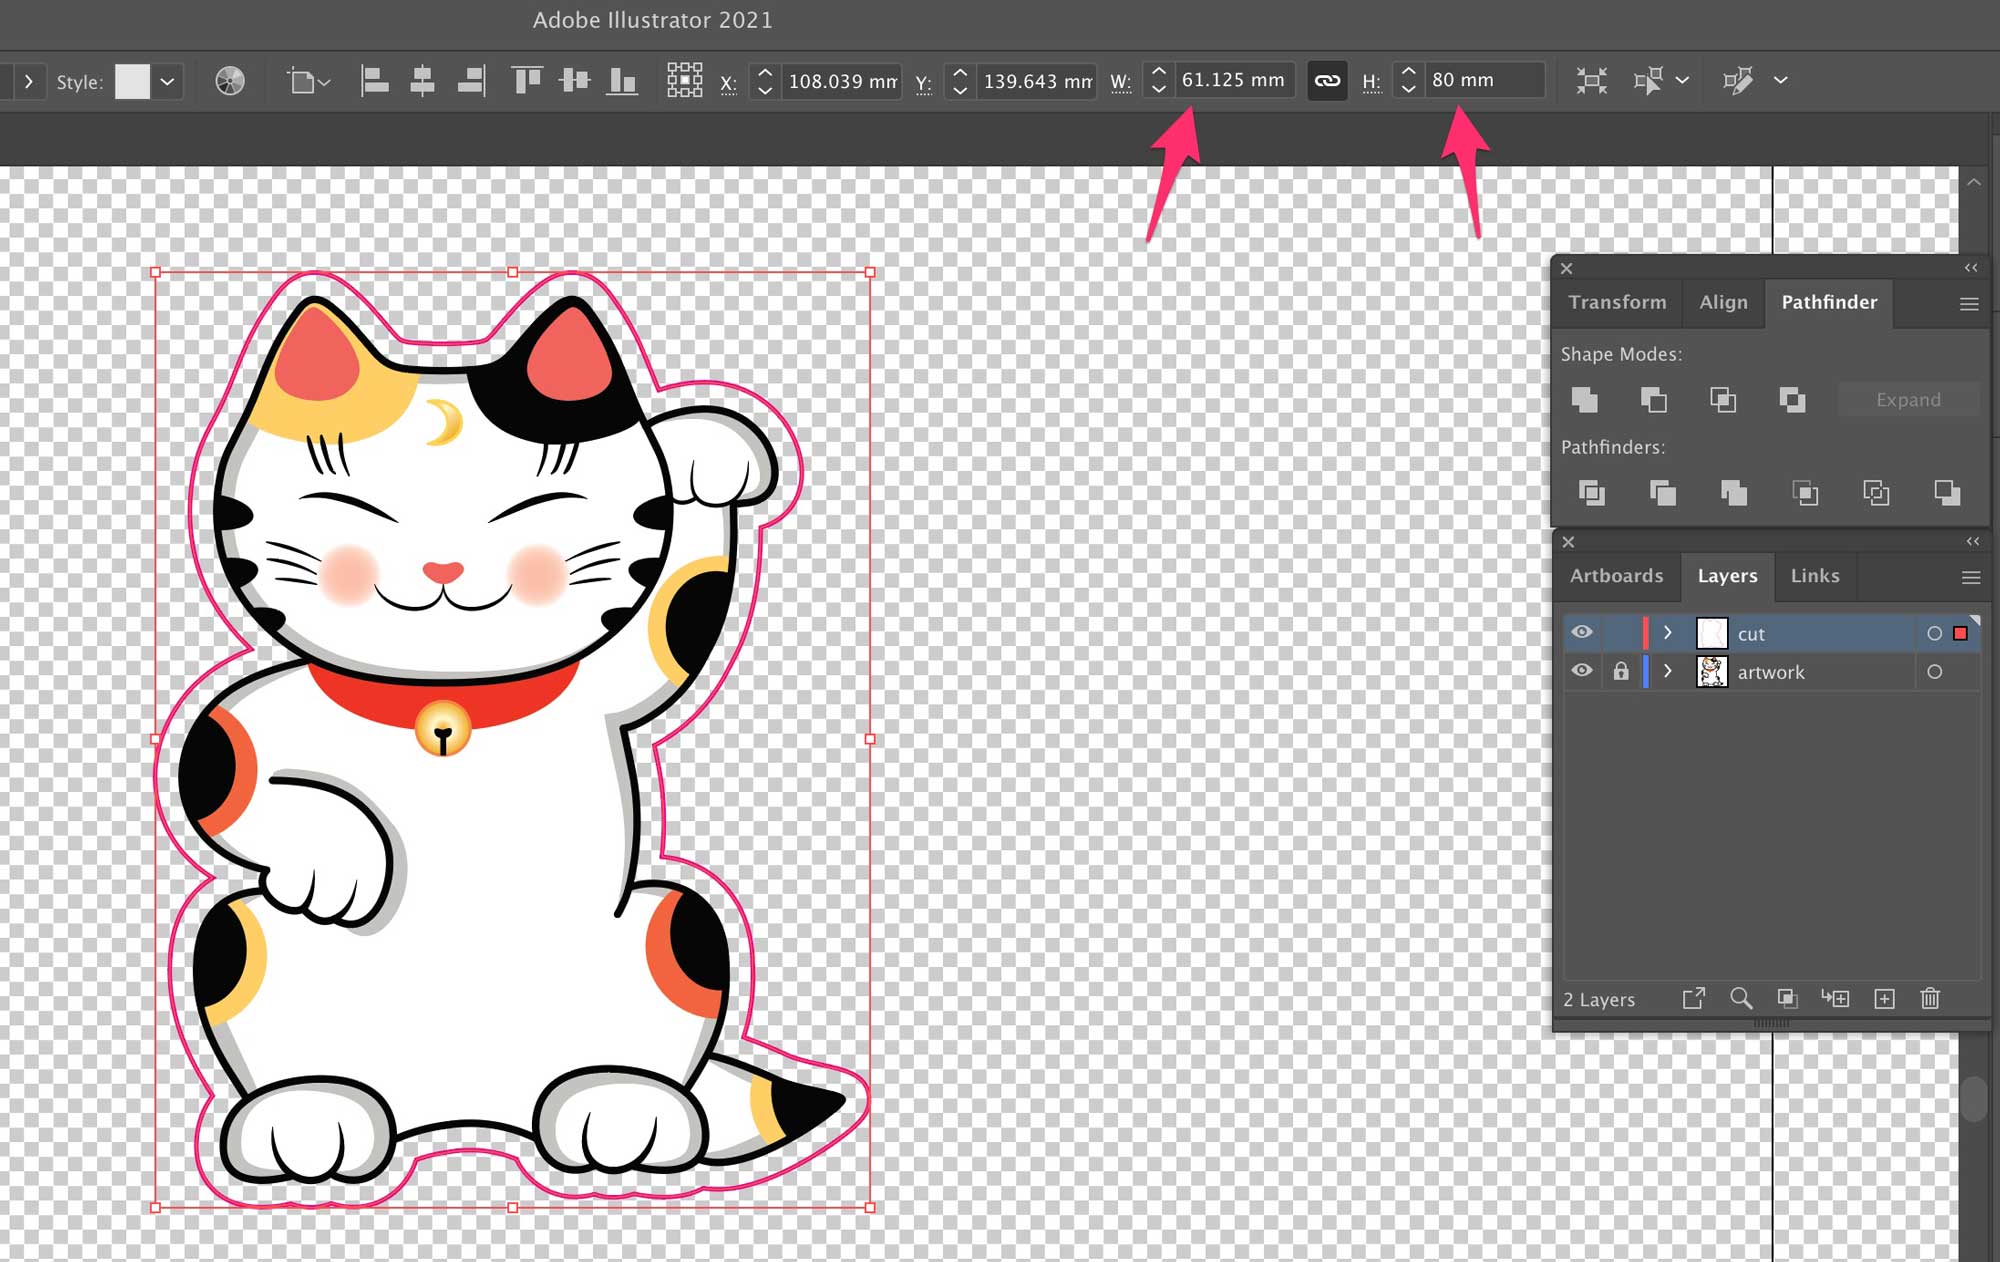
The size of the sticker is now 61mm (w) x 80mm (h). Perfect!
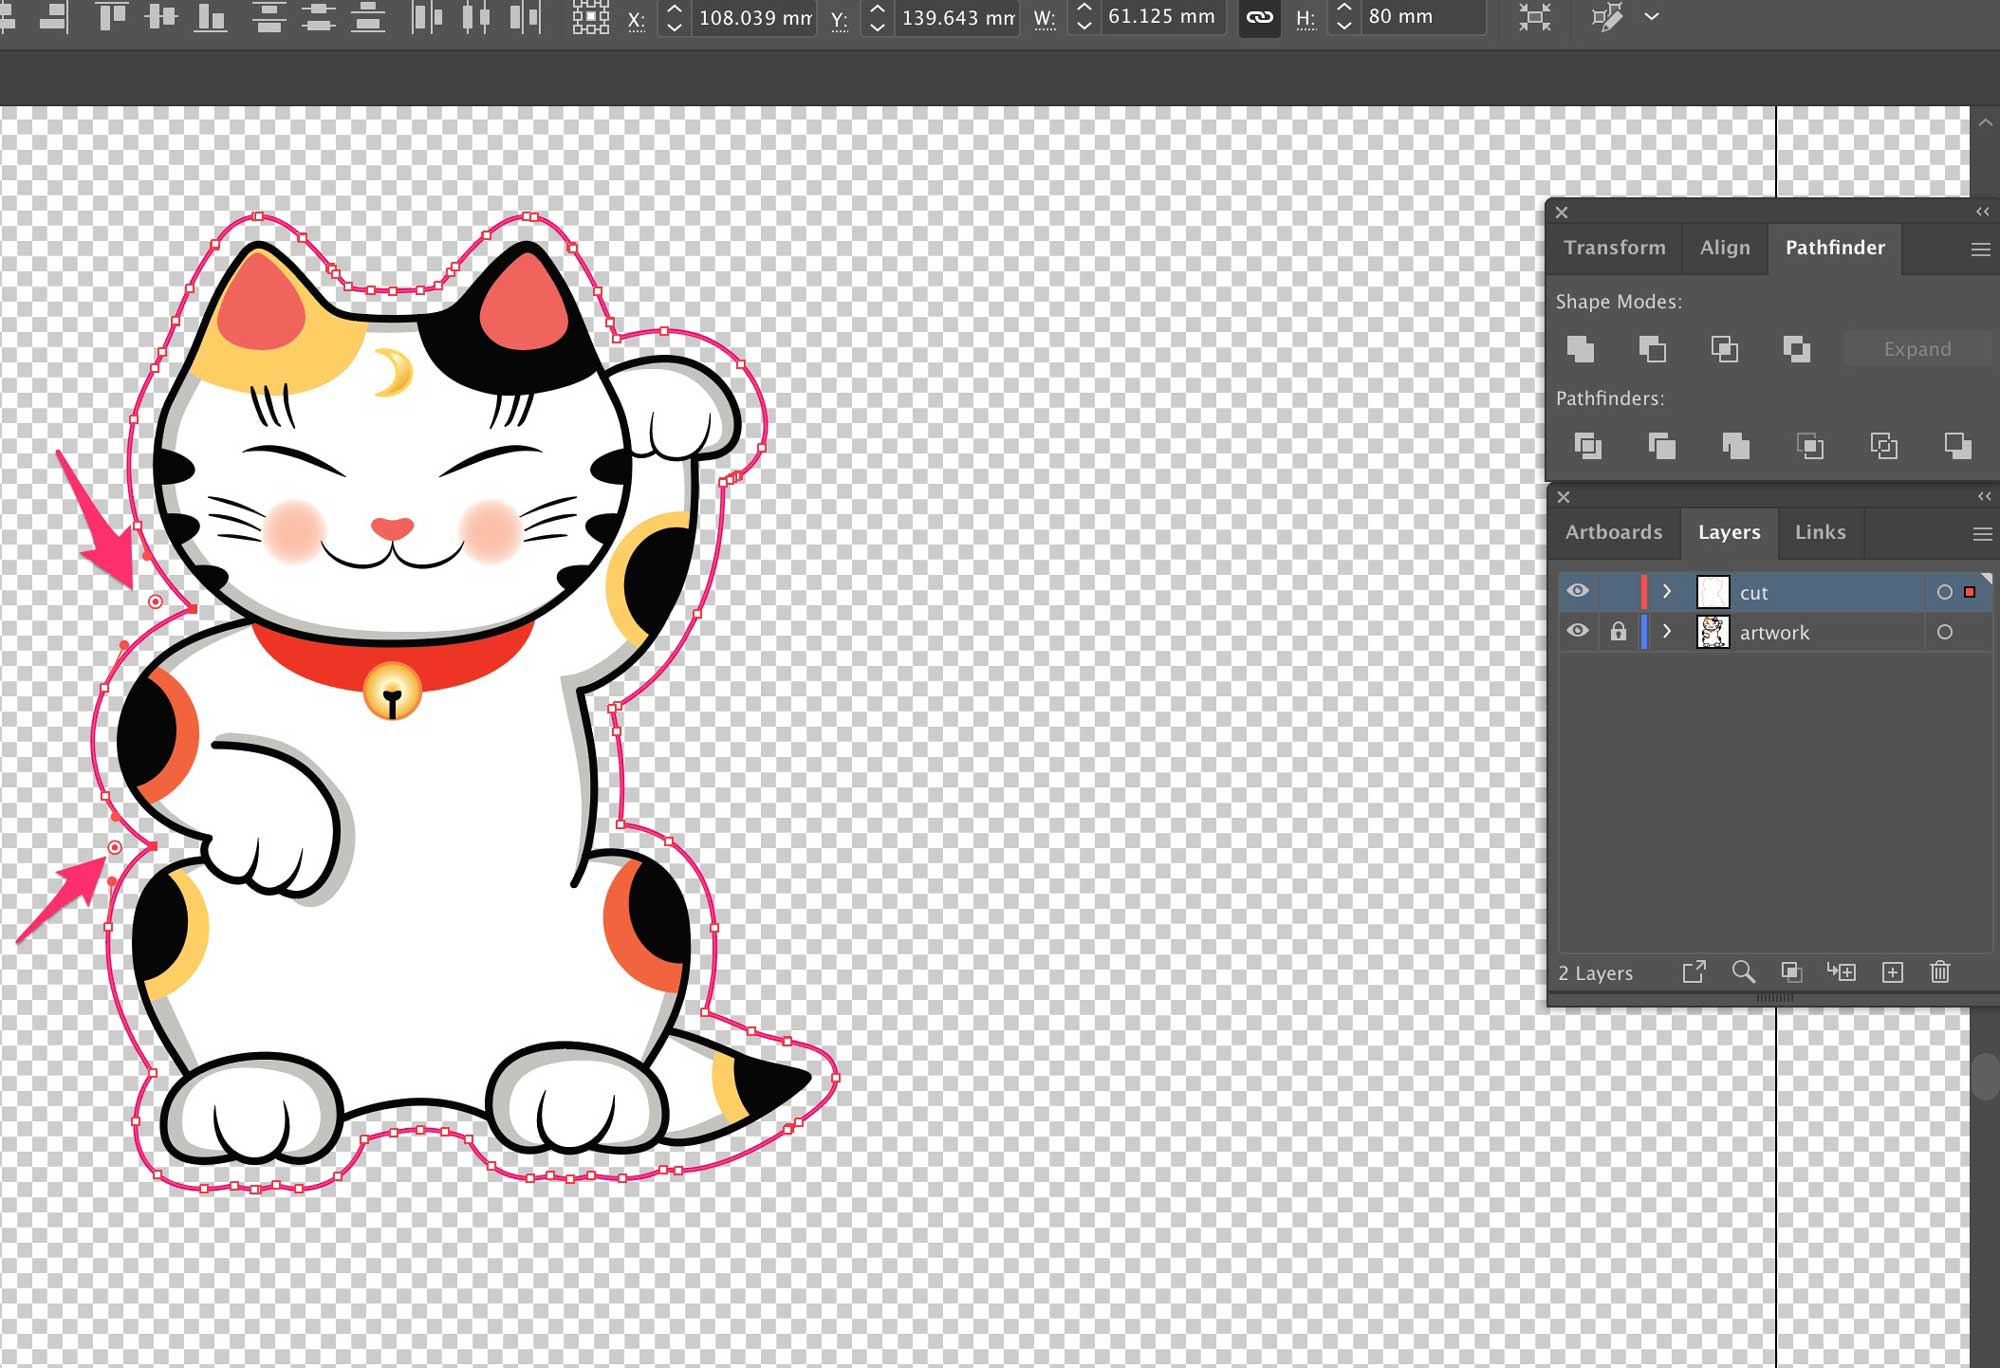
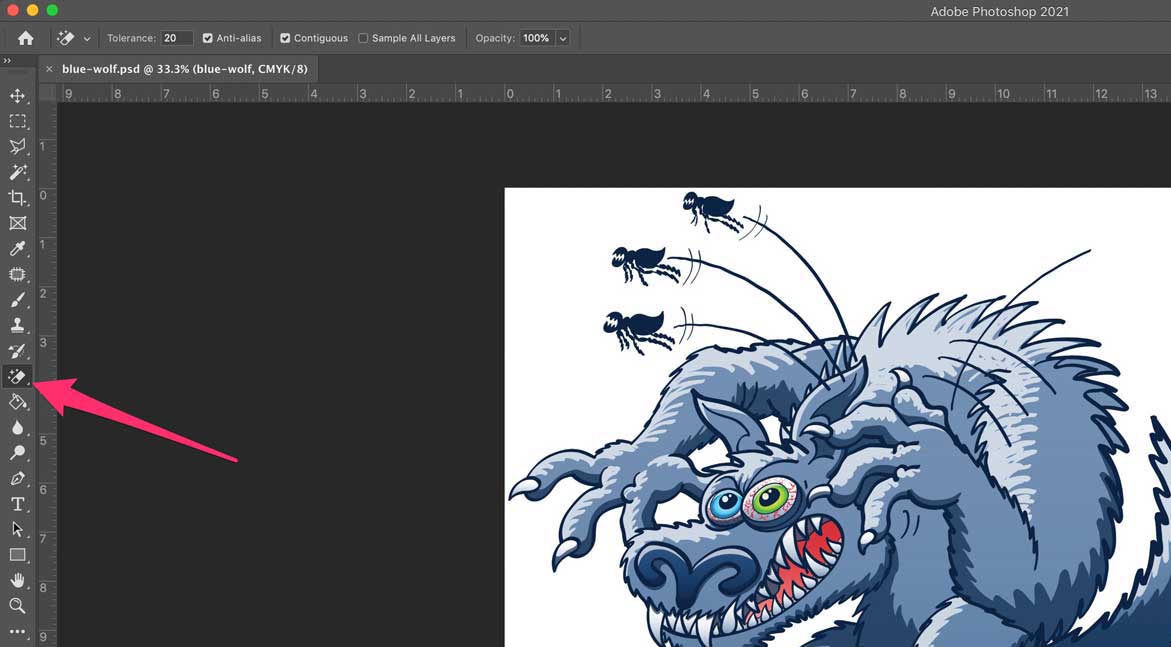
When creating cut paths it’s good practice to slightly round any acute angles. To do this click the offending points with the white arrow and pull the round corner handle circle thingy (not Adobe’s name for it).
You can then set the artboard to the size of the sticker, because it feels good, and go about your business. Your work here is done.
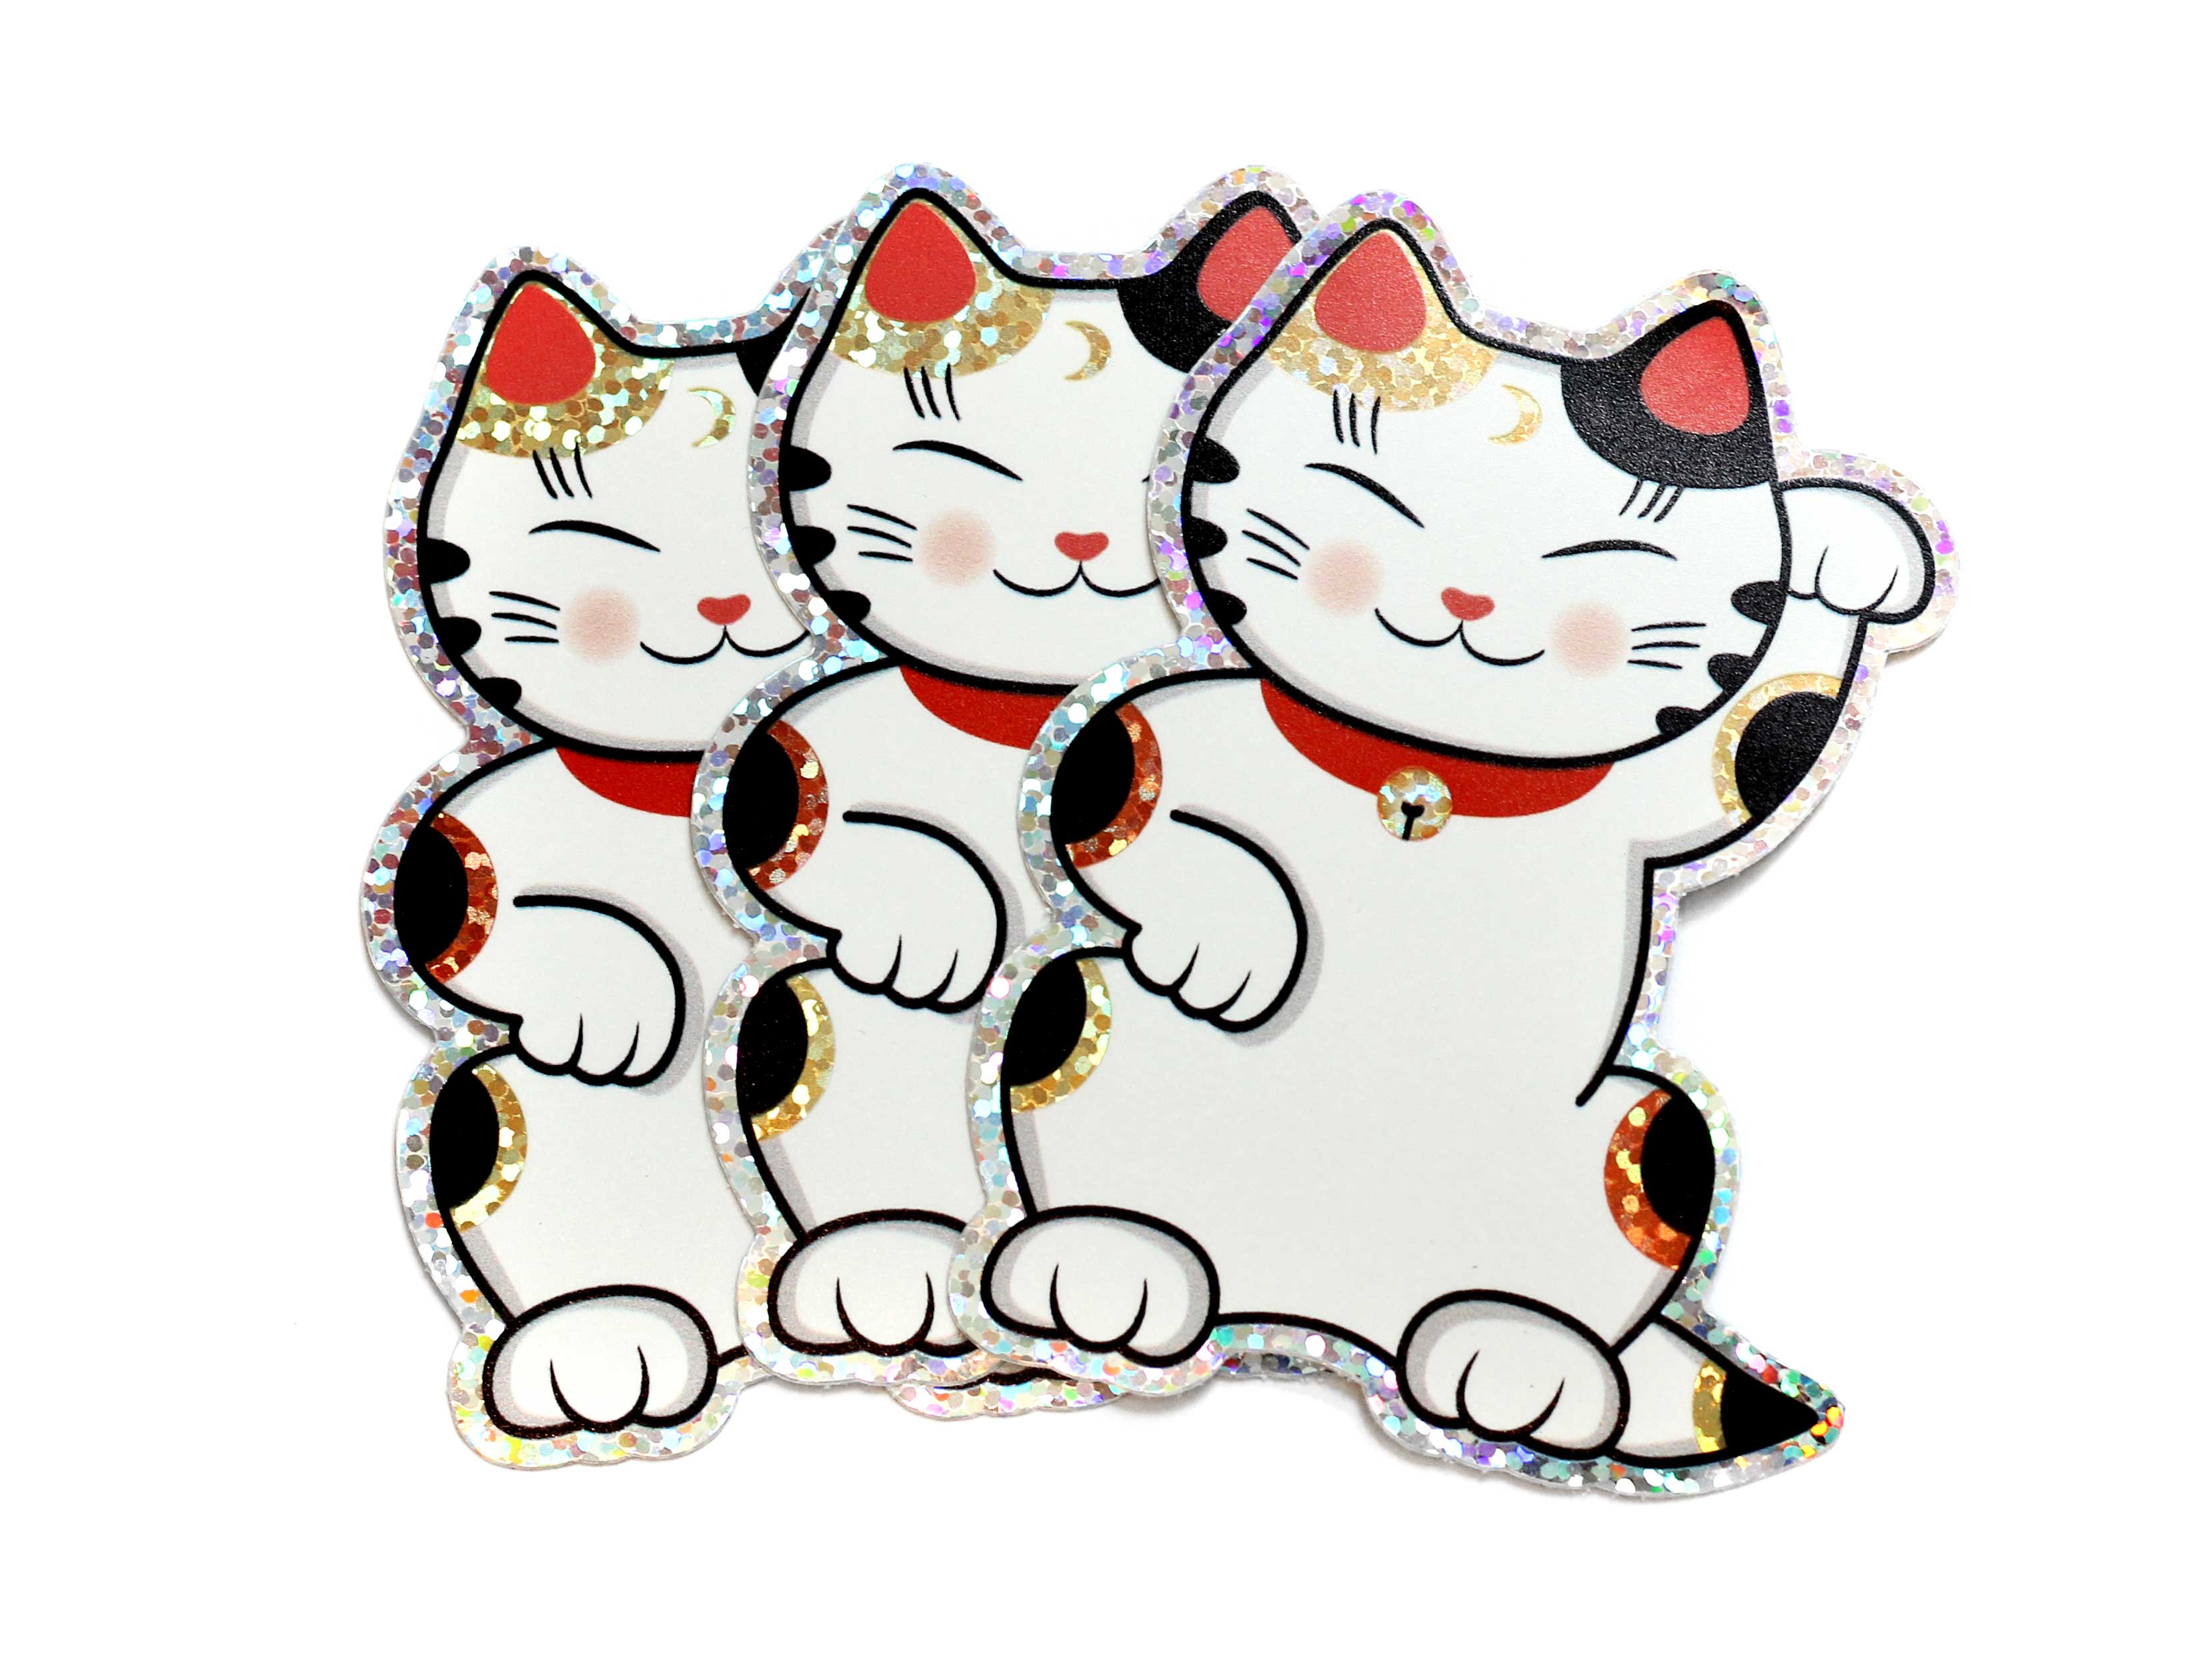
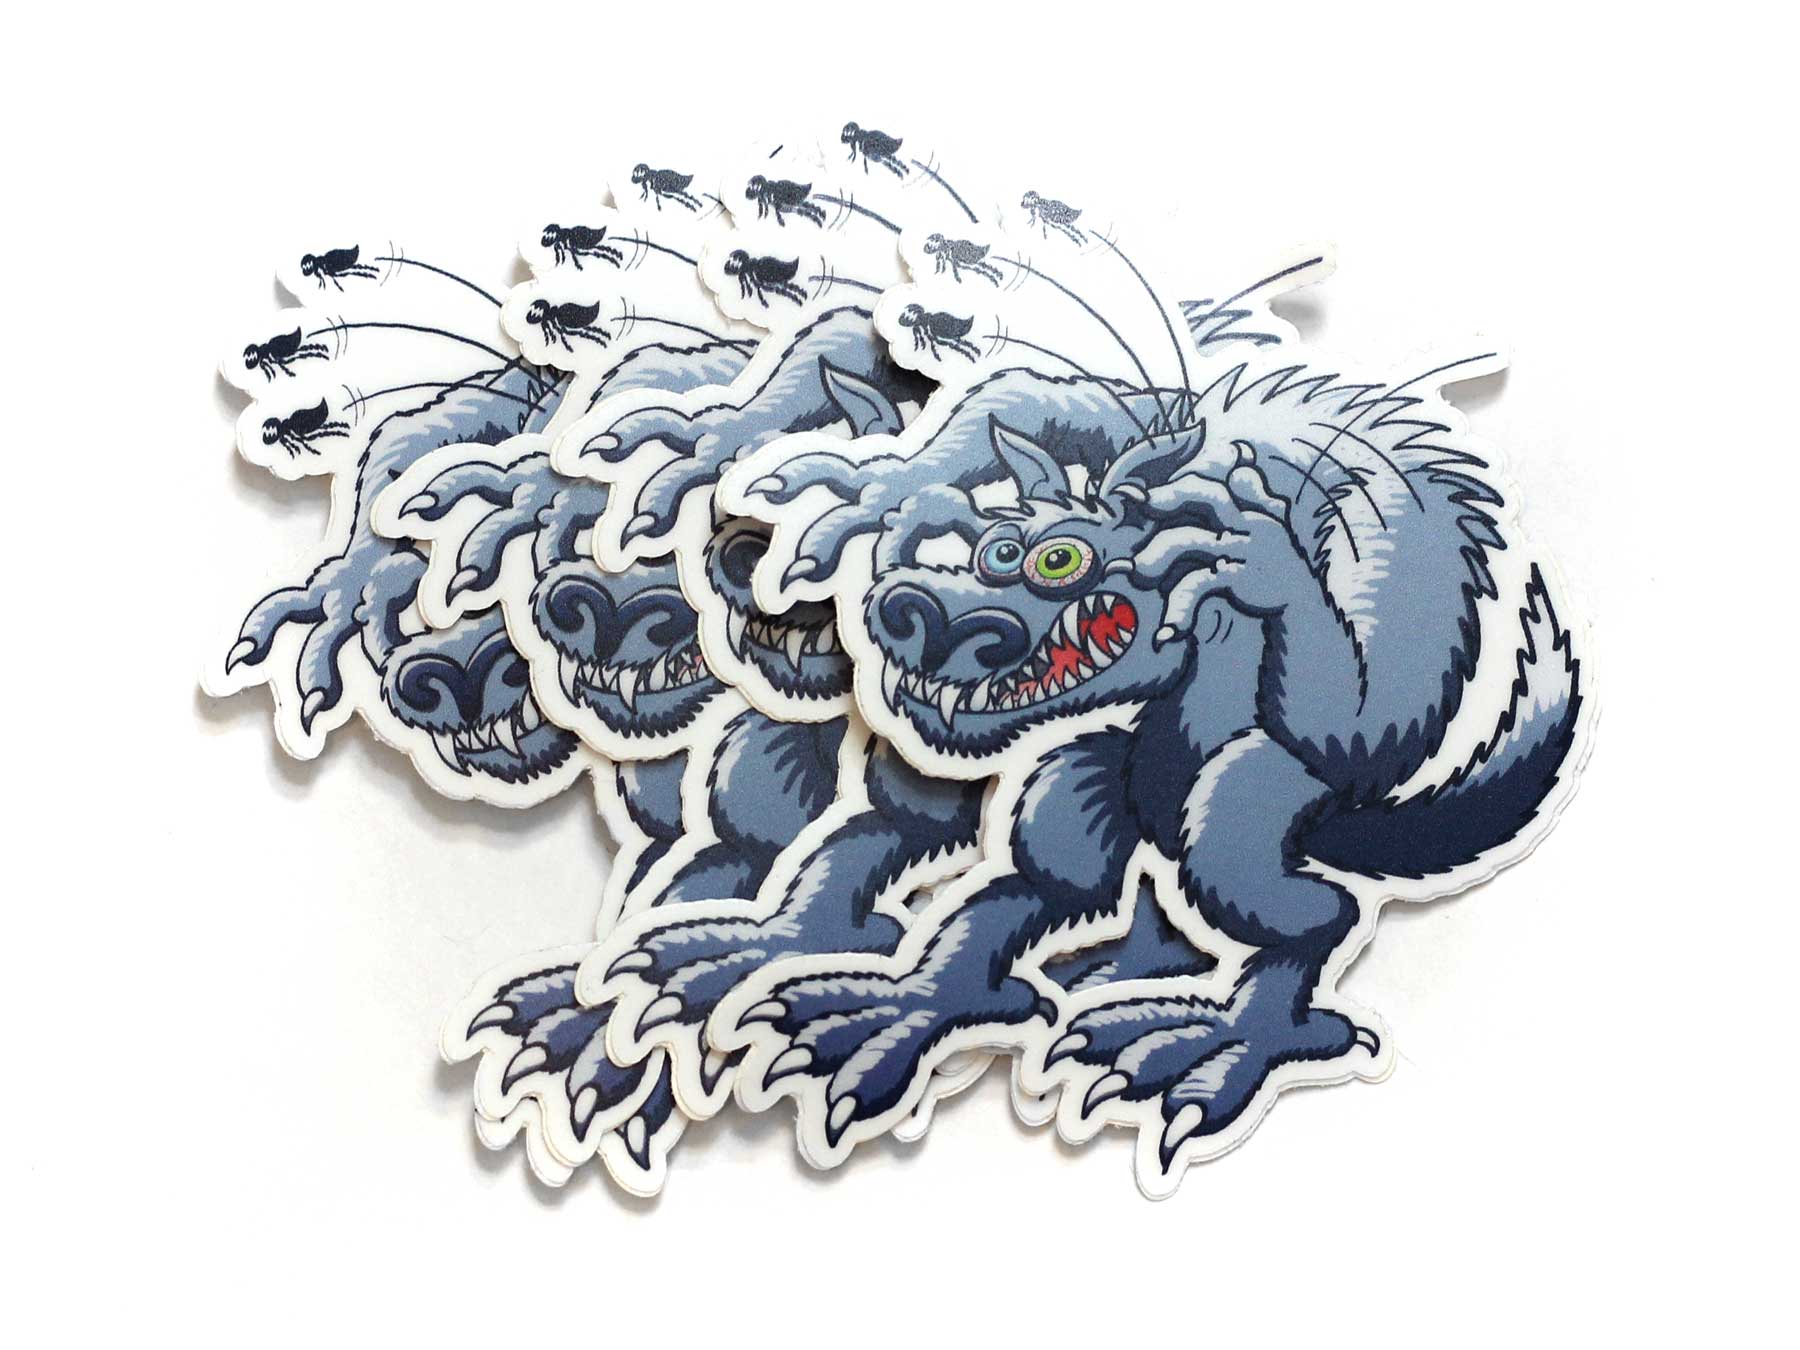
I printed these as sparkly stickers because, well, why not. Here’s the finished stickers!
Creating cut paths from raster artwork
Creating a nice cutpath from raster artwork (e.g. jpeg, png) is a little more involved, but equally as satisfying.
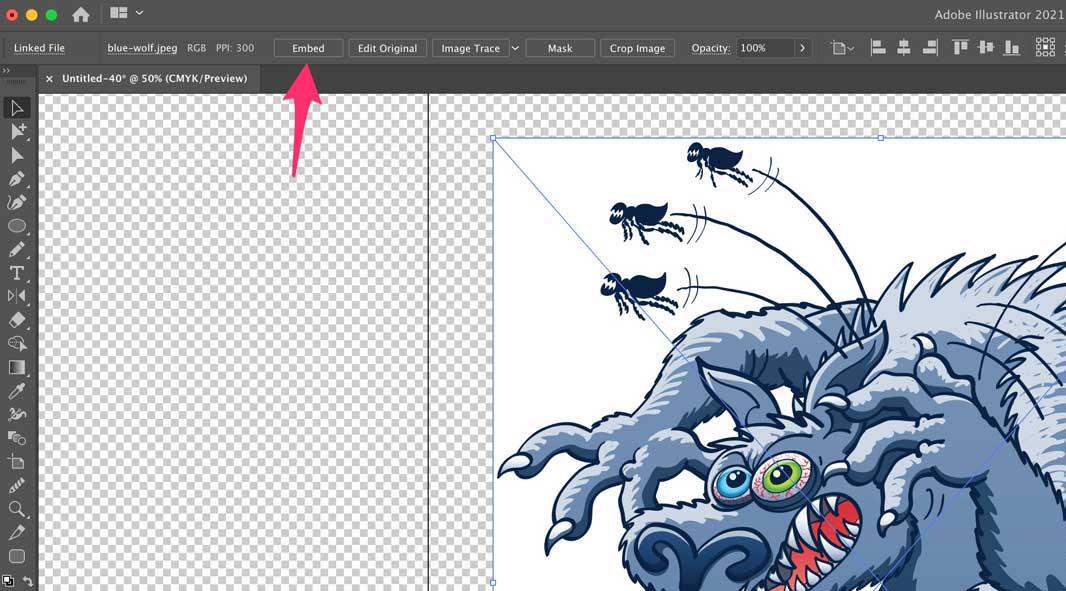
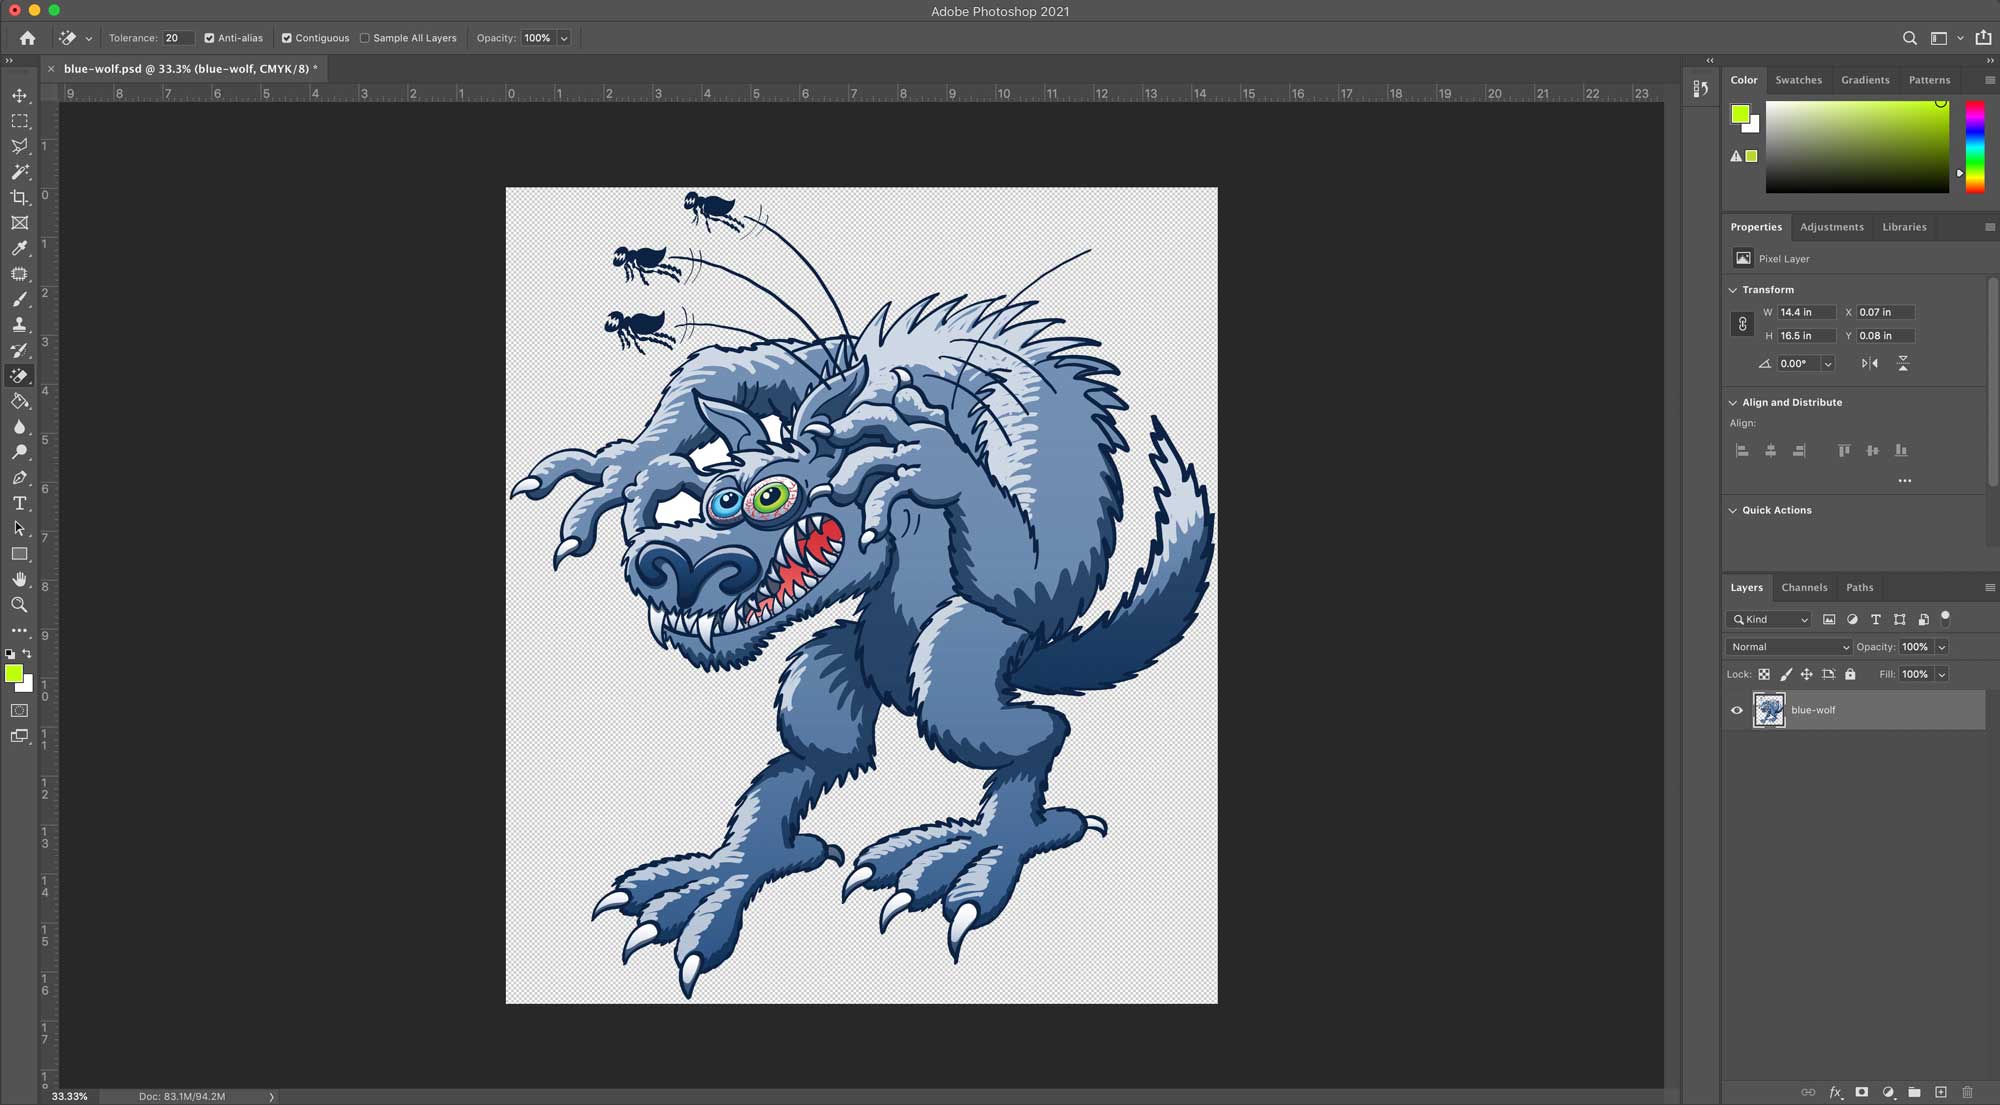
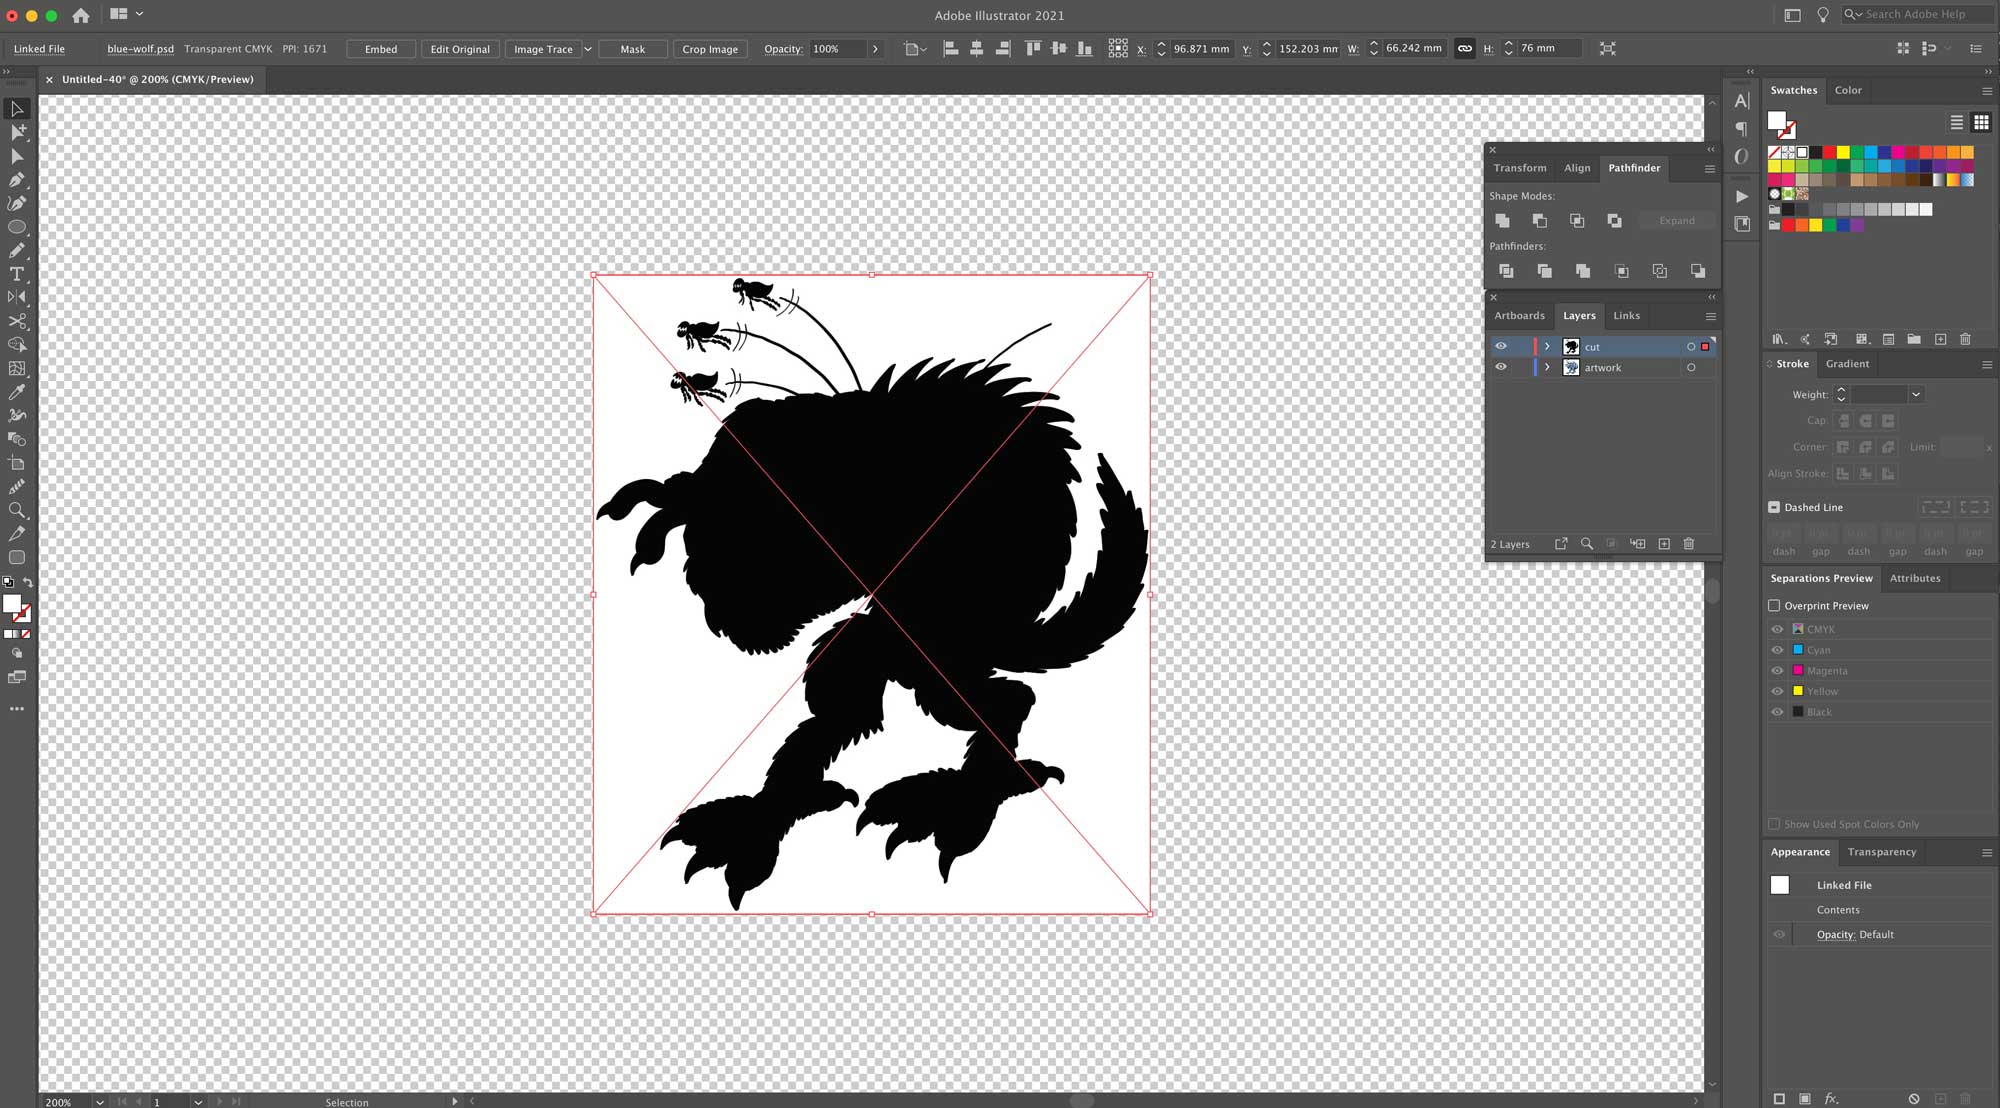
First, set up a layer called ‘artwork’ and drag your jpg or png onto it. Hit ‘Embed’ in the top toolbar to… embed it.
Next it’s a good idea to scale the image to roughly the size of the finished sticker. Again, I’m going for an 80mm tall sticker, including a 2mm border, so I’ve scaled the artwork to around 76mm height.

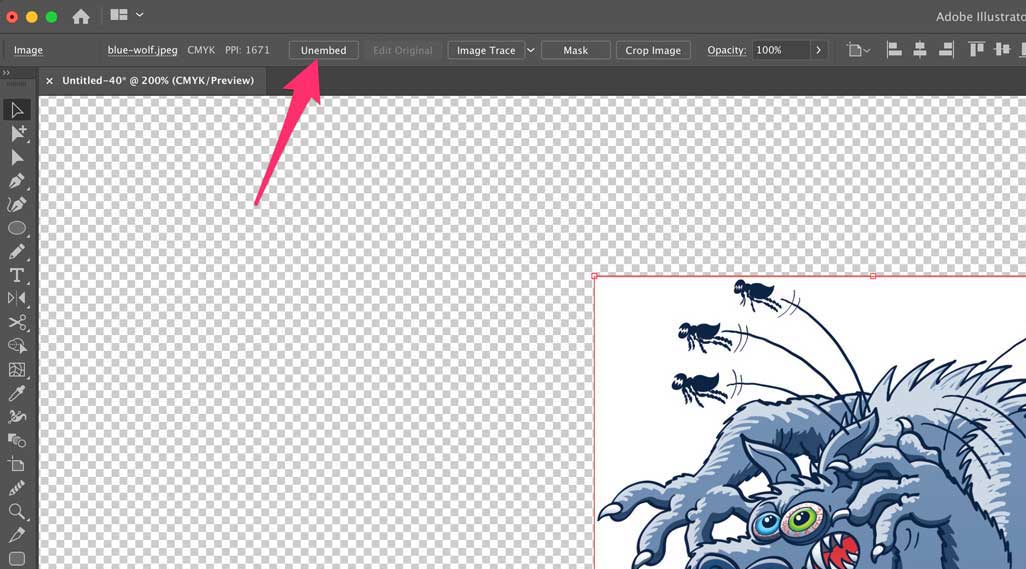
Next, duplicate the artwork layer onto a new layer called ‘Cut’.
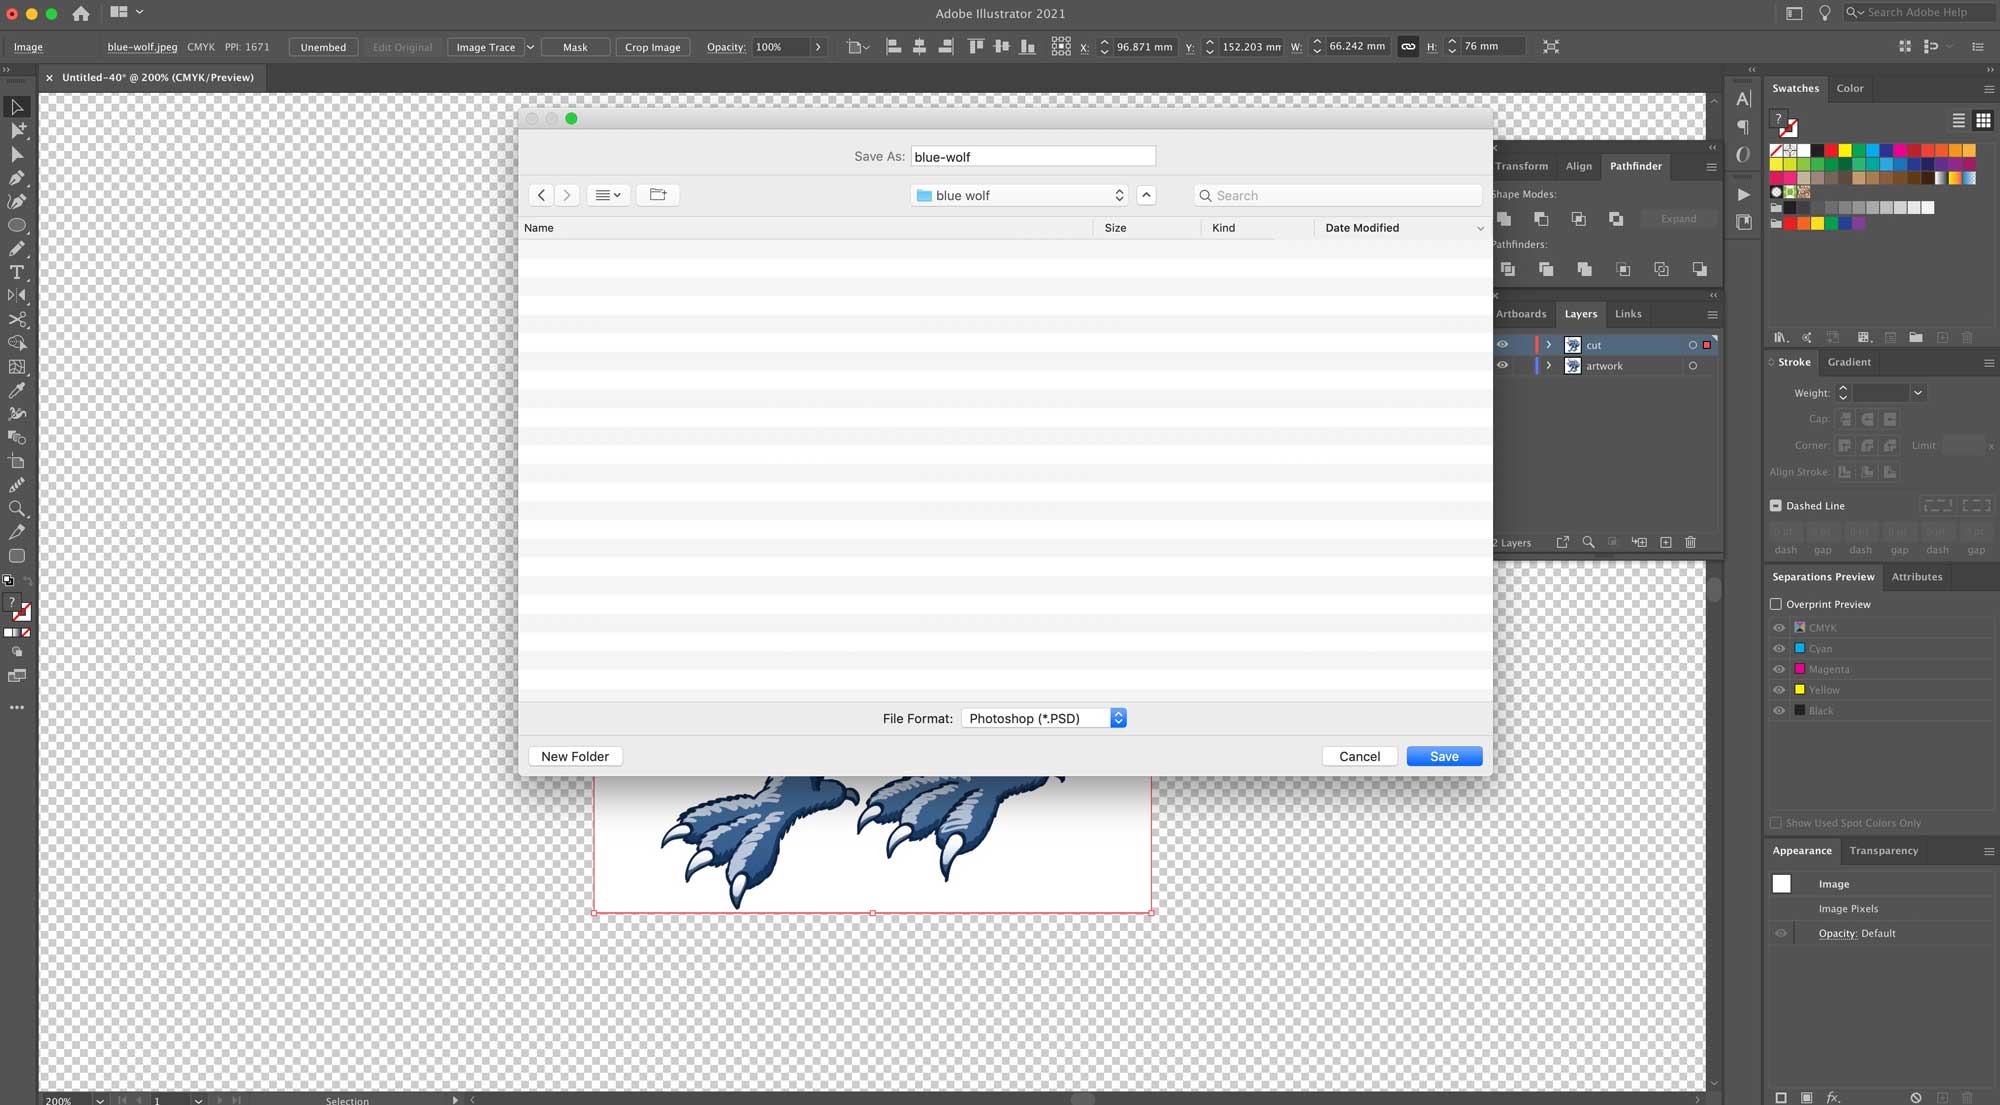
Here’s where it gets spicy. Click on the image on the cut layer and click ‘Unembed’ on the top tool bar. Illustrator will ask you politely where you would like to save the file. Anywhere is fine.
The file will save as a ‘psd’ in the location of your choice. Again, it doesn’t matter where.
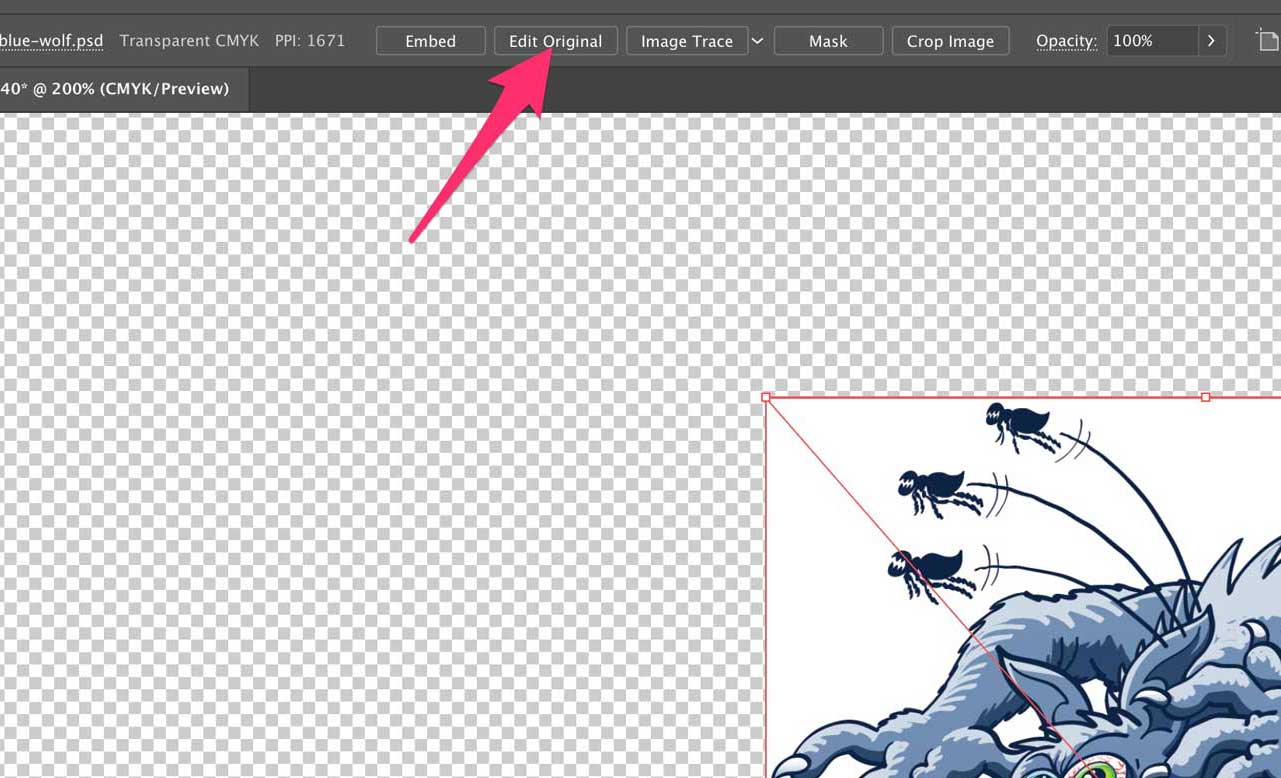
Now, with the image on the cut layer selected, click ‘Edit original’ on the top toolbar. This will open the image up in Photoshop. If you don’t have Photoshop, well, this tutorial is over for you, sorry. Go home.
In Photoshop select the Magic Eraser tool and use it to decimate the white background (or whatever colour it is on your image). If you have a png file the background may already be transparent.
The remaining areas of your image will form the basis of your cut path.
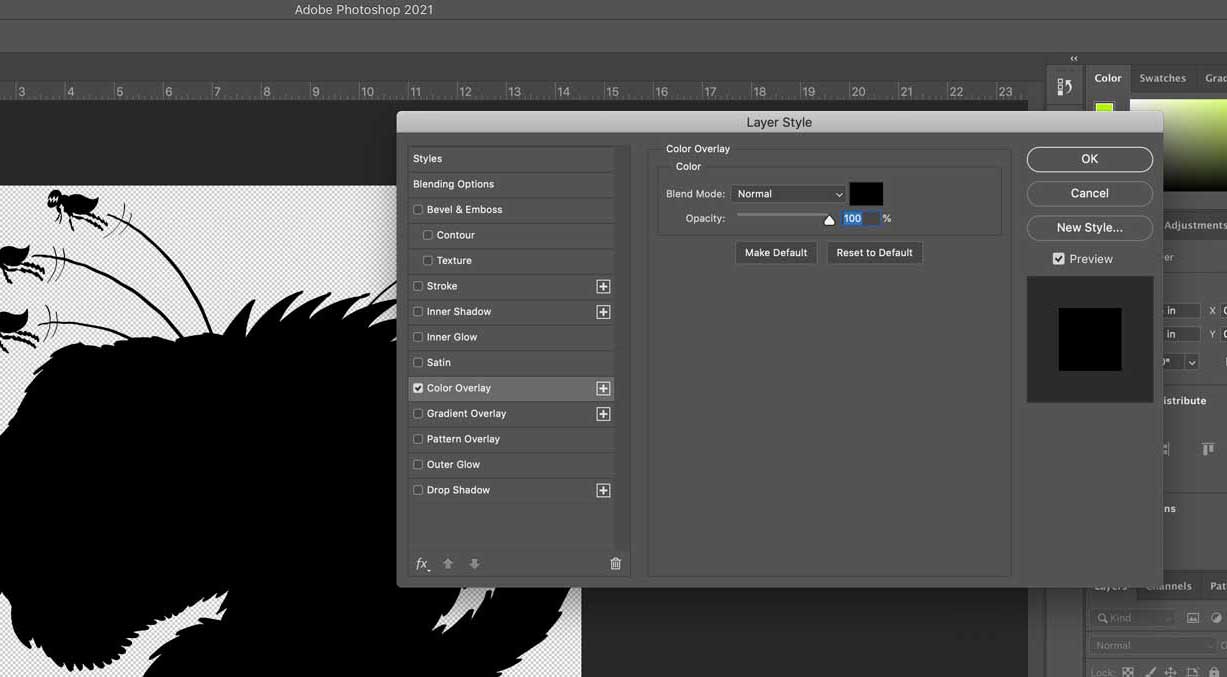
Next, double click on the layer with your image and select ‘Color Overlay’ (or ‘Colour Overlay’ if you’re using UK Illustrator*). Add a black overlay.
Save the file in Photoshop.
* jk
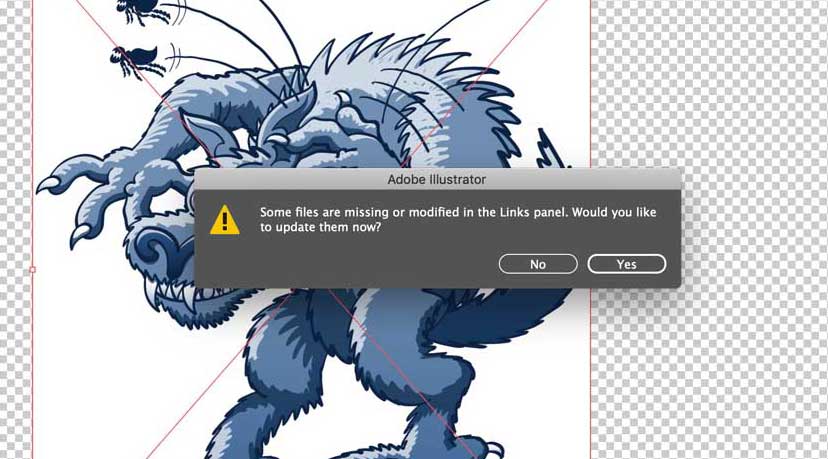
Navigate back to Illustrator. You should see a notification in a slightly accusatory tone: “You’ve messed with the damn file? What the hell! I guess you want me to update everything then?!?” Click ‘Yes’.
The image on the cut layer will update to the black version. Select it…
…and embed it using the ‘Embed’ button on the top toolbar.
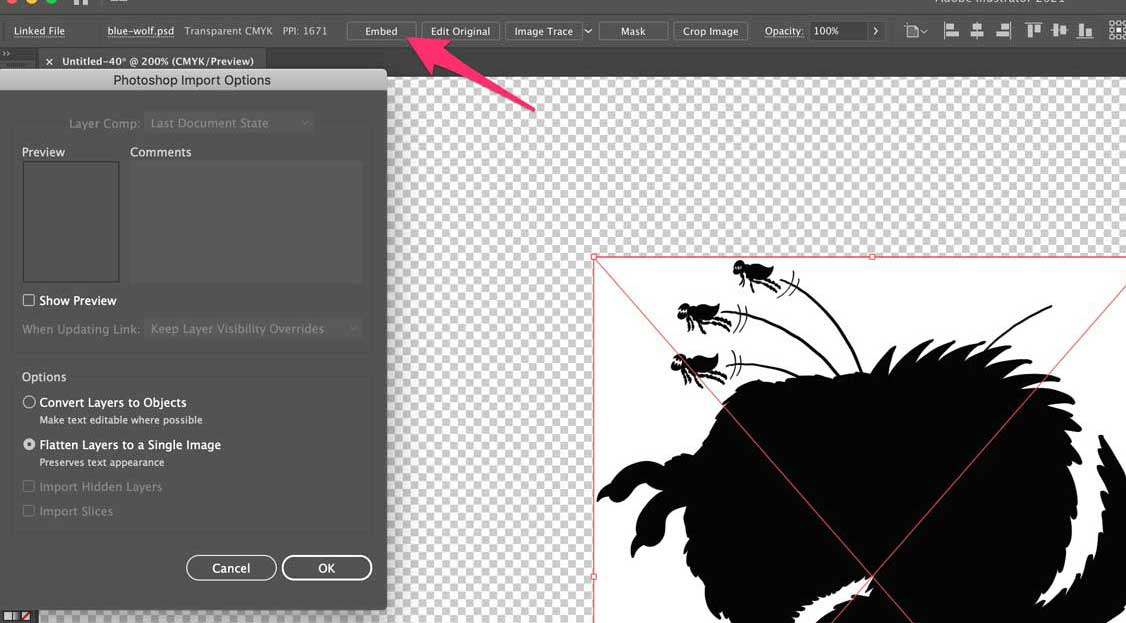
With the image selected, click ‘Image Trace’ on the top toolbar. It will then trace the image, just as you instructed.
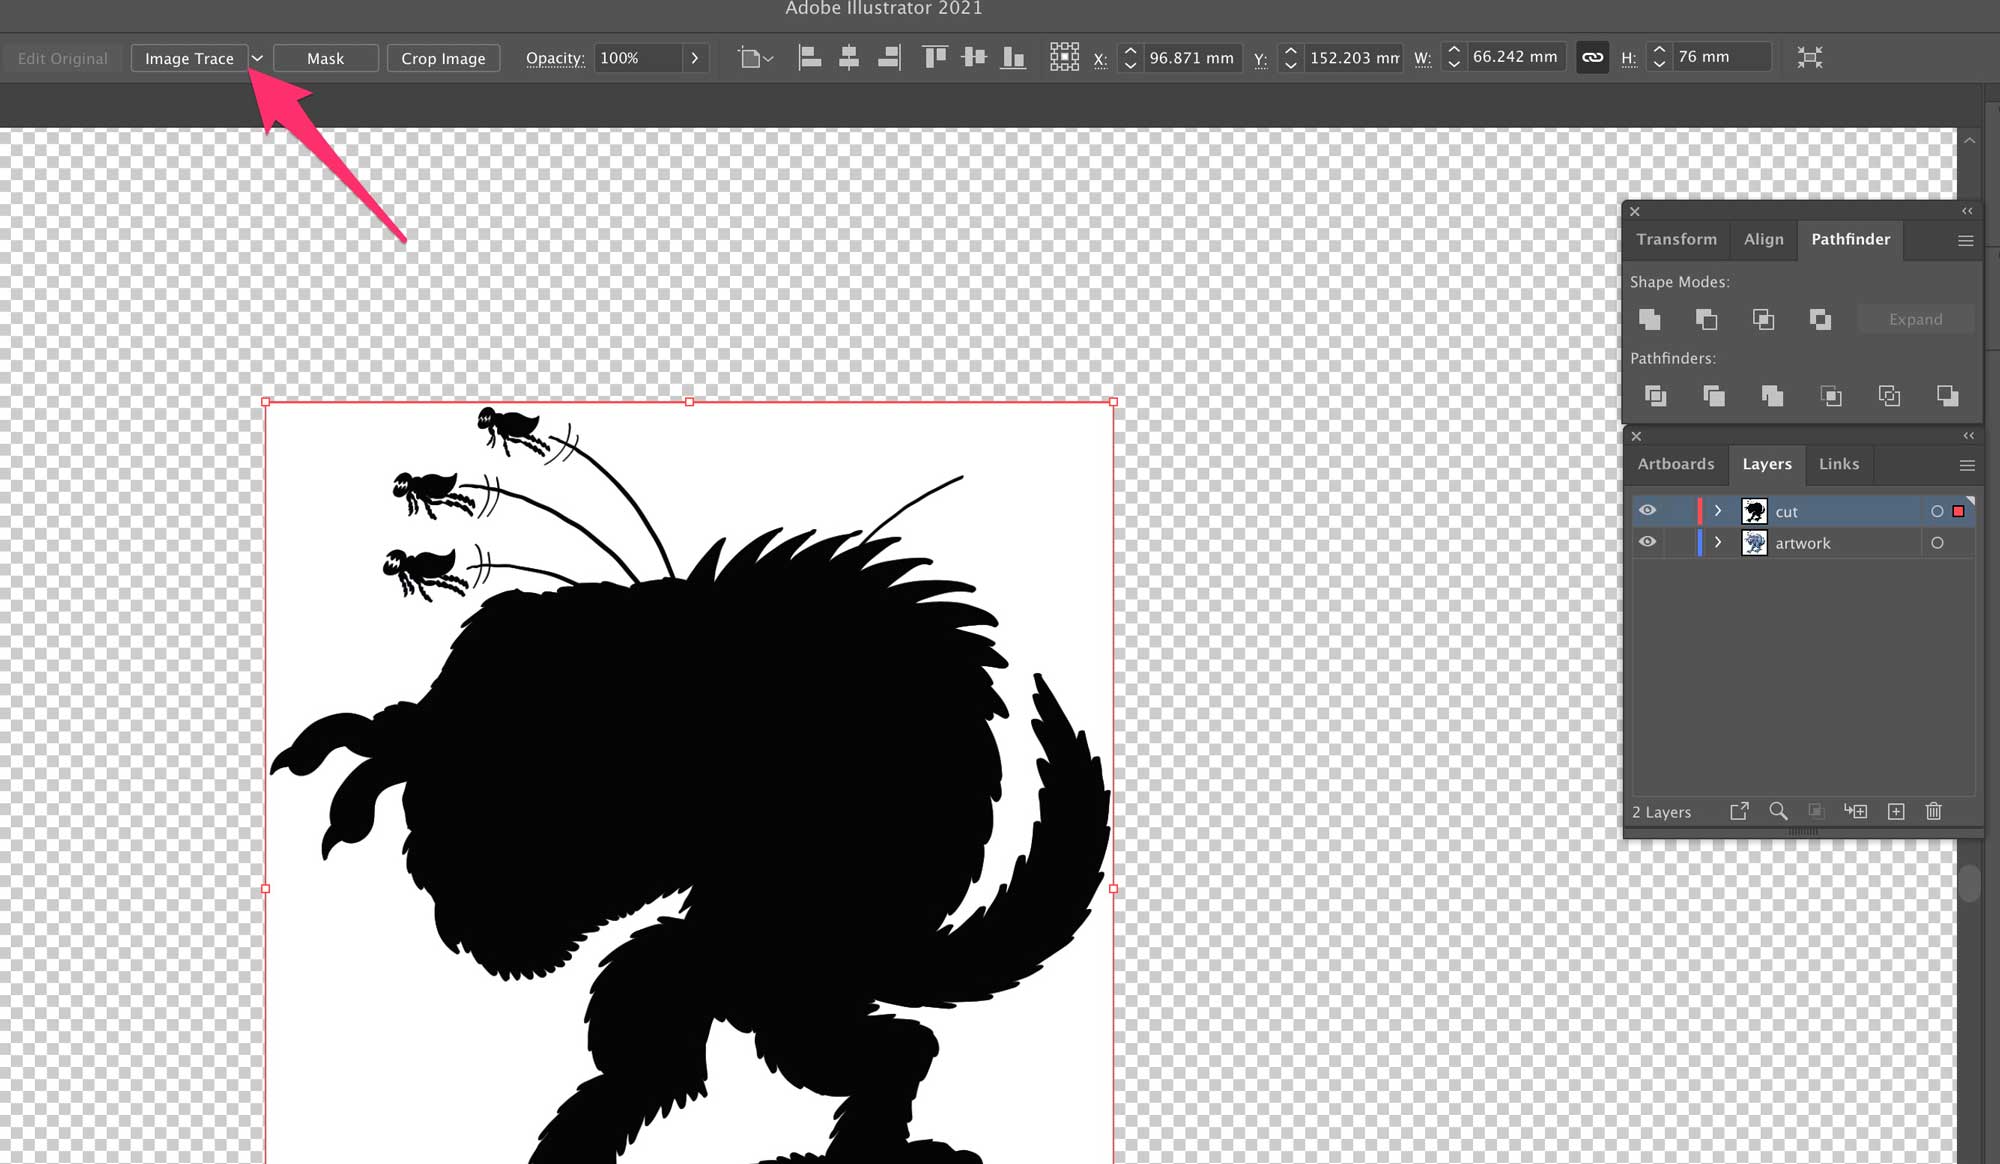
Once the image has been traced, hit ‘Expand’ to convert it back to paths.
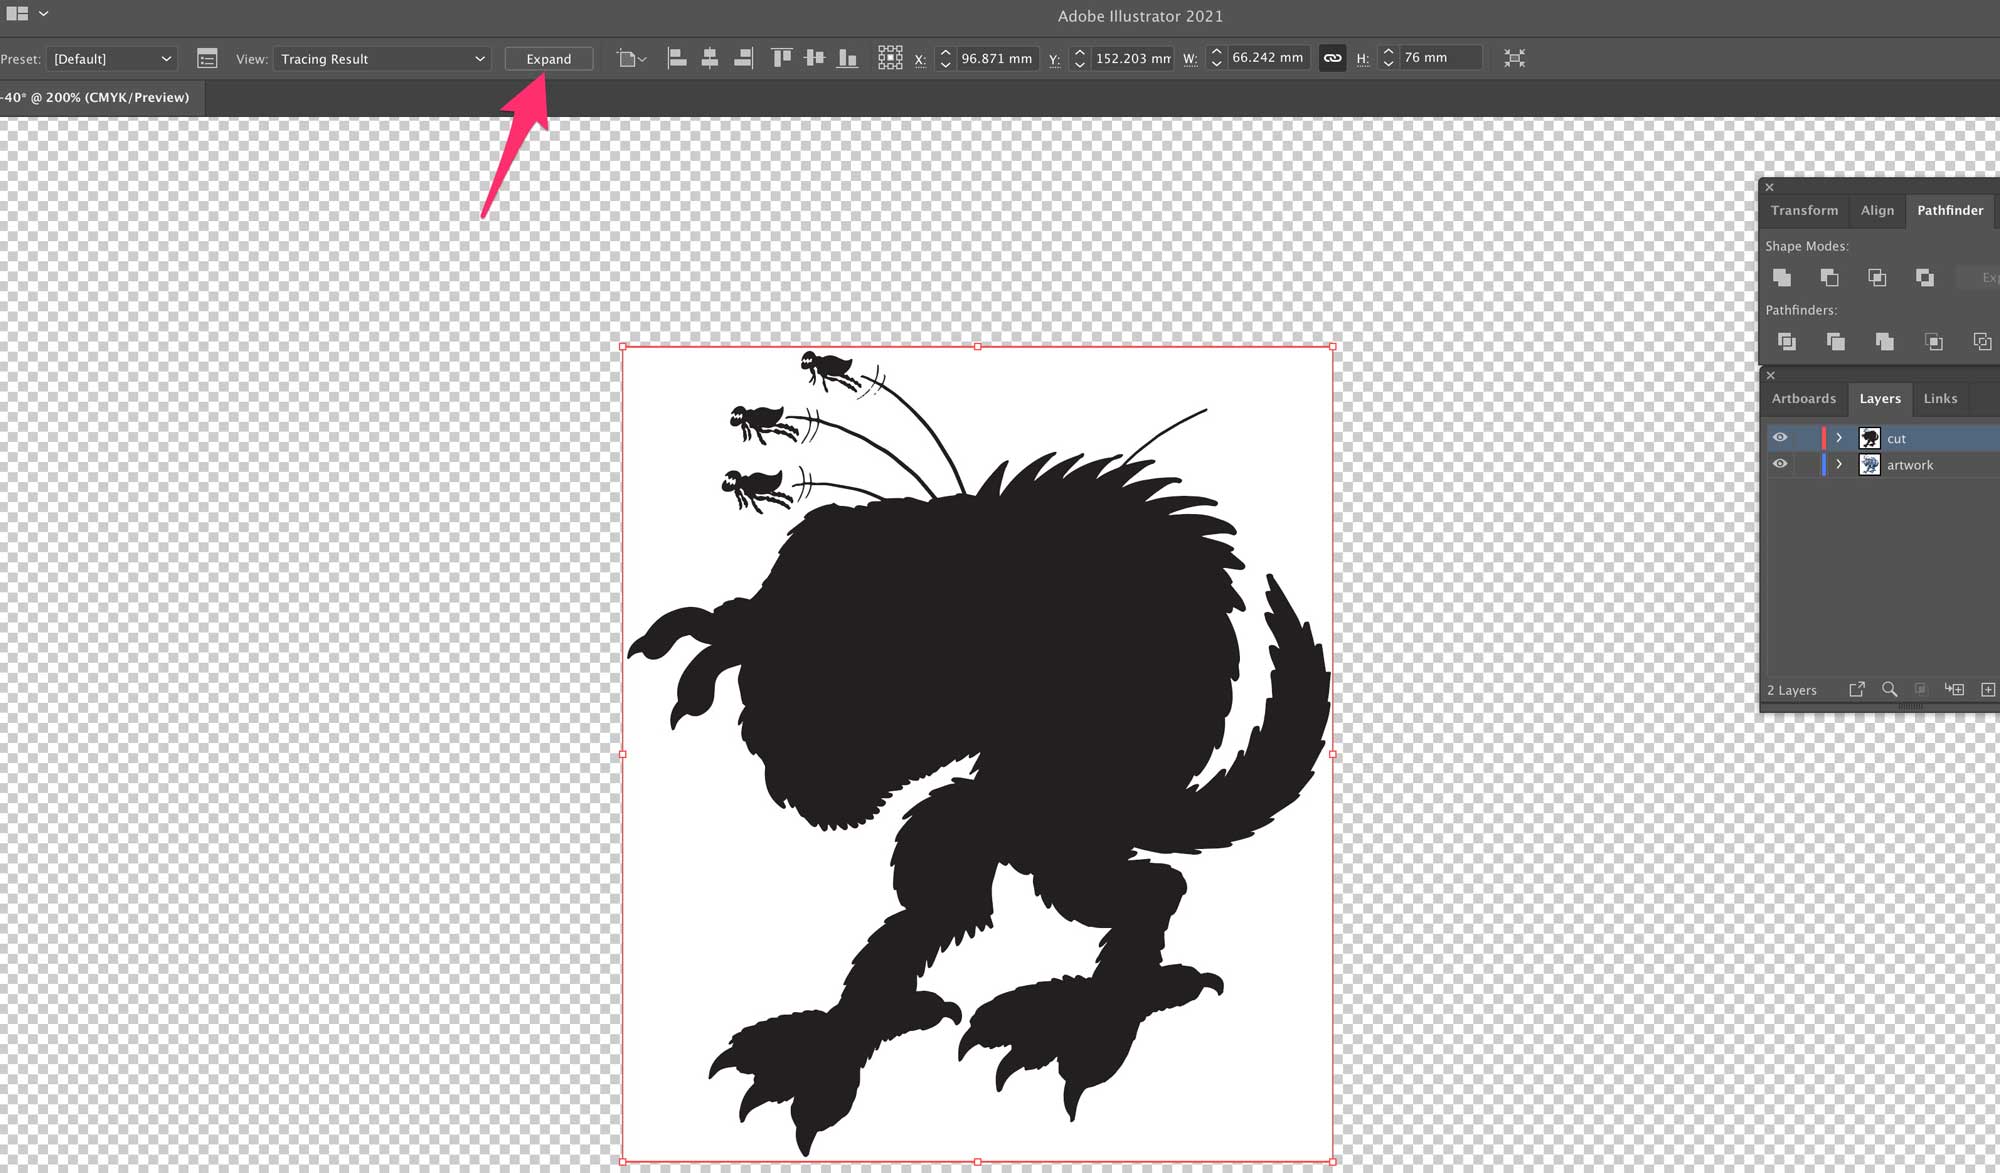
Next, remove any areas you don’t want as part of your cut path. In my case that’s the white areas. Use the white arrow for this.
Once you’ve removed everything you don’t want select what’s left and apply the magenta stroke, because magenta is the colour of cutpaths (or the ‘Color of Slice Zones’, if you’re in the US).
You can then offset the path using ‘Object > Path > Offset Path’ as we did in the vector cutline tutorial. Always select ‘Round’ for your joins, or your cutpath will be real jagged.
Here’s the original and the offset path. The offset has smoothed the path nicely.
Next, select everything on the cut layer and hit ‘Unite’ on the Pathfinder. Because it’s about time for some unity guys.
You may be left with some extra inner cutpaths. Remove anything you don’t want (I’m going to keep the one at the bottom).
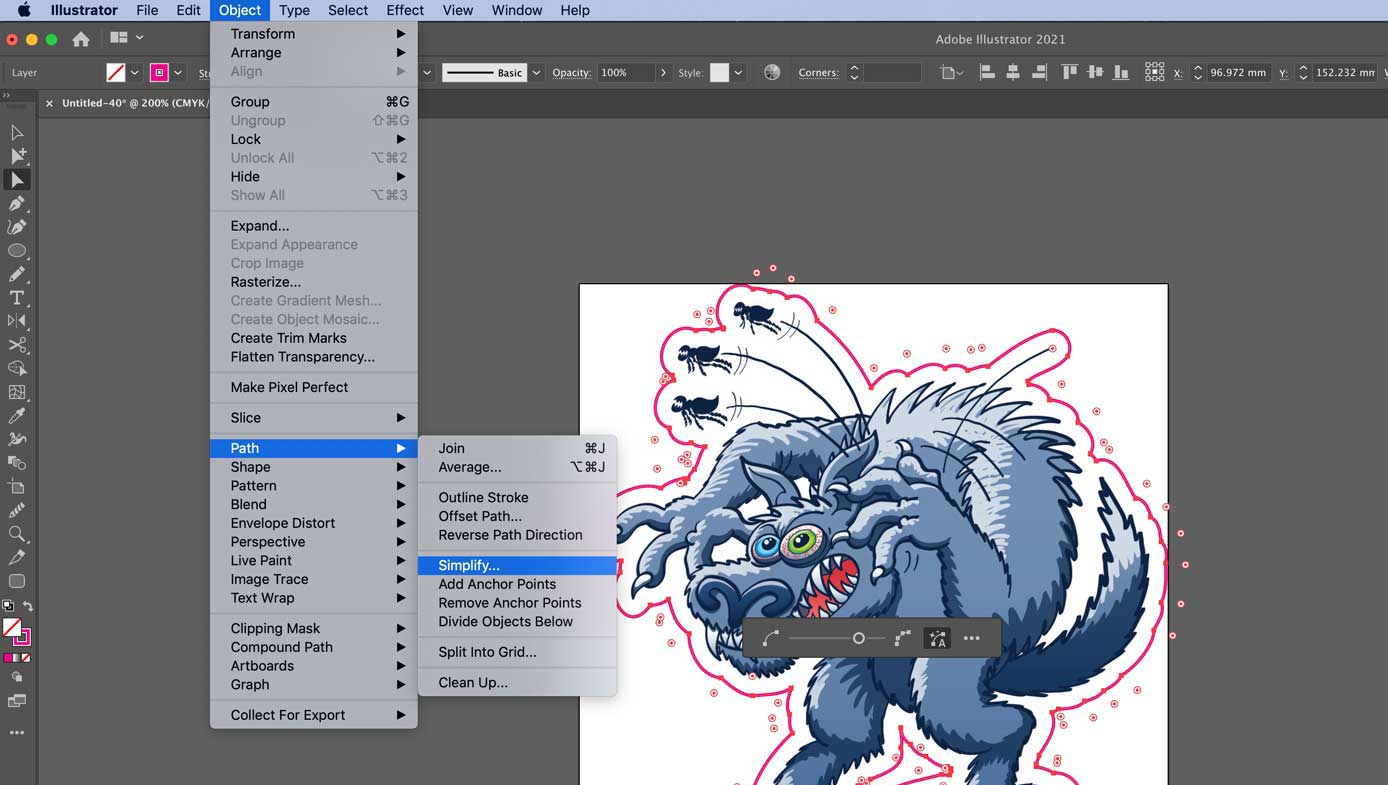
Cut paths generated using Image Trace often have a lot of points, so it’s a good idea to simplify the path. This will also smooth out any rough bits. To do this click ‘Object > Path > Simplify’. Pull the slider to adjust the amount of simplification. Compromise is the key here, just like a marriage.
Tidy up any stray paths, update your canvas size, and your work is done. Great job!
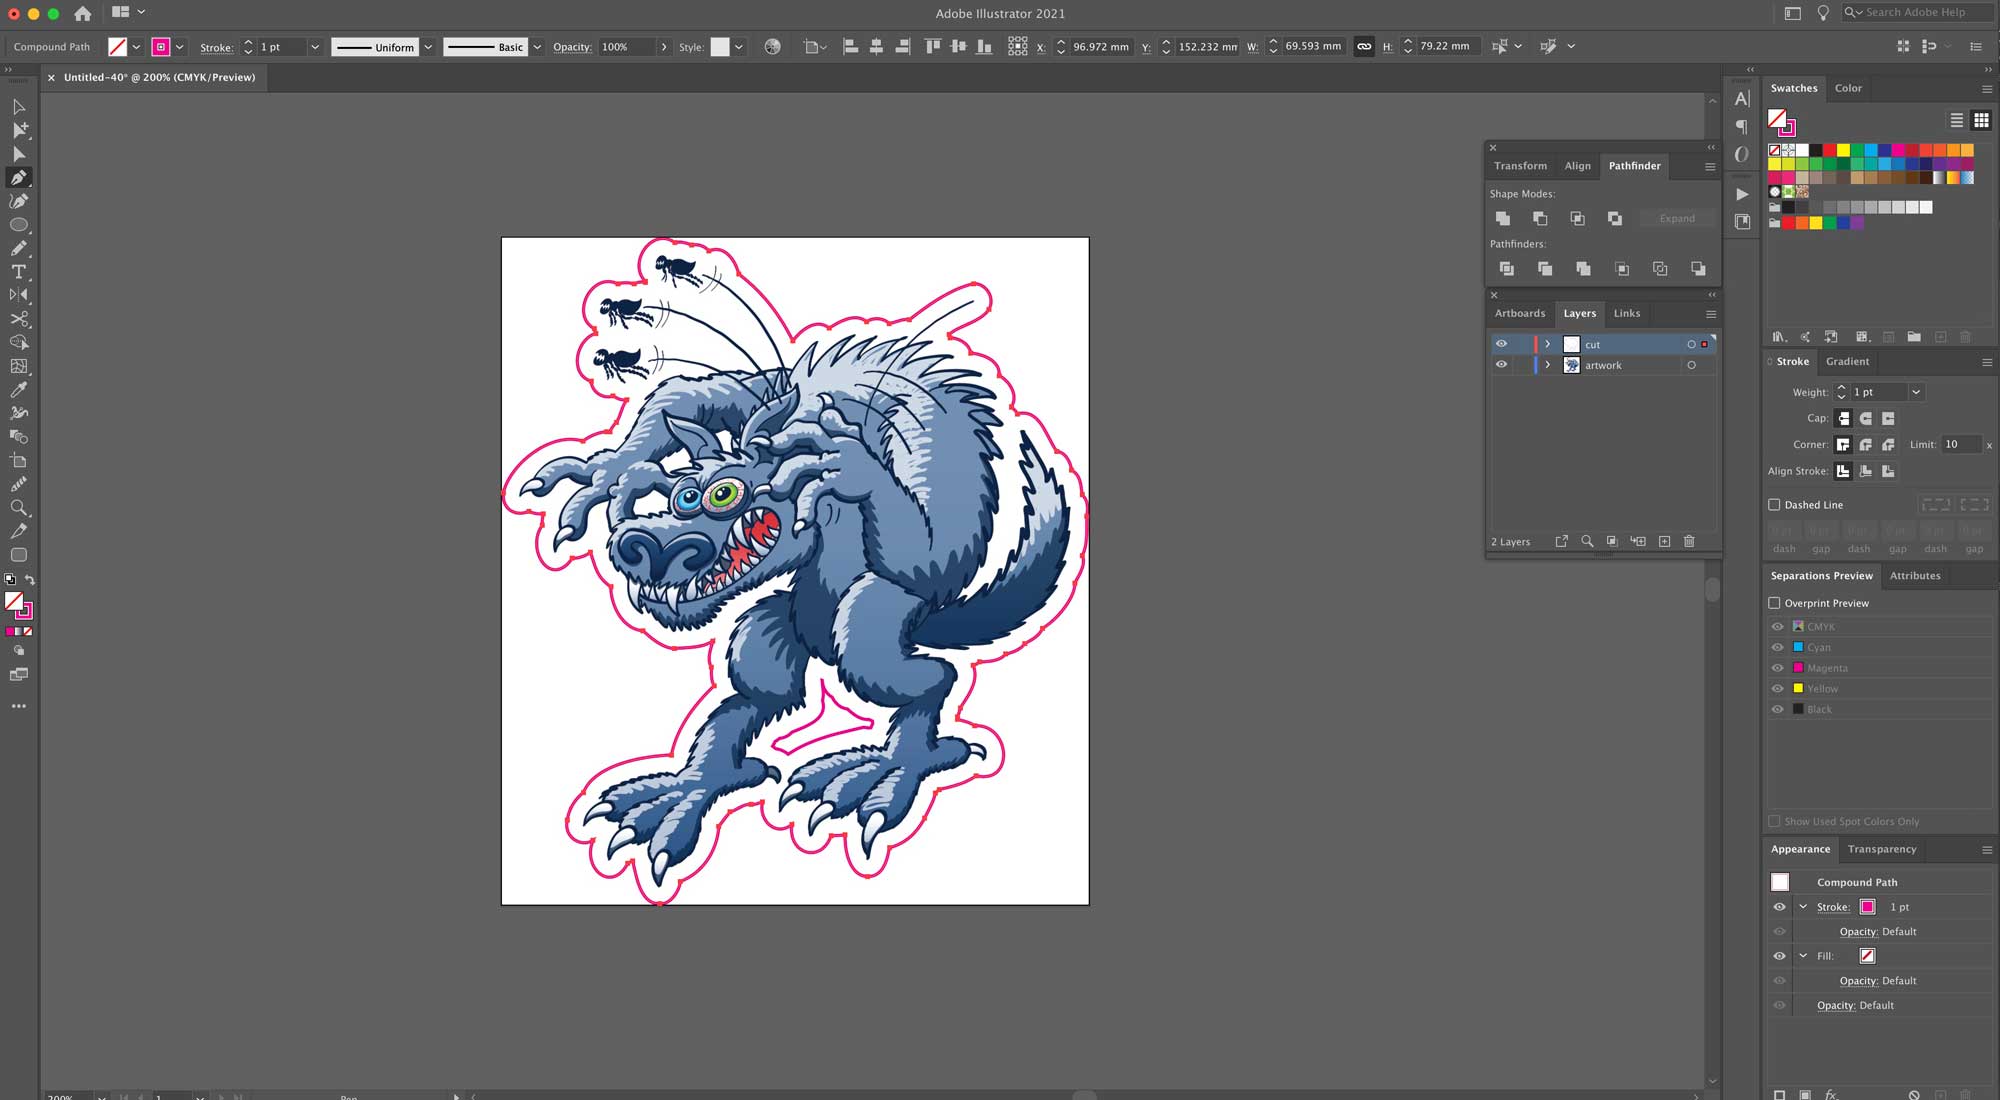
Here are the finished stickers. Wild!
If none of that made any sense to you, don’t panic.
Simply remember these two things:
Thing 1: If you contact us before placing your order we can help you set up an awesome cut path.
Thing 2: If you place an order with no cutpath specified we’ll add one, and send you a preview to approve before we go to print.
Thanks for reading!